Grade Level
9-12
minutes
Multi-day
subject
Physical Science
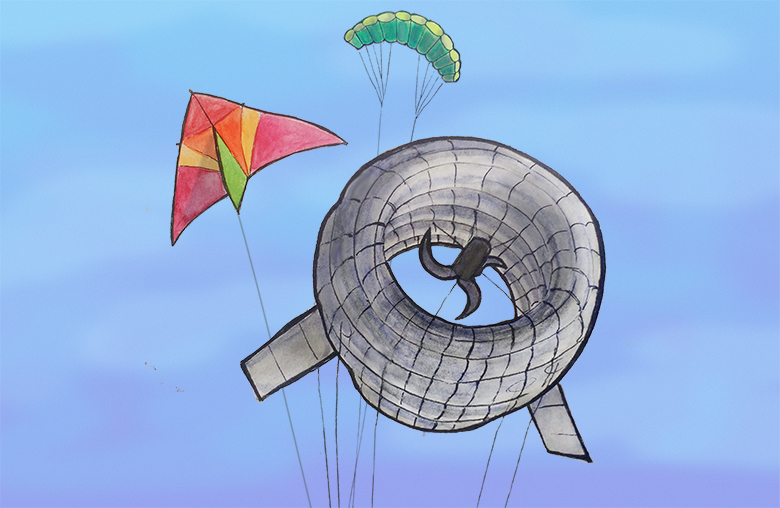
Kites have lifted us since ancient times, providing thrills, beauty, and utility. They have been used all over the world for communication, recreation, science, transport, industry, and even energy generation. Marconi’s 20th century transatlantic radio transmissions that make our cell phones possible owe their success to kites. Are you into extreme sports? Few things are as cool as kiteboarding.
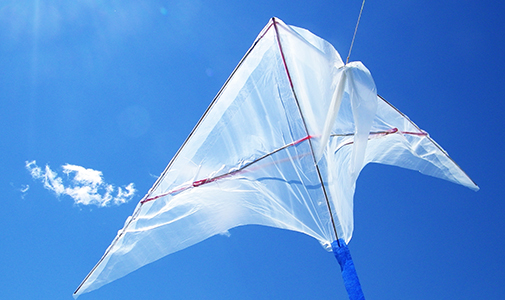
In this activity you will build a basic delta kite, then use your understanding of the main forces of flight to modify your kite design for improved flight.
How does a kite fly?
Just like rockets, jets, or birds, all kites experience a combination of forces as they fly. The main forces that determine whether or not a kite is able to fly are weight, lift, tension, and drag. Though these fundamental forces act on the kite together at the same time, they do not necessarily act on the same positions on the kite (more on this later).
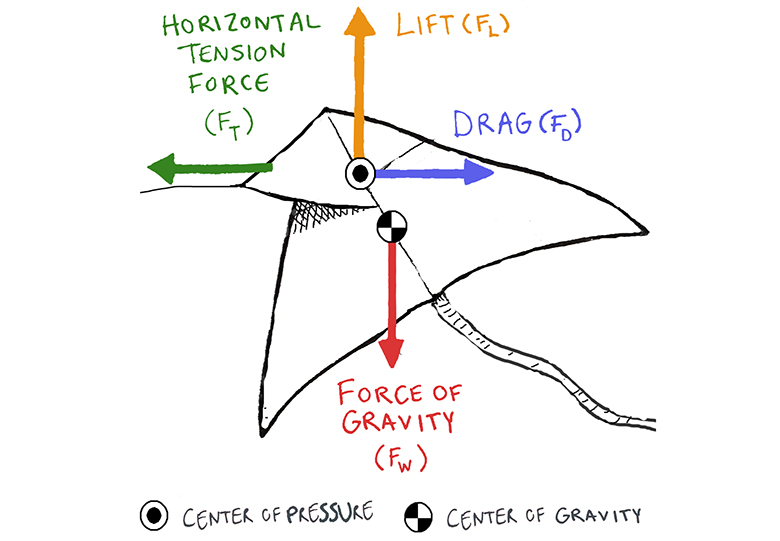
- Weight (FW) – the gravitational force of the earth pulling down on the kite
- Lift (FL) – pushes the kite up and is the upward force acting on the kite
- Tension (FT) – the pull originating from the person holding the string
- Drag (FD) – the push of the wind against the kite
The forces of weight, lift, tension, and drag determine whether a kite stays aloft or plummets to the ground. When the kite is flying, these forces play tug-of-war with each other on three different axes: They pull or push the kite up or down, side to side, and forwards and backwards. On any given axis, one force might be bigger than the other, and will pull or push the kite in that direction.
These competing forces contribute to a net force—that is, a single, mathematically summed force that accelerates the kite, meaning it causes the kite to change its straight speed in a certain direction, or keeps the kite in equilibrium. Newton’s Second Law tells us that when a net force is present, the acceleration of the kite depends on the size of the net force and the mass of the kite.
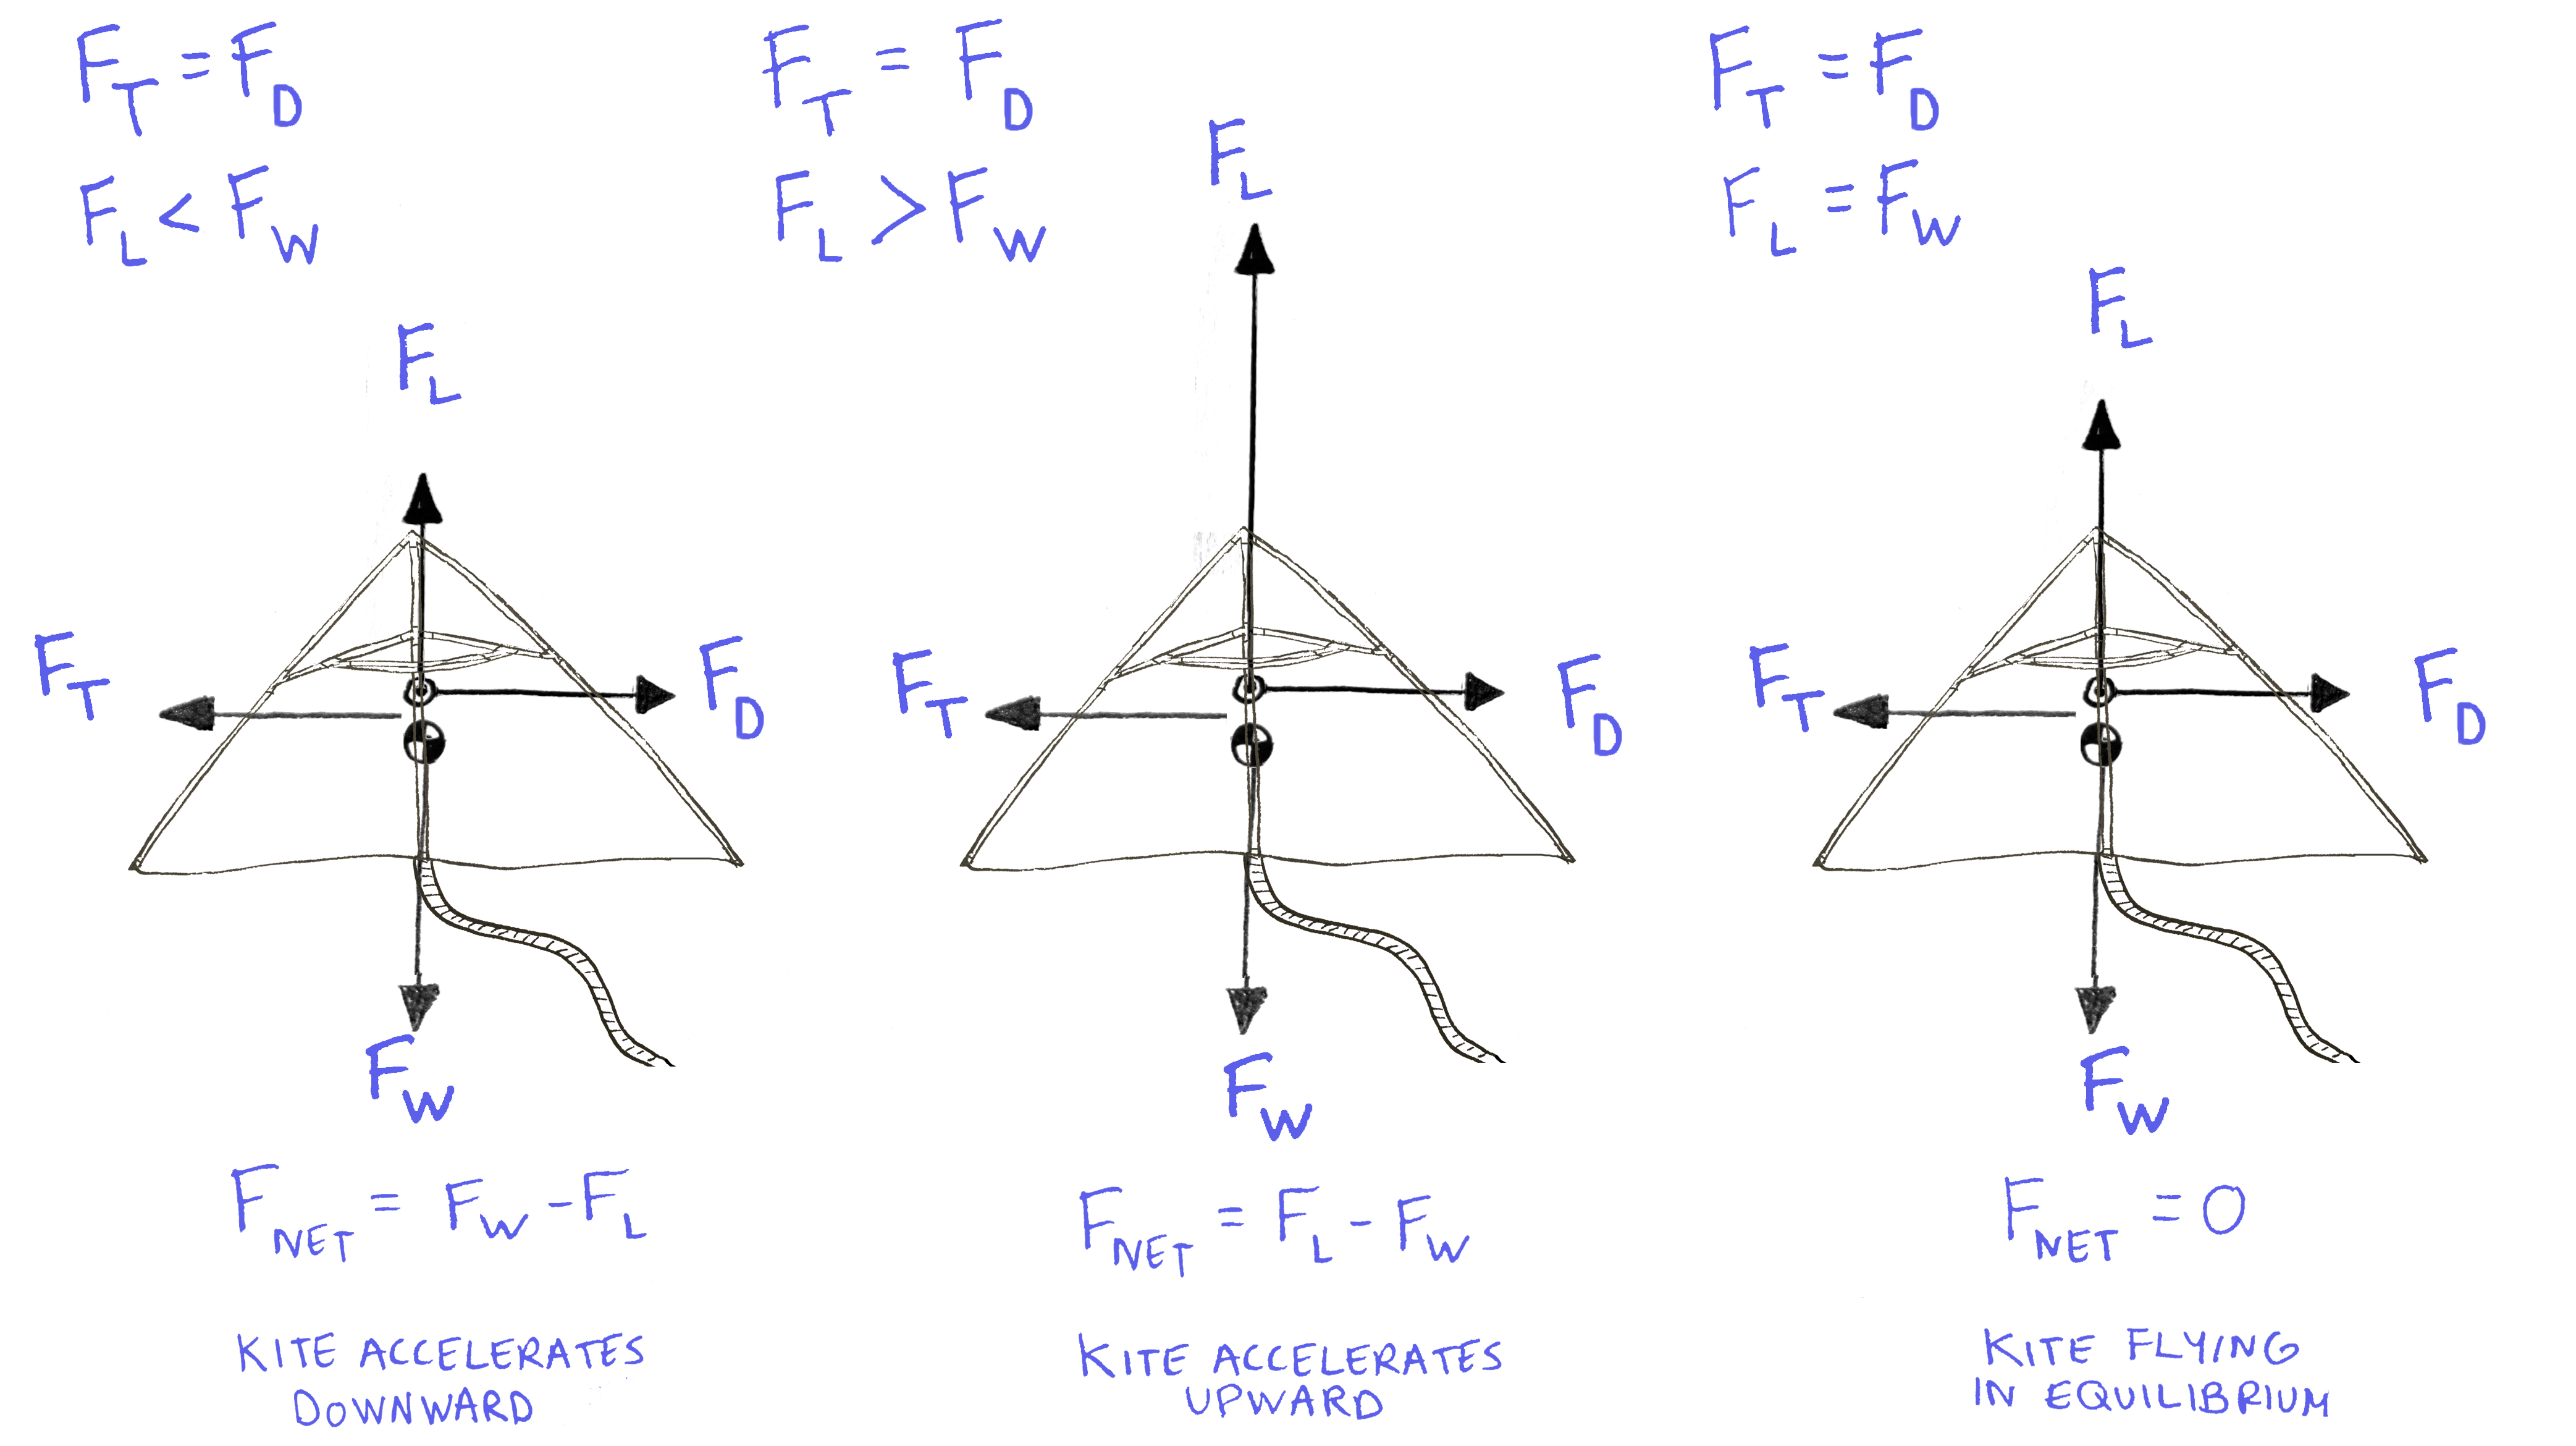
The sketches above show that lift (FL) and weight (FW) oppose each other in a kite, as do tension (FT) and drag (FD). The length of each vector indicates how much force is exerted. Below each sketch is a mathematical statement that indicates how opposing forces combine to create a net force.
- In each diagram, how do the lengths of the horizontal vectors compare with each other?
- How do the vertical vectors compare?
In all three sketches, the horizontal vectors are the same length, meaning that tension and drag “cancel” each other out, and the net horizontal force is zero. None of these kites would accelerate horizontally. Now, let’s look at the vertical axis.
- In the first sketch, the lift vector is shorter than the weight vector, so the net force accelerates the kite downward.
- In the second sketch, the lift vector is larger than the weight vector, and the net force accelerates the kite upward!
- In the third sketch, the lift and the weight vectors “cancel” each other out, the net force is zero. The kite flies without accelerating in either direction.
When we watch a kite soar, we witness a tumultuous series of net forces in action, which quickly influence the kite’s speed and direction.
Anything that flies contends with air, which is a fluid—and fluid behavior can easily change. Fluids don’t just flow straight and horizontal. They can flow chaotically in different directions, curl around obstacles, and create vortices or swirls that can push off the flying object. If you’ve ever watched water in a river, you’ve witnessed the complexity and dynamism of fluid behavior.
To precisely explain kite flight mathematically, we would need computers to map the air’s behavior, and we would also have to measure all acting forces on the kite, analyze those forces, and sum them for literally every instant’s change. Instead, we will focus on the four major forces that determine whether or not a kite flies, and delve into the physics happening behind the scenes.
To help us think about how these forces affect a kite, let’s first look at how they affect a human—specifically, a ski jumper. These athletes don’t just witness flight—they experience it firsthand.
Ski Jumpers-in-Training – Kites Unto Themselves
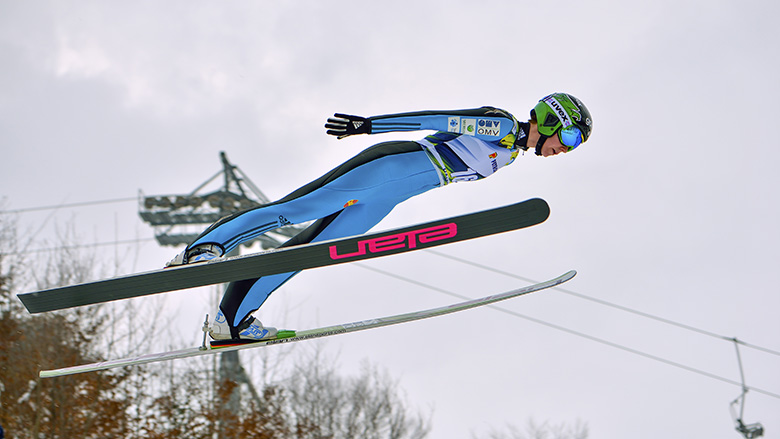
It’s a bird! It’s a kite! It’s a…ski jumper? Like kites, ski jumpers fly through the air, and like kites, they deal with weight, lift, and drag. Sometimes ski jumpers even resemble kites as they sail across the sky.
Understanding the physics of what happens when something flies through the air has helped us to build better jets, launch rockets, and even improve how we train ski jumpers. Ski jumpers try to minimize forces that decrease their flight time and maximize forces that help them soar. To improve their technique, these athletes train in wind tunnels, which allow them to concentrate on each force separately and figure out how to manipulate it to their advantage.
This behind-the-scenes video shows how ski jumpers-in-training figure out how to move their bodies and equipment to increase their chances of winning a gold medal.
Let’s stop to consider:
- Does a suspended ski jumper still have weight? If so, what is counteracting the weight?
- Does a faster fan speed mean more or less drag?
- Will the jumper experience more or less drag if (s)he increases the amount of surface area exposed to the “wind”?
- Does the jumper seek to minimize lift or drag?
- Does the jumper seek to maximize lift or drag?
Unlike kites, ski jumpers don’t experience tension unless they’re training in a harness, like what you saw in the video. You learned earlier that, on a kite, tension opposes drag. But it’s important to note that, on a ski jumper, tension opposes weight.
The harness is designed to hold the person’s entire weight in equilibrium—meaning that the tension is equal to their weight—for as long as needed. The wind tunnel allows the ski jumper to isolate lift and drag and control each one without worrying about the length of time that each force acts. This frees the jumper up to concentrate on minimizing drag and maximizing lift. In the wind tunnel, the drag a ski jumper experiences is influenced by two factors: the speed of the fans (the faster they push the air, the more drag is created) and the surface area that’s exposed. Like a kite, a skier wants maximum lift and accomplishes this by spreading and pulling the skis up into a “V” shape.
In this next video, watch the ski jumper respond to forces like a kite in flight.
What three forces do a ski jumper and a kite share?
If you want to take a deeper dive into the physics of kite flight, do the Kite Engineering and Calculating Lift version of the activity here.
Let’s Build a Kite
Let’s use the engineering design process to build a kite. We’ll start with a standard delta kite as your first prototype.
Materials (per kite)
- 6 reeds in 4 foot (1.2 meter) lengths
- 7 flexible straws
- Thin plastic drop cloth
- Packing tape
- ~ 20 meters thread or string
- Cardboard tube or stick (to wind string around)
- Black marker
- Meter stick
- Pair of sharp scissors
Susan’s Kite Building Tips
- Be careful pulling the reeds out of the fencing bundle; they are sharper than they look.
- When you’re cutting plastic with scissors, rather than cutting up and down like you do when you normally cut with scissors, find a sharp spot on the scissors, keep them open, and push through the plastic to slice it. Don’t worry if the edges are ragged or your lines aren’t perfectly straight.
- Keep the plastic drop cloth and the tape apart until you want to bring them together. Should tape stick to the plastic in an unwanted place, cut the tape rather than tear the plastic.
- Kite repairs are easy. If a reed breaks, use a short piece to “splint” the broken section, and tape it on either side. If the plastic rips, tape it.
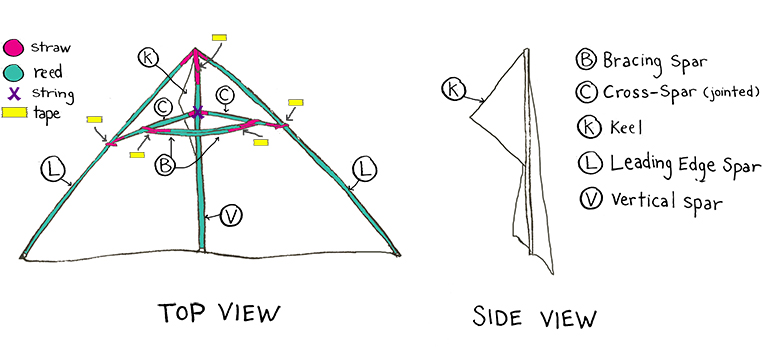
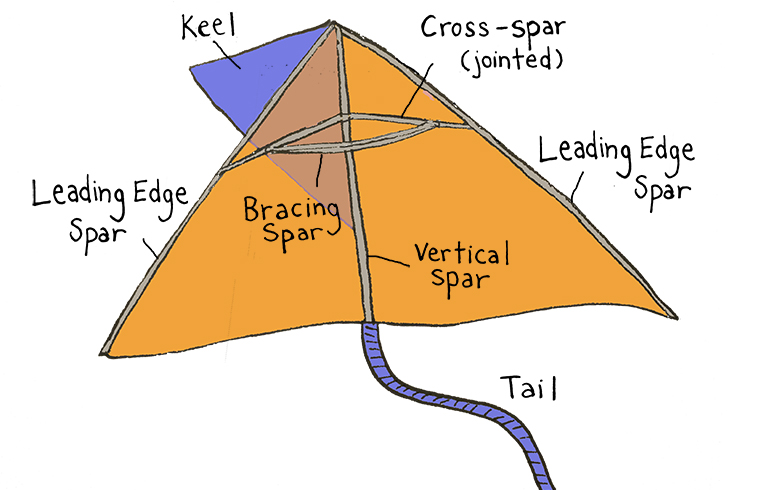
Build your delta kite using the image above as a guide. You can access Susan’s instructions for building a delta kite here.
Launch your kite and collect data.
- Before launching, create a scaled sketch of your delta kite on your Kite Engineering Guide Sheet. Label the sketch with spar and span lengths, and angles.
- To fly your kite, pick a time when there’s a light breeze. Go outside, turn your back to the wind, and let the string out as necessary. The wind will provide lift and drag. Pull on the string (this provides the tension), and if there’s not enough breeze, you can run with the kite trailing behind you.
- Adjust the bracing spars to accommodate the wind. In a stronger wind, slide the bracing spars away from the vertical spar to bend the kite’s leading edge spars back. In a lighter wind, slide the bracing spars forward to flatten the kite. Patch as needed.
- Have a team member take videos or pictures to document your kite’s performance.
Analyze your kite’s flight.
You can write your answers and ideas down on your Kite Engineering Guide Sheet.
- Create a description of the kite’s flight. Be as accurate as possible; use the terms outlined on the kite diagram above (e.g. keel, bracing spars) to help with your description. The success of the flight doesn’t matter—what matters is that your observations provide detailed data.
- What four forces did the kite experience? Are these forces what a ski jumper would encounter? Explain.
- Select a problem or issue encountered during the kite’s flight that you think could be addressed by redesigning the kite. What is the problem or issue you wish to address?
Plan your redesign
Part of the fun of engineering is the freedom to improve on what has already been built, but redesigning a kite needs to be done thoughtfully. Kites fly upward when the lift is greater than or equal to the weight, and drag and tension are in balance. Since the dynamics that affect kite flight are complex, it’s a good idea to learn which variables (e.g. location of center of pressure and center of gravity, wingspan, point where control line attaches) influence the main forces of flight and make alterations based on those.
Here are a few redesign suggestions to get you thinking.
- Change the size of the delta kite.
—How large and how small can this basic delta kite be so that it still flies?
- Change the kite materials.
—Perhaps you want a sturdier kite and want to substitute different building materials (e.g. swap the reeds for dowels).
- Change one of the kite parts in the original design
— Really want to be adventurous? Change one of the kite parts like the length of the vertical spar. Research your chosen kite part carefully by looking at NASA’s Kite Index, which details some of the ways that design changes can affect forces on your kite. Look at your schematic for the different kite parts.
Use the Kite Engineering Guide Sheet to plan your design.
Research kite designs online. Start with NASA’s Kite Index, kiteplans.org, and mybestkite.com. Look for information on specific redesign options. Read up on the science of kite building. There are so many kite resources to explore!
Educator's Toolbox
Meet the Writer
About Susan Romano
Susan Romano is a 20-year veteran high school teacher who never gets tired teaching physics to her students at Keene High School in New Hampshire. She’s also a physics adjunct instructor at Keene State College, where she teaches an activity-based physics class using a guidebook she authored.