Grade Level
6 - 8
minutes
Multi-day
subject
Life Science
stem practices
Planning and Carrying Out Investigations
How to Make Your Own Winogradsky Column
Your body is home to trillions and trillions of tiny living things called microbes, and most of them live in your digestive tract.
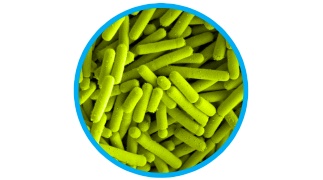
And no wonder, it is a warm and sheltered place filled with food—a perfect spot for bacteria! But not all microbes live in the same place. Based on the habitat they’re most suited for, different species of bacteria live in different parts of the tract.
Take an interactive tummy tour here.
Build an ecosystem for microbes to see how they separate into their own habitats.

With just a few cupfuls of mud and other simple ingredients, you can create an entire ecosystem for bacteria called a Winogradsky column. In this sealed system, microbes reuse and recycle nutrients continuously. Over time, different species separate into visible layers depending on how they use—or don’t use—oxygen, light, and nutrients such as carbon or sulfur. Each bacterial species finds its habitat according to its needs—much like in your digestive tract.
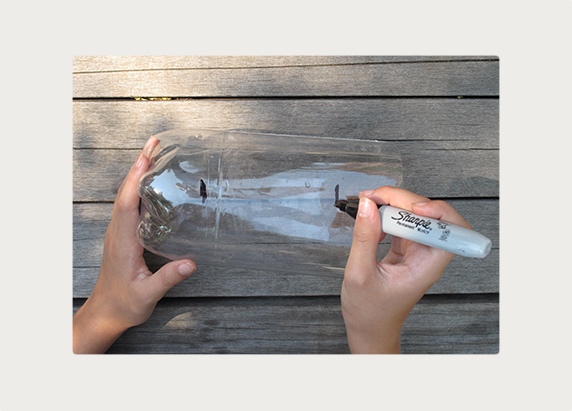
What You Need: The Bottle
a 2-liter plastic bottle
scissors
permanent marker
large rubber band
plastic wrap
data collection notebook
crayons, color pencils, or markers
camera (optional)
What You Need: Ingredients
mud
shovel and bucket (to dig and carry the mud)
water (from the tap or your mud source)
pitcher or small plastic bottle (to carry the water)
spoon and 2 mixing bowls (1 large, 1 medium)
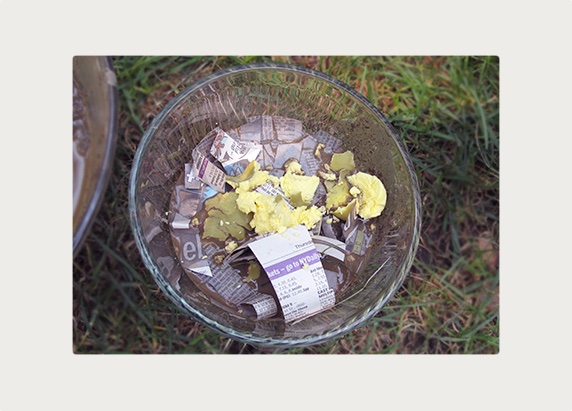
a page of newspaper, shredded
an egg yolk (raw or hard-boiled)
rubber boots and old clothes that can get muddy (optional)
gloves (optional)
Part 3: Track the Microbes' Movement
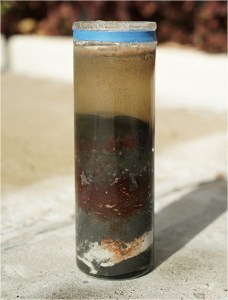 Over the next eight to ten weeks, watch for various color layers to form as microbes separate into their habitats.
At least once a week, on the same day at the same time, write down and draw any changes you see, including colors, the movement or thickening of sediment, and any differences between the side facing the light and the once facing away. You can also take photos for comparison. Note the day and time the photo was taken.
Part 4: Identify the Microbes
Just as no two people’s gut microbes are exactly the same, no two Winogradsky columns are the same. Depending on the microbes present and the amount of nutrients available, many different layers may form.
Check out some common microbes that might grow in your column. Does yours include any of them?

A: Oxygen levels are highest at the top of the column. Microbes that that grow here use oxygen and not sulfur.
B: Sulfur levels are highest at the bottom of the column. Microbes that grow here can survive without oxygen and instead use sulfur.
C: Some microbes use different wavelengths of visible light to make food. The first changes you see might be green or purple spots on the side of the column facing the light source. These spots are photosynthetic microbes. If there is too much light or not enough light, these microbes will not grow.
D: GREEN Cyanobacteria
Oxygen levels are highest near the top. Here, cyanobacteria use sunlight, carbon, and hydrogen to produce energy while giving off oxygen.
E: PURPLE, BROWN, ORANGE, RED Non-sulfur bacteria
In the mud in the middle, purple non-sulfur bacteria get energy from sunlight and carbon. They convert carbon-rich plant materials, like newspapers, into carbon dioxide.
F: PURPLE AND DARK GREEN Sulfur bacteria
A little lower, purple and green sulfur bacteria use light, carbon, and hydrogen.
G: BLACK Sulfur-reducing bacteria
Sulfur levels are highest near the bottom. Here, sulfate-reducing bacteria that cannot tolerate oxygen use the egg yolk. This process releases hydrogen sulfide, which, not surprisingly, smells like rotten eggs!
Experiment with More Winogradsky Columns!
Want to see how varying nutrients and sunlight will affect the microbe layers? Create more columns with these different conditions and compare the results.


Want to Learn More About Microbes?
The Secret World Inside You exhibition at the American Museum of Natural History explores the rapidly evolving science that is revealing the complexities of the human microbiome and reshaping our ideas about human health.

Illustrations: © Liz Vernon/AMNH, Photos: L. Johnsonii, courtesy of Kathryn Cross/Institute of Food Research; Sergei Winogradsky, © Wikimedia Commons; Materials and steps, © AMNH
Meet the Writer
About The American Museum of Natural History
@AMNHThe American Museum of Natural History in New York City is one of the world’s preeminent scientific, educational, and cultural institutions, drawing millions of visitors each year. Visit amnh.org for more information.
