
Grade Level
All
minutes
15 min - 1 hr
subject
Earth Science
stem practices
Planning and Carrying Out Investigations
Activity Type:
sun science, STEAM, Family activity, space, solstice
This activity is part of the Science Friday Sun Camp collection!
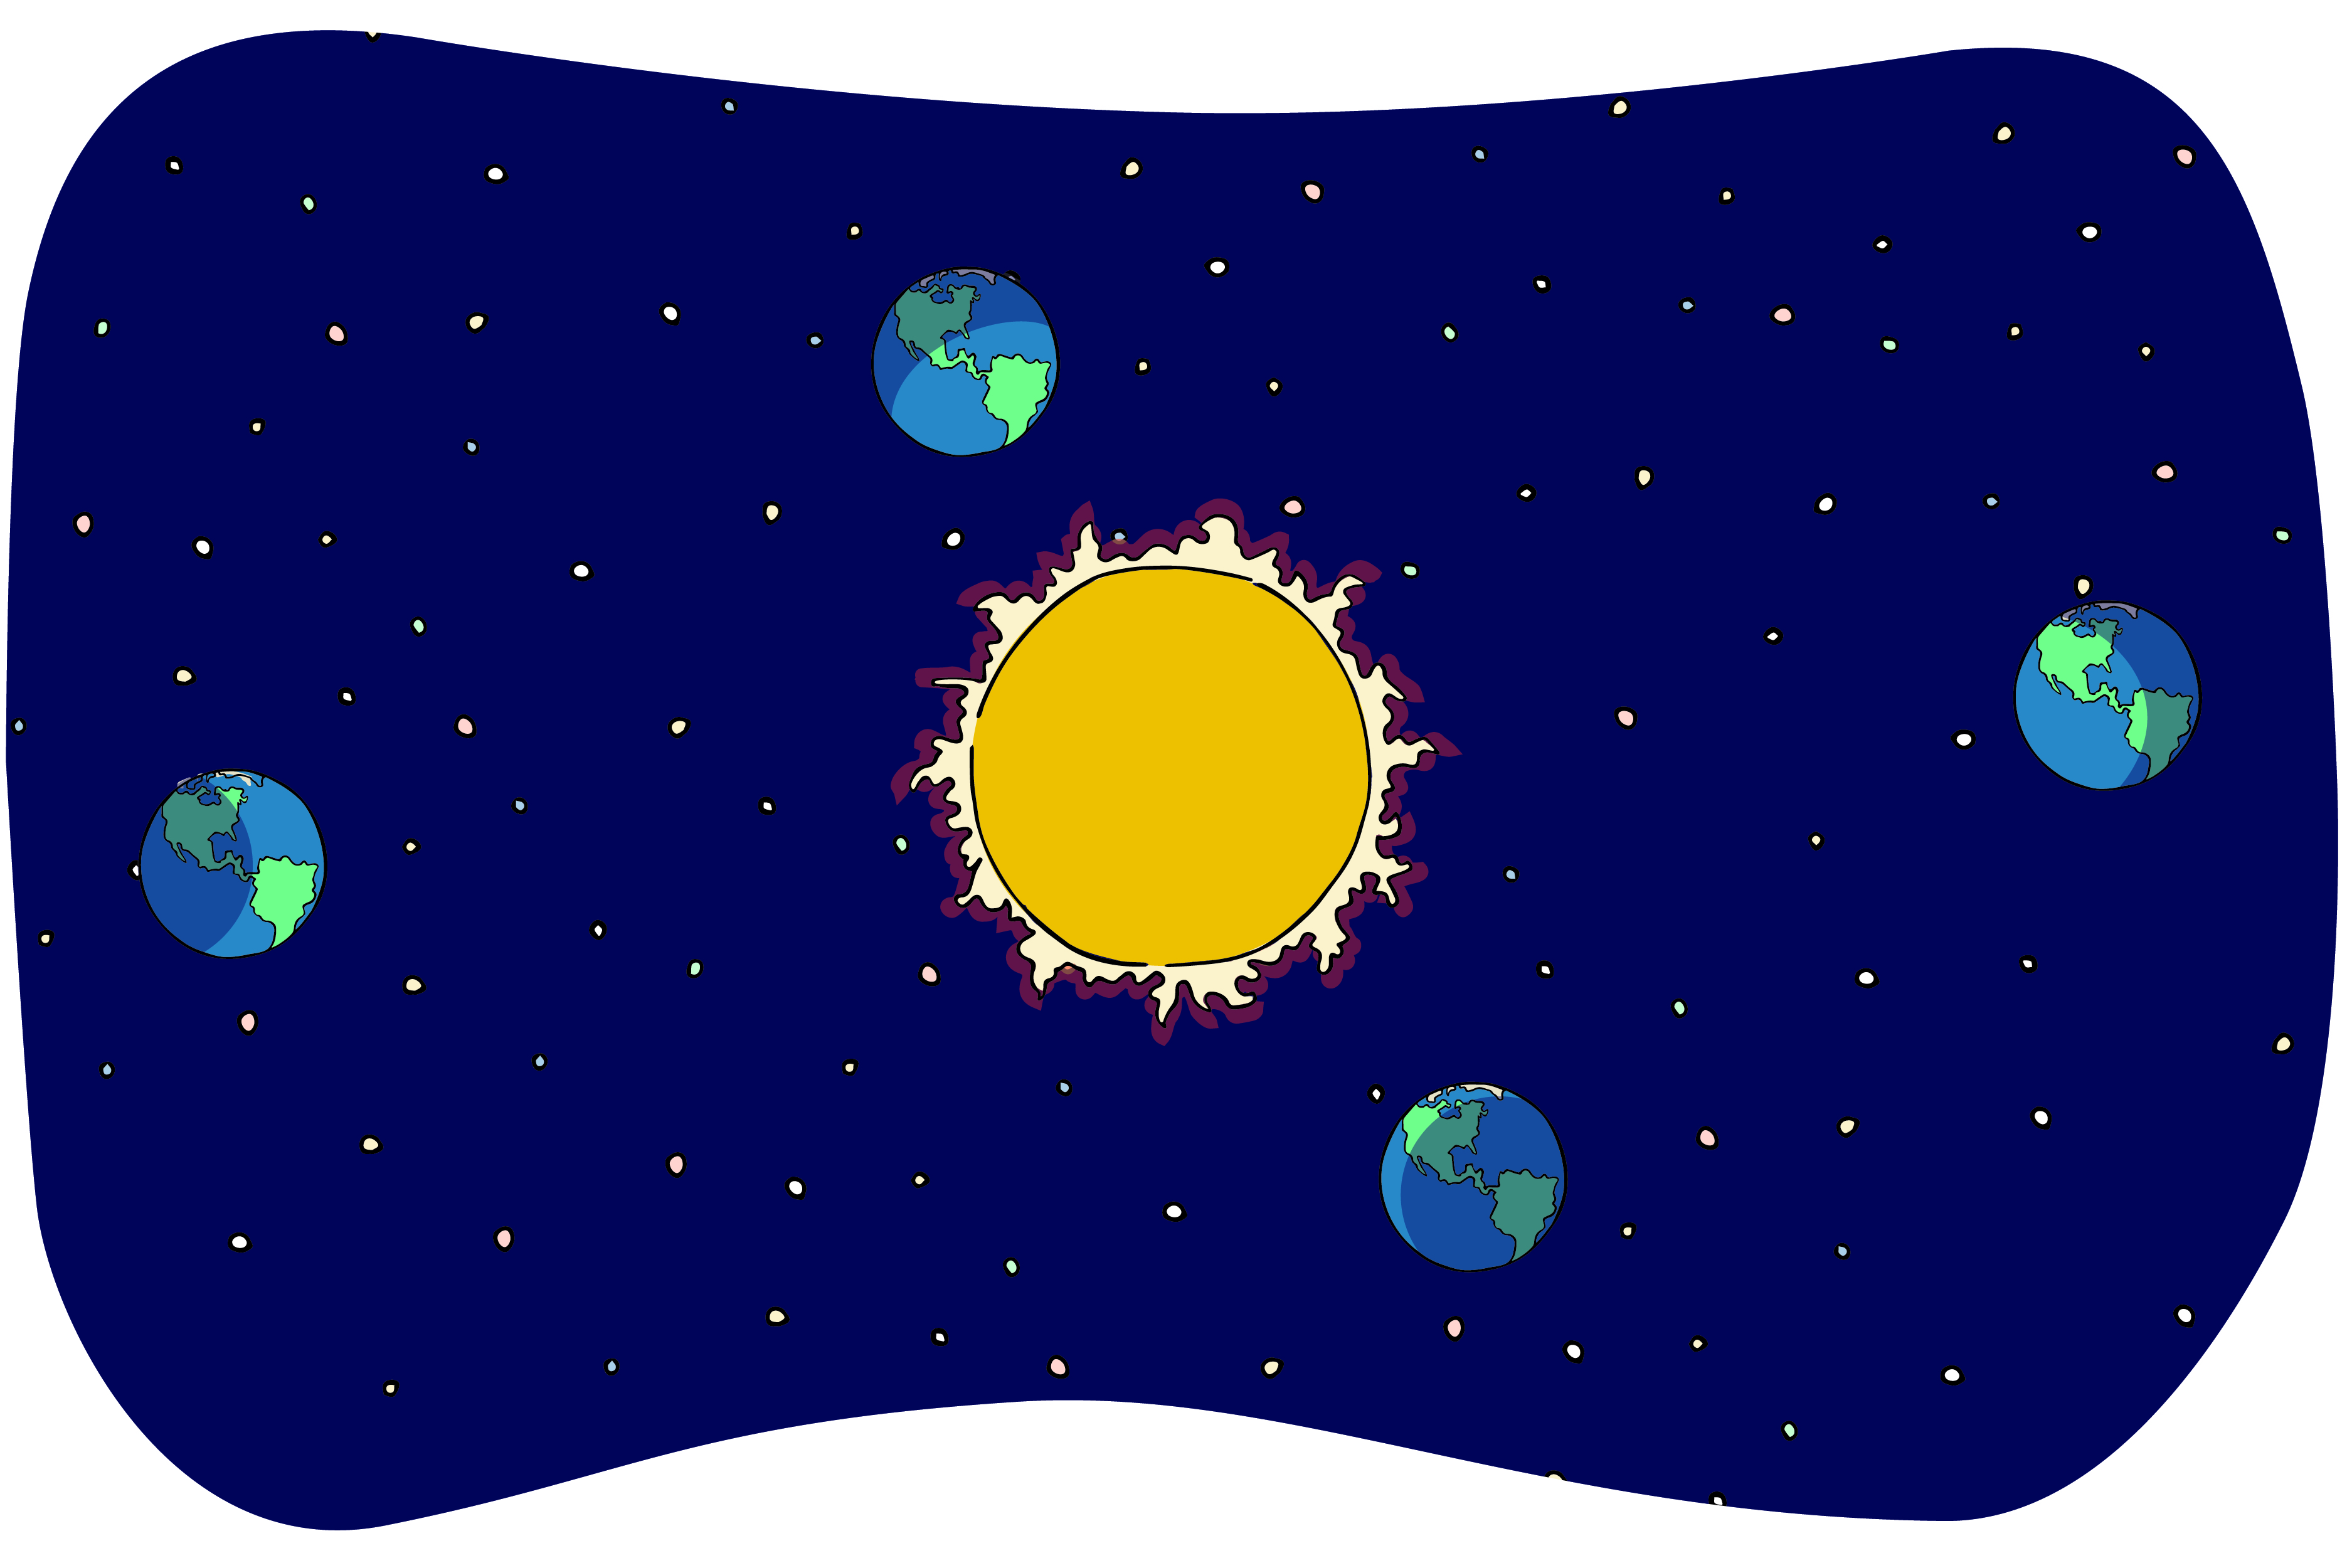
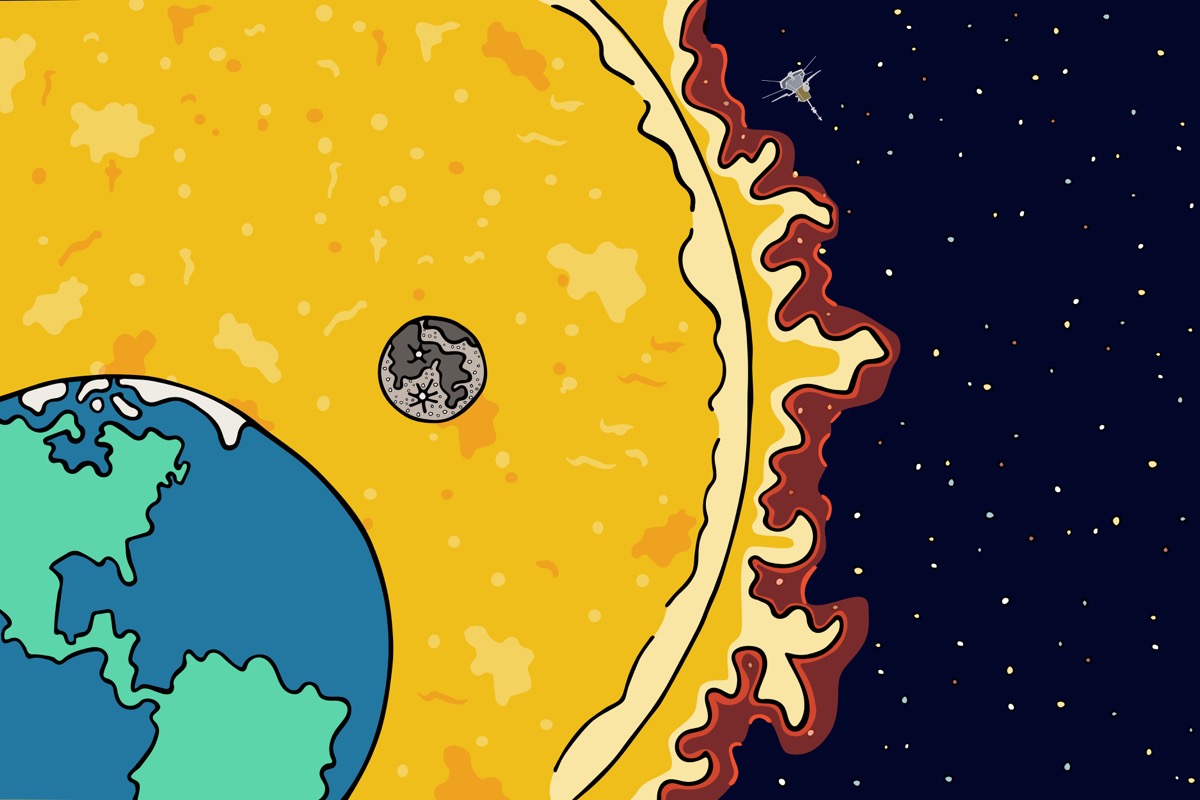
For 4.5 billion years, the Sun has generated energy to power the solar system. Visible light is the most obvious form of that energy. Every day the Earth turns, and the new day starts with sunlight. Here on Earth, the Sun’s light causes day and night, shadows, eclipses, and seasons. As the Earth moves on its journey around the Sun, the people on Earth experience changes in light. You experience those changes all the time. Have you ever noticed that the days are longer in summer, that it‘s colder in winter, or that your shadow practically disappears at noon? These natural phenomena are caused by the movement of the Earth around the Sun. With a little know-how, you can use some simple experiments to track those movements and model them.
Can’t wait to get started? Jump to the experiment!
Changing Light And Shadows
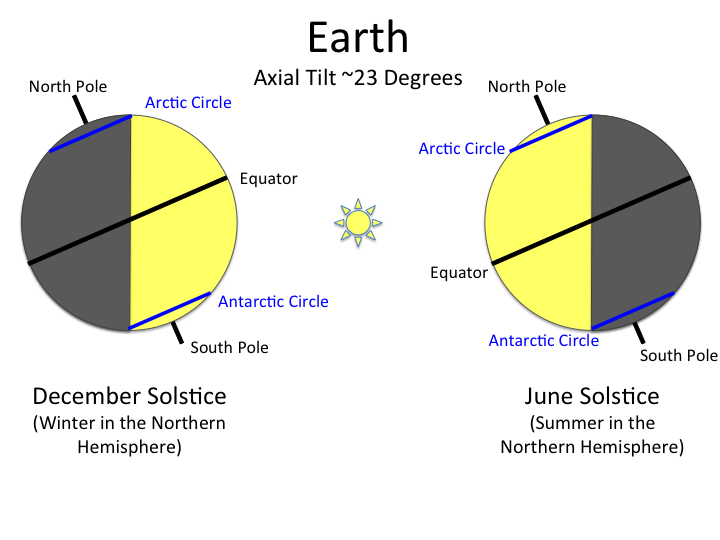
The Earth is moving in space, so the light from the Sun doesn’t shine on it the same way every minute of every day. Over a year, the planet revolves around the Sun, moving along its elliptical orbit. Because of the shape of that orbit, there are times when Earth is closer to the Sun and times it is farther away. You may be tempted to assume that when the Earth is closest to the Sun, we experience summer, but that’s not how it works. In reality, it’s all about the Earth’s 23.5 degree tilt on its axis.
Days And Years
That tilted axis is essential to the seasons. Because of that tilt and the shape of Earth’s orbit, different parts of the planet receive the Sun’s most direct rays at different times of the year. When the North Pole tilts towards the Sun, the Northern Hemisphere gets the most direct rays of light, absorbs more energy which becomes heat, and experiences summer. When the North Pole tilts away from the Sun, the light is more indirect, causing winter. In addition, the part of the Earth that tilts towards the Sun receives more hours of sunlight during the day than the part tilted away from the Sun.
You can model this at home. Take a flashlight, turn it on, and point it straight toward a wall. You get a concentrated bright light on a small area of the wall. When you tilt the flashlight a bit, the light spreads out. It’s the same amount of light, but because it’s spread over a larger area, it looks dimmer. Because the light is less concentrated, less energy is absorbed, and less heat is generated. That’s winter.
Meanwhile, it takes 24 hours for the Earth to complete one rotation on its axis. That means the Earth spins, a bit like a tilted toy top. This rotation exposes parts of the Earth to sunlight as it turns. When a part of the Earth faces the Sun, it experiences day. As that part of the Earth turns away from the Sun, it experiences night. The part of the Earth nearest the Sun at any moment gets the most direct sunlight.
Sometimes that light gets blocked. You see this every time you observe your shadow or stand under the shade of a tree. Because the Earth rotates, the angle of that tree relative to the Sun changes during the day. So the size and direction of the shadow change too.
Really Big Shadows
Shadows play a role in eclipses as well. An eclipse happens when a planet or moon gets in the way of the Sun’s light. In the case of a lunar eclipse, the Earth moves between the Sun’s light and the Moon. The Earth’s shadow covers the Moon. Because the moon’s orbit is tilted, we don’t get an eclipse every month, but they are more common than solar eclipses.
For a solar eclipse, the Moon gets between the Sun’s light and the Earth. That causes it to get dark during the day. A total solar eclipse happens somewhere on Earth about every year and a half. However, the Moon’s shadow on Earth isn’t that big, so you need to be in just the right place to see a solar eclipse. That makes them very special. The next total solar eclipse in the United States will happen on April 8, 2024.
We may need to wait a while to experience another eclipse, but we can explore shadows and light any day of the year. So grab your materials and get ready to experiment with light!
Materials
- Chalk
- Tape Measure
- Compass or GPS app (optional)
- Lamp or flashlight (optional)
Safety and clean-up notes: Never look directly at the sun while doing any of these activities! It can seriously hurt your eyes. While outside, take care to be aware of your surroundings.
Tracking Visible Light Across Time
It’s best to perform shadow tracing outdoors on a sunny day. You will need a safe, clean, dry, and open space of pavement or concrete for your work. Since you’ll need to visit the location several times during the day, ensure the area will be available.
If you cannot draw on the ground, you can lay down newspaper, cardboard or a dropcloth instead. Use masking tape, rocks, or other easily removed materials rather than chalk to mark the shadow if needed. Even if you don’t have helpers, you can still do these activities. Just find a doll, a vase, or some other tall opaque item to substitute as a person in this activity.
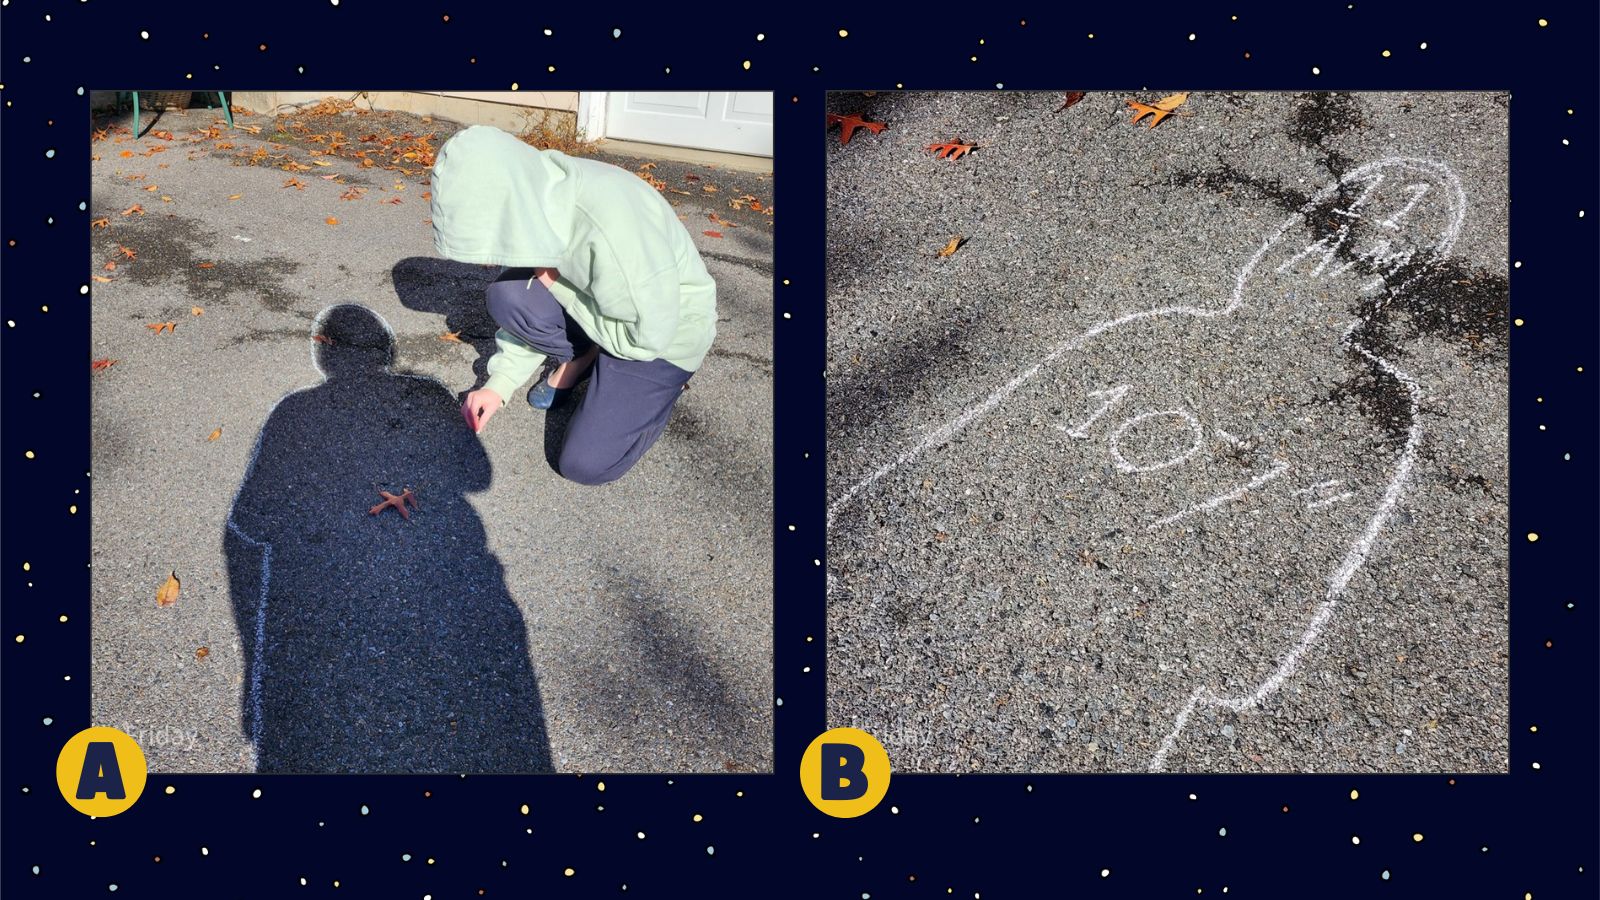
Activity 1: Shadow Tracing Over Time
- Find a safe, clean, open space of pavement or concrete that you can visit several times throughout the day. Plan to visit at least three times during the day—morning, midday, and afternoon—so that you can trace a shadow.
- Select who will be the Shadow Maker and the Shadow Tracer.
- Starting in the morning, draw a box on the ground using chalk.
- Have the Shadow Maker stand in the box with their back to the Sun. If using a compass or GPS, have the Shadow Maker stand facing west. Make sure they stand in a comfortable position that they can repeat in the future.
- Using the chalk, have the Shadow Tracer outline the shadow of the Shadow Maker. Write the time of day by the head of the shadow.
- Use your tape measure to measure the length of the shadow starting from the edge of the box you drew to the top of the head. Write the number next to the head.
- Repeat the shadow tracing at least twice more.
- Record all your data in a notebook or take a picture of your tracings.
After making the first tracing make a prediction. Do you think the shadow will be in the same place when you next check? Why do you think that is?
Once you have completed your tracings, take a look at them.
- Is there a pattern to the tracings?
- Is the shadow the same length in inches as your height?
- At what time of day is the shadow the longest? At what time is it the shortest?
- Is the shadow always pointing in the same direction? Why do you think that is?
- How can shadows on the ground tell you where the Sun is in the sky?
- When the Sun goes down at night, what happens to your shadow? Why?
One way scientists analyze data is to summarize it by making a visual representation of the data. For example, you could create a line graph to show the change in your shadow over time. The x-axis, the horizontal line, could be the time of day, and the y-axis, the vertical line, could be the height of the shadow. Does your graph show any patterns or trends? Compare your chart with others if possible.
If you do not have an appropriate place to perform your shadow tracing outside, that’s ok! Using a lamp or flashlight to model the Sun, you can simulate the process indoors. For this activity, you will need three people—the Shadow Maker, the Shadow Tracer, and the Light Holder.
As the Earth rotates on its axis each day, the Sun appears to follow an arched path across the sky, traveling from east to west. From our reference point on Earth, the Sun looks like it’s moving around the Earth. It’s important to remember that the apparent movement of the Sun is actually due to the motion of the Earth. This video shows the sun’s apparent movement in the sky over the course of 12 hours.
Activity 2: Shadow Tracing Indoors
- Have the Shadow Maker stand in the box with their back to the light holder. Make sure the Shadow Maker stands in a comfortable position that they can hold.
- Have the Light Holder stand about two feet to the right of the Shadow Maker and hold the light facing the Shadow Maker’s back. Hold the light at roughly the shoulder height of the Shadow Maker.
- Next, the Shadow Tracer should outline the Shadow Maker’s shadow. Label this tracing as “morning.” Measure the shadow using your tape measure.
- Repeat the shadow tracing. This time have the Light Holder stand directly behind the Shadow Maker, with the light at least the height of the Shadow Maker’s head. Label this as “noon” and measure the shadow.
- For the third tracing, repeat step 2 but have the light holder to the left of the shadow maker. Label this as afternoon and measure the shadow.
- You can add additional tracings, testing other places along the arc.
As you moved the light, what happened to the shadow? How does this model the apparent movement of the Sun across the sky? In what ways is this simulation limited?
Even if you can go outdoors for Activity 1, performing Activity 2 as a follow-up provides an opportunity to think about the Sun’s apparent movement across the sky by directly simulating it with a flashlight.
What other ways can you use this technique to model other phenomena, such as an eclipse?
Use What You’ve Learned
Now that you’ve traced and tracked shadows throughout the day, try using what you’ve learned to make a sundial. People have been tracking the sun’s apparent movement across the sky for thousands of years. Long before we had watches, clocks, and calendars, people used the placement of the Sun as a way to tell time and track the seasons. You can do the same with simple supplies from around the house and this tutorial from Sky & Telescope. Or learn more about how places like England’s Stonehenge, Machu Picchu’s Temple of Sun, and New Mexico’s Sun Dagger were used to track important solar events by building your own Sun tracker.
Keep Learning And Sharing
The last total solar eclipse in the US was in 2017. The next is coming up in 2024. Start planning now with Science Friday articles and activities to help you become an eclipse expert and view the eclipse safely.
Want to keep learning about light? Try What Makes Day and Night by Franklyn M. Branley. If you discover a great book, make sure you share your recommendation with Science Friday. We’d love to see your satellite models too. Share photos of your project with the hashtag #SciFriSunCamp on social media or send them to [email protected].
NGSS Standards
- 1-PS4-2: Make observations to construct an evidence-based account that objects in darkness can be seen only when illuminated.
- 1-PS4-3: Plan and conduct investigations to determine the effect of placing objects made with different materials in the path of a beam of light.
- 1-ESS1-1: Use observations of the sun, moon, and stars to describe patterns that can be predicted.
- K-2-ETS1-1: Ask questions, make observations, and gather information about a situation people want to change to define a simple problem that can be solved through the development of a new or improved object or tool.
- 3-5-ETS1-3: Plan and carry out fair tests in which variables are controlled and failure points are considered to identify aspects of a model or prototype that can be improved.
This activity is supported by the NASA Heliophysics Activation Team (NASA HEAT), part of NASA’s Science Activation portfolio.
![]()
Credits:
Written by Sandy Roberts.
Edited by Ariel Zych.
Illustration by Carrie Lapolla.
Digital Production by Sandy Roberts.
Have you registered for Sun Camp yet? Join today! You’ll get a weekly newsletter, access to interactive Q&As with real scientists, and extra resources for learning.
Meet the Writer
About Sandy Roberts
Sandy Roberts is Science Friday’s Education Program Manager, where she creates learning resources and experiences to advance STEM equity in all learning environments. Lately, she’s been playing with origami circuits and trying to perfect a gluten-free sourdough recipe.