Grade Level
All
minutes
15 min - 1 hr
subject
Earth Science
stem practices
Constructing Explanations and Designing Solutions
Activity Type:
Engineering design challenge, STEAM, Family activity, space
This activity is part of the Science Friday Sun Camp collection!
It’s a big universe out there. Even as we explore the Sun and nearby planets, scientists and engineers are looking for ways to study stars, planets, moons, and galaxies far beyond our solar system. Because the distances to travel are so huge, they rely on unmanned spacecraft to collect data and send it back to Earth. NASA and other space agencies have designed and built hundreds of unmanned spacecraft, including satellites, probes, telescopes, and other devices to learn more about space.
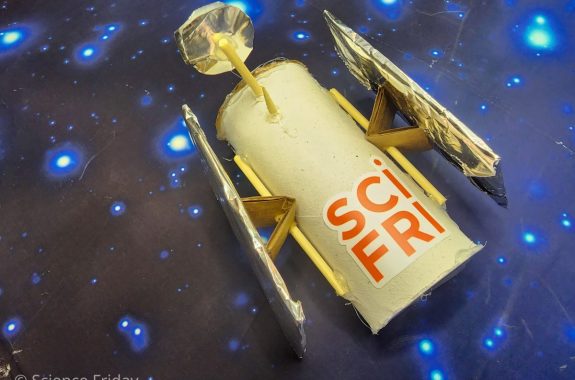
In this activity, you’ll design your own space probe to study the Sun!
Tools To Study The Solar System
Scientists have several ways to study the solar system and beyond. Generally, they use three types of robotic explorers: landers, rovers, and satellites. Each type of explorer has its merits and limitations, so they are used for different purposes when studying planets.
Landers make observations from one location on the surface of a planet, moon, or space object and do complex, in-depth science using sensitive equipment. Rovers land on a surface like landers do, but instead of staying at the same place, they travel to a variety of locations to make observations and collect samples. Satellites are fly-by or orbiting spacecraft that gather scientific information about planets, moons, and the Sun from a distance, allowing large areas to be studied.
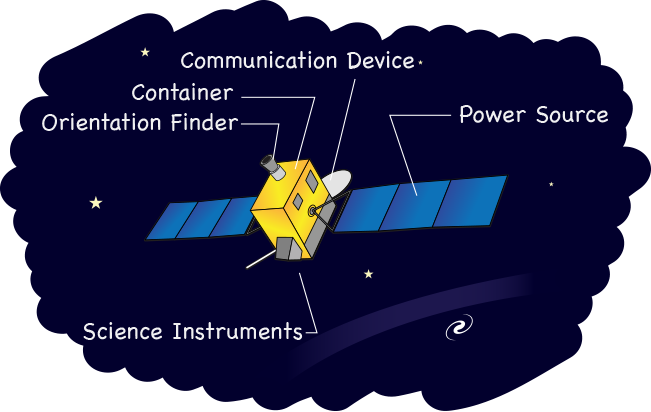
Satellites are unpiloted and unmanned, but they carry many scientific instruments and tools to collect information. Every satellite has a main bus—the body of the spacecraft—that holds all its electronics and computers. Satellites also have antennas that allow them to communicate with Earth. Antennas can look like anything from a short flag pole to a big dish depending on what kind of communication they send and how fast they send the information. Satellites also need a power source–often they use solar panels.
Probes are a type of satellite. Instead of orbiting a planet as satellites do, probes travel through space and may carry telescopes and other instruments to study space objects such as planets, moons, asteroids, comets, and the Sun. Because launching a probe into deep space requires a lot of energy to begin with, they must be small and light. Satellites on the other hand, usually orbit a nearby planet, so they can be larger and heavier than probes.
Current Solar Studies
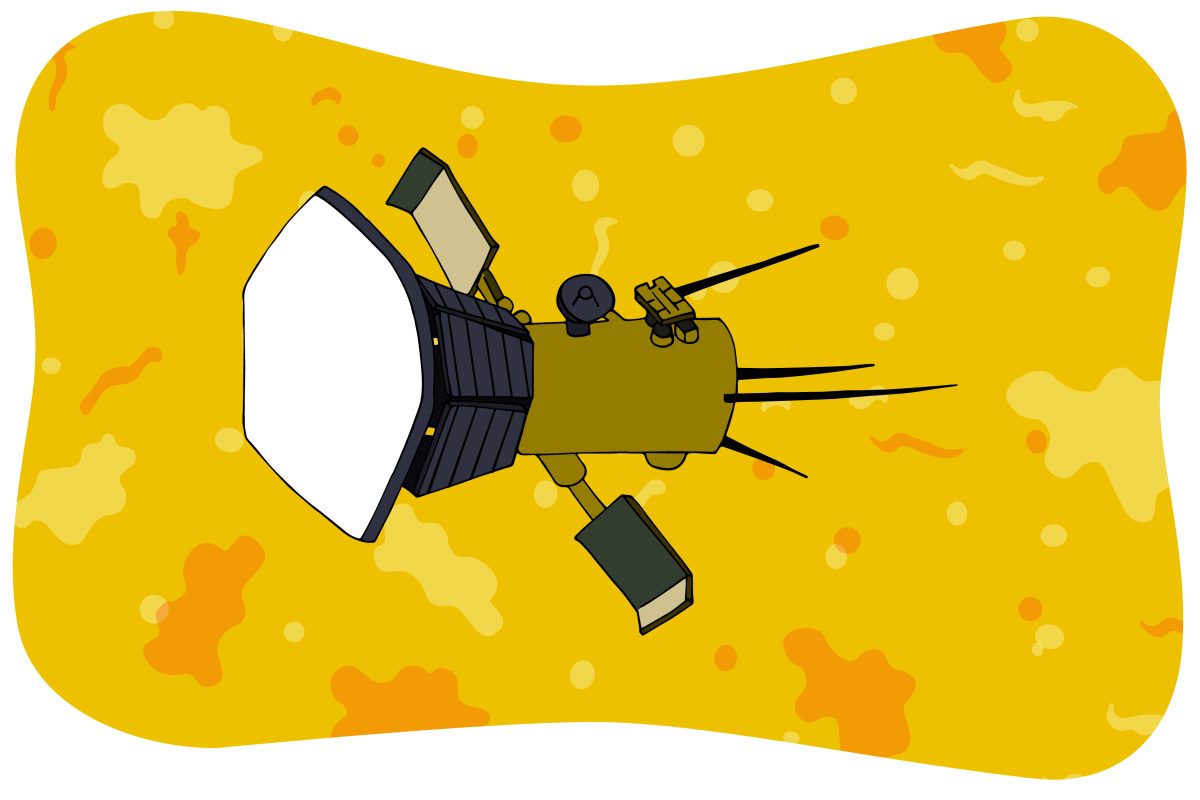
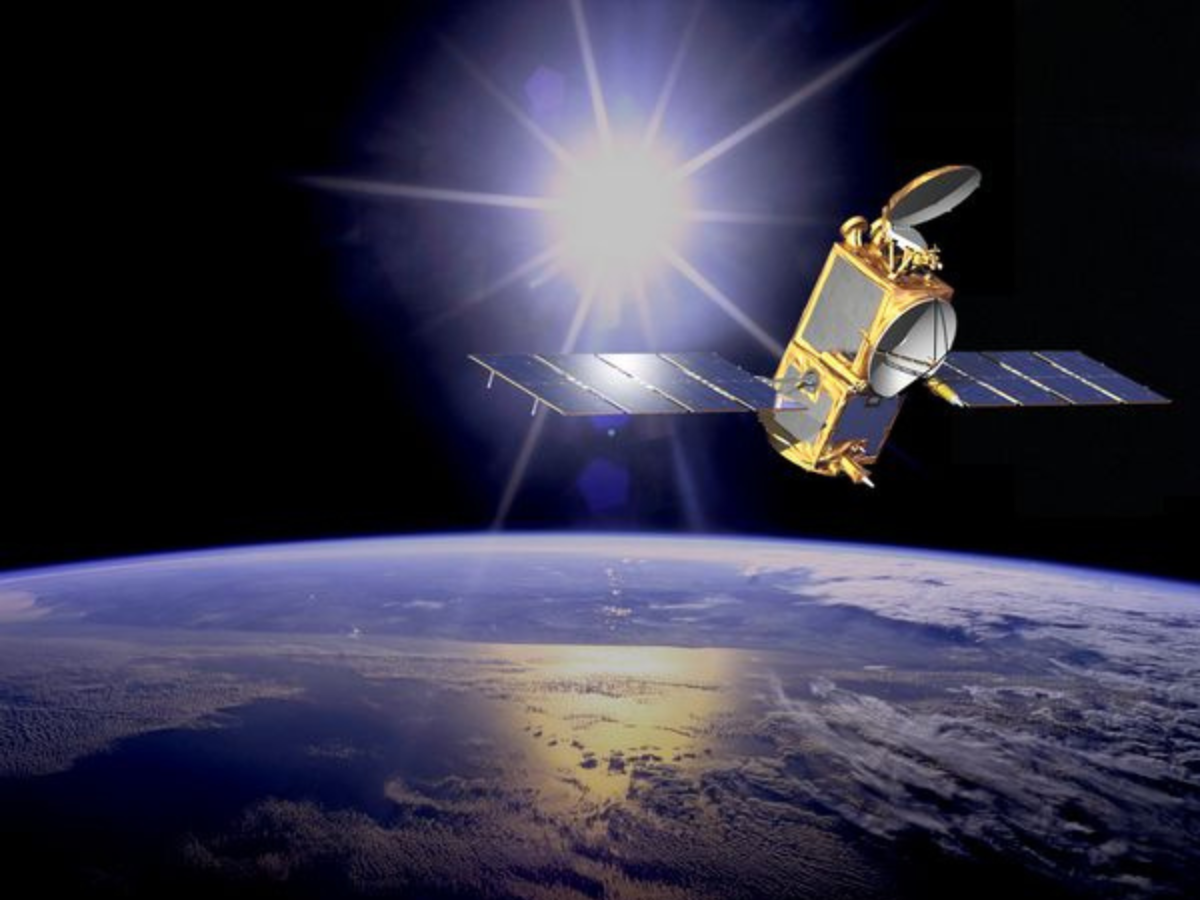
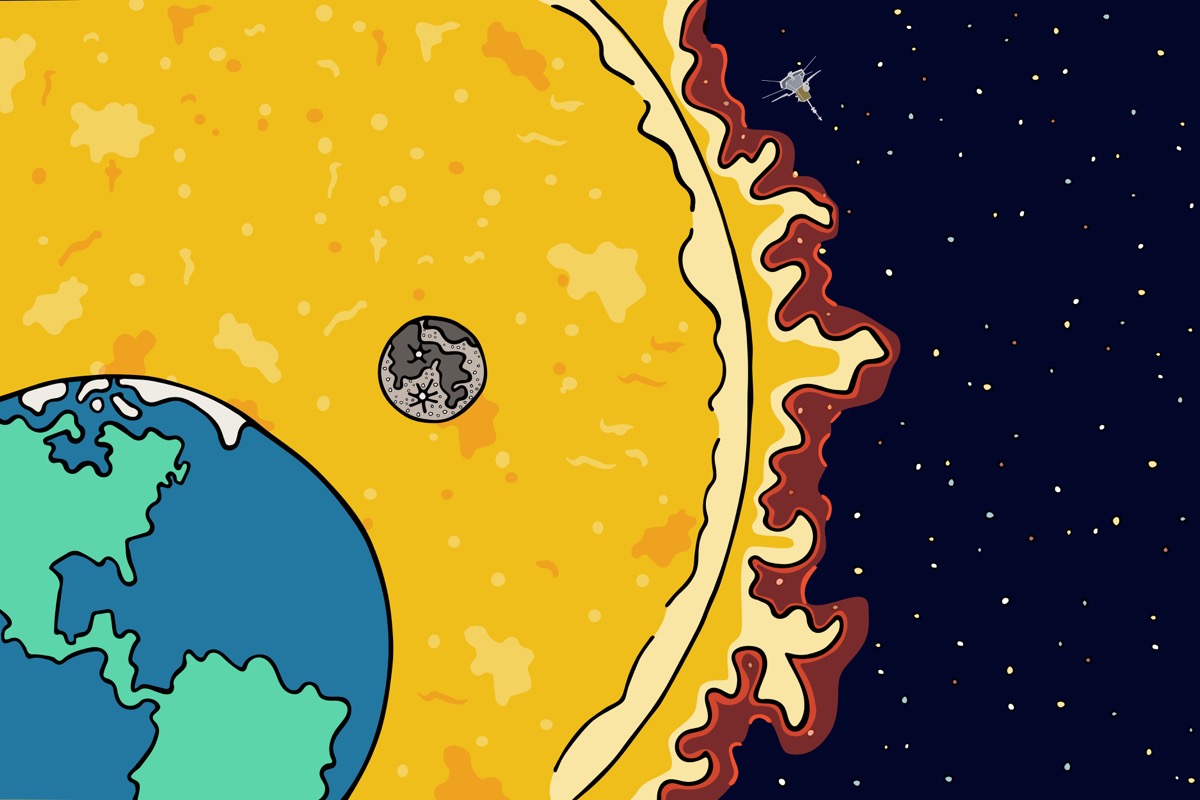
The Solar Dynamics Observatory (SDO) and the Parker Solar Probe are two famous spacecraft studying the Sun. SDO is a satellite in orbit around the Earth that adjusts to face the Sun to provide 24/7 observations of the Sun. Over the course of nine years, it has sent scientists more than 350 million amazing images of the Sun. The Parker Space Probe is very different—it is getting up close and personal with the Sun! It will travel around and ultimately through the Sun’s atmosphere, facing its intense heat and radiation, to collect the closest observations of our Sun ever recorded. Together, the Solar Dynamics Observatory and the Parker Solar Probe are helping scientists unlock the mysteries of the Sun.
What would you want to know if you could study the Sun by sending a probe? Start thinking while you scavenge your house for materials. It’s time to design your own Sun probe!
Materials
Recycled and scrap materials from around your house such as:
- Disposable paper cup or cardboard tube (optional)
- Disposable water bottle (washed, optional)
- Pipe cleaners (optional)
- Paper straws (optional)
- Popsicle sticks (optional)
- Sheet of foil (optional)
- Scrap cardboard (optional)
- Paint, markers, etc. for decorating (optional)
Scissors (and other cutting tools as needed)
Hole punch (optional)
Glue or hot glue
Tape
Safety and clean-up notes: When using scissors, cutting tools, and hot glue, protect your hands and eyes. Cover surfaces while working.
The Engineering Design Process
In this activity, you will use the engineering design process to transform everyday household materials into a space probe. Because it would be very time-consuming and expensive to make a real probe, you’ll be building a prototype. A prototype is a kind of functional model meant to be evaluated for its performance. It’s a physical representation of your solution to a problem that can be tested in some way. Engineers use prototypes to look for potential flaws in their designs. Often, early prototypes are simpler or smaller than the final item and may not be operational, though you should be able to explain how it would work. To design a piece of technology, engineers create many prototypes improving the design with each one. We call this process iteration, and it’s the heart of the engineering design process.
Let’s get started!
Identify A Problem
Before building a space probe, you need to know what it will do. You want to identify a problem your invention can help solve. For example:
- How can you collect samples from the corona—the outer layer of the Sun?
- How can you take pictures of solar weather like sunspots, solar flares, and coronal mass ejections?
- How can you measure the strength of the solar wind?
- How can you observe auroras in the Earth’s ionosphere?
- What information can you gather to benefit science’s understanding of the Sun, the Earth, the solar system, or the universe?
Engineers often have requirements they must meet for a project. Requirements are needs that can be measured or tested to determine their success. They help to define the form (the shape or configuration of a thing) and function (what a thing does). Here are the requirements for your space probe:
- It must have a purpose related to understanding the Sun.
- It must have a main bus (a body or container) to hold its equipment and components.
- It must have at least one scientific instrument to collect data.
- It must have an antenna to communicate information back to Earth.
- It must have a power source, such as a solar panel.
- It must have at least one moving part, for example, an arm that deploys a scientific instrument or solar panel that folds open.
Your sensors, antenna, and power source don’t have to be functional. They can just be representations showing what those items would look like or where they would be placed because this is an early prototype. Also, you can add additional components if you want to, so long as the basic requirements are met.
Engineers also have constraints. These are the resources that engineers have available for their inventions. You can also consider constraints to be limitations because you usually don’t have unlimited resources. Here are your constraints for the project:
- People: You can work individually or as a team. (It’s often more fun to work with a team, especially when brainstorming.)
- Tools/Machines: Suggested tools include scissors, hole punch, paintbrushes and paint, and markers. You can use a hot glue gun if you are old enough and have adult supervision.
- Raw Materials: You may use found craft materials, scraps, and recycled items from your home (or classroom).
- Time: You must build your first prototype in under an hour.
- Budget: $0. Get creative and use what you have on hand!
- Energy: Your body is your only energy source required for construction.
- Information: You can use anything you learned about space probes and the Sun in this resource, as part of Sun Camp, or elsewhere.
This is a good time to do some research about space probes. Research isn’t only about reading books, visiting websites, or watching video clips. It includes finding and testing materials, learning to use tools, and exploring construction techniques. What do you need to know to complete this project?
Visit NASA’s Solar System Exploration Missions page to research different probes, satellites, and telescopes. Or read Explore Space Probes by Lola Schaefer or Space Probes: Exploring Beyond Earth by David Jefferis to get ideas.
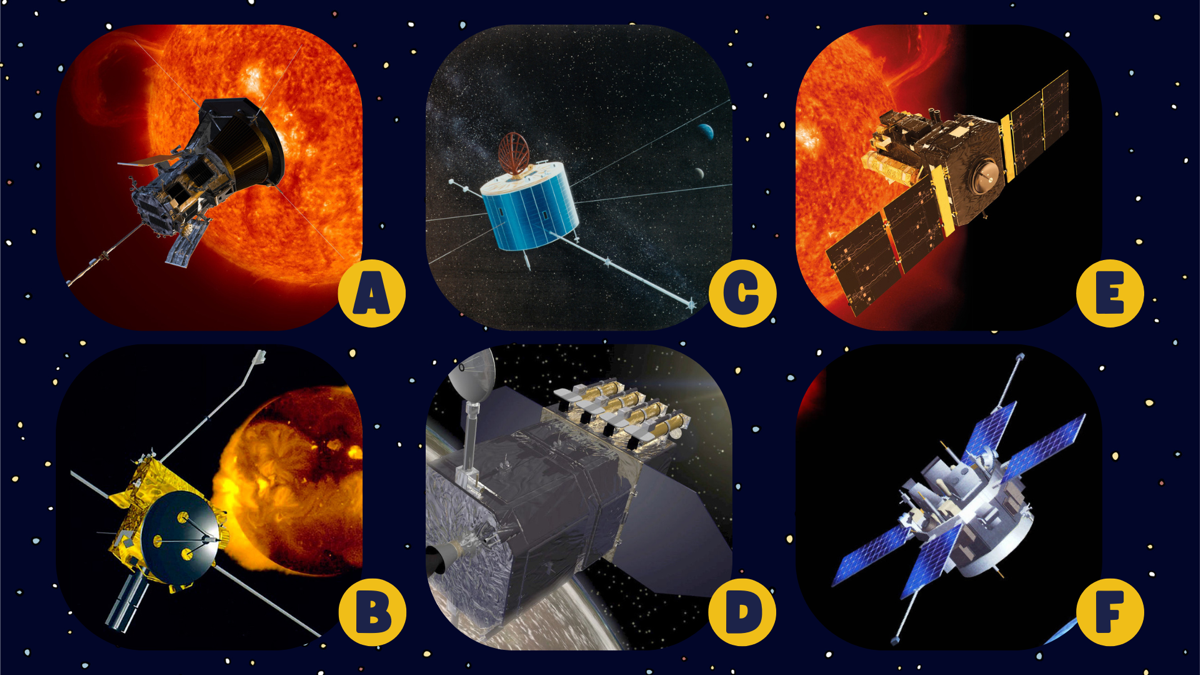
Want larger versions of these images, additional photos, or a description of what’s happening in each picture? Download this presentation.
Now that you know what you need to build. It’s time to think about how you’ll build it!
Imagine A Solution
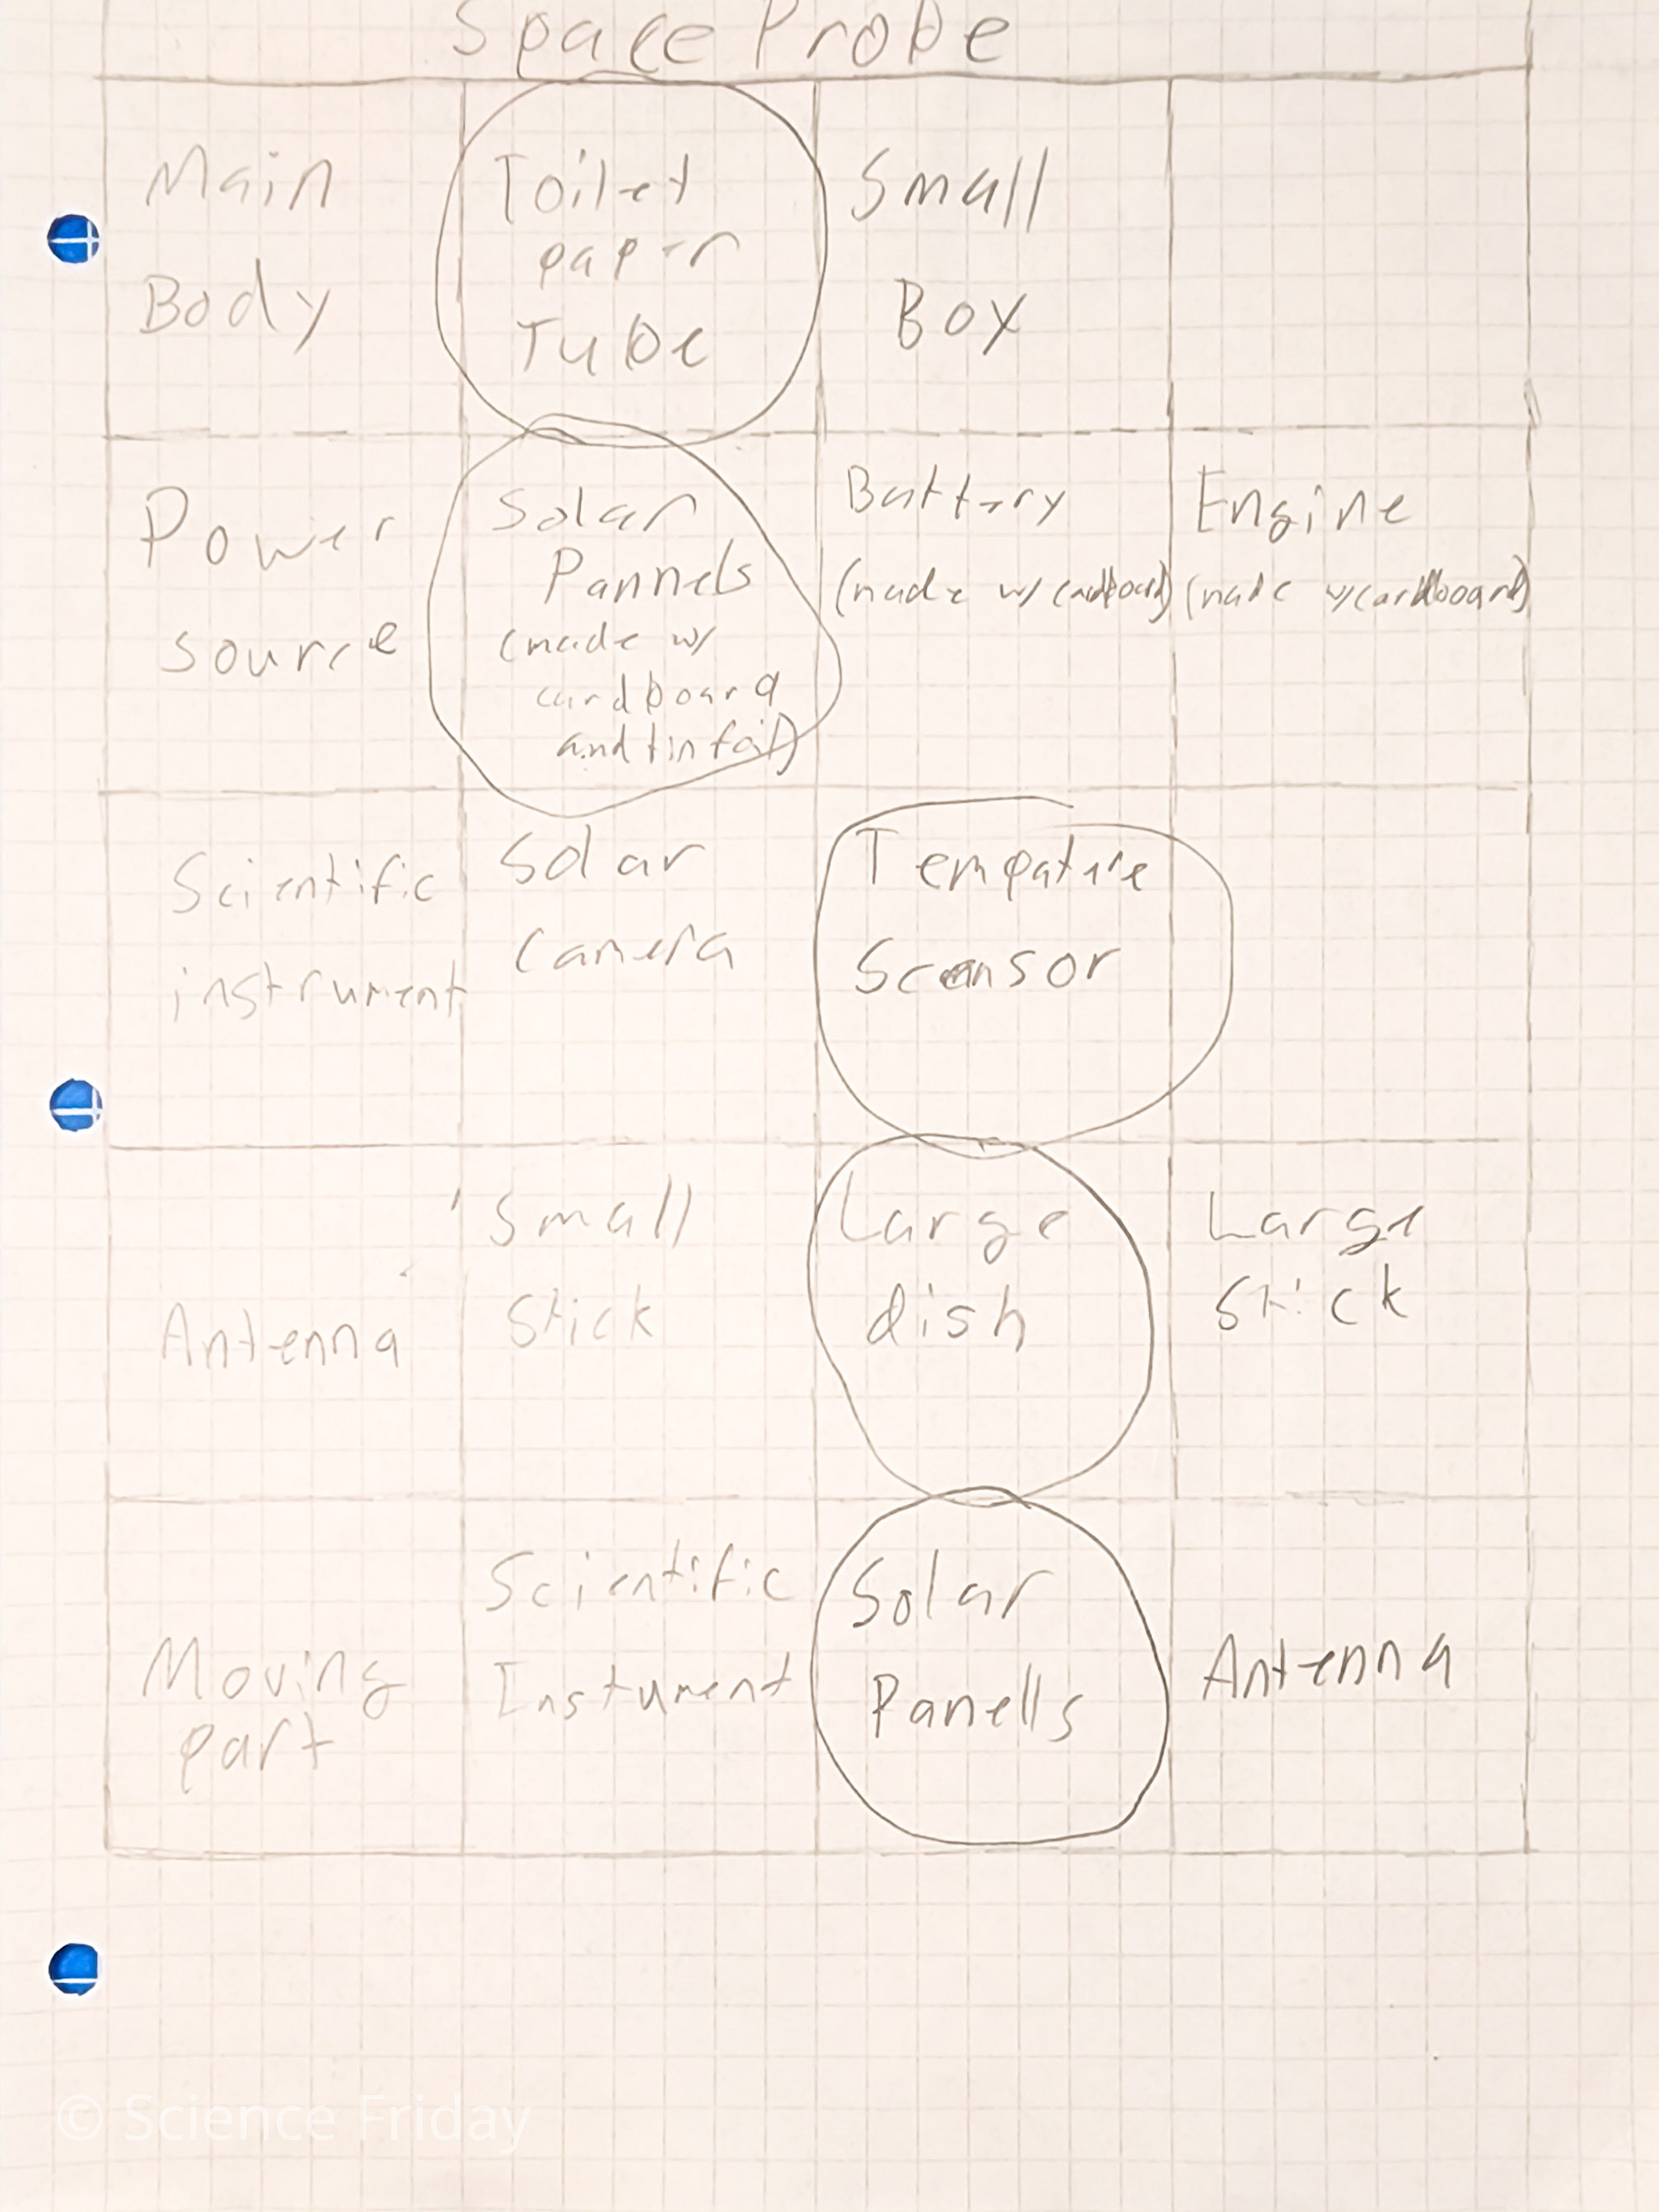
When engineers imagine ways to solve a problem, they often work with others to brainstorm. When you brainstorm, you try to come up with as many different ideas as possible. Be wild! Be creative! One fun way to generate many ideas is to use a morph chart—a visual way to capture your ideas.
Here’s what to do:
- Draw a grid with 5 rows and 5 columns. Write the problem you want to solve along the top so that you remember your goal.
- In the first column, list or draw 3-5 functions or requirements for your probe, one in each box. What does it need to do?
- For the first row, come up with as many ways as possible to meet that need. Put each idea in a new box across the row. Try to fill all the boxes.
- Repeat that procedure for each row. Fill in as many blocks as you can. Remember, you want to come up with as many ideas as possible!
- Once you’ve filled the chart, think about your constraints. What materials do you have? How much time do you have? Circle at least one idea from each row that will best meet your requirements and constraints.
- This combination is the starting concept for your prototype!
Plan Your Probe
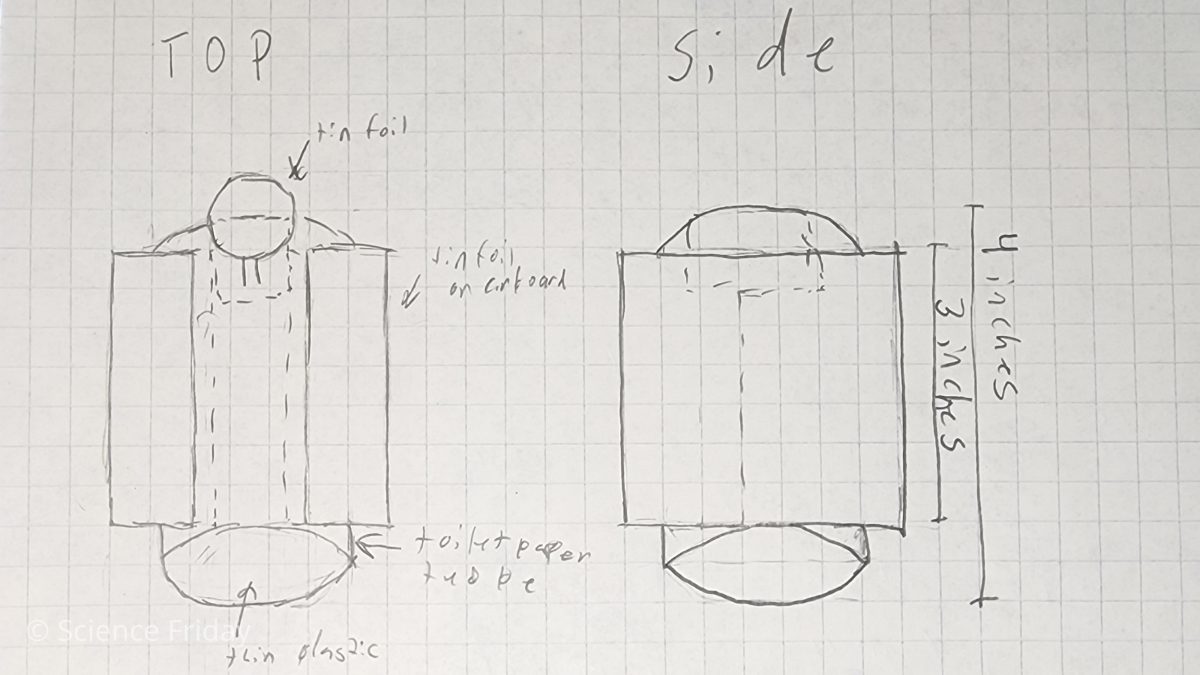
Now it’s time to plan. For engineers, that usually means making a design sketch. A design sketch is a way to plan your ideas on paper before you start building in 3D. Sketching before building ensures you understand how pieces will fit together. It also provides a way to check that you have enough materials, time, and space to create what you want.
A design sketch doesn’t have to be pretty. Its job is to communicate your ideas in the simplest form possible. Your sketch can be as straightforward as basic shapes drawn on paper or more complex as computer-aided design (CAD), so long as it communicates your ideas clearly.
Here are some basic steps to follow to create an engineering design sketch.
- Start with thumbnails. Focus on the most important parts you are building and make small sketches of those items first. These small drawings are called thumbnails.
- Combine the ideas. Sketch a larger version of what you plan to build, using your best thumbnails to guide you. Go big and add as much detail as you can. Remember, it doesn’t have to look perfect or pretty.
- See it from different angles. You may want to do several drawings, imagining your space probe viewed from different perspectives. Engineers often include views from an item’s front, back, top, and side.
- Add some details. Label items on your drawing, especially important features like antennae and scientific instruments. It’s also helpful to add the item’s estimated length, width, and depth. Include any important notes that will help you build the probe.
Create, Iterate, And Test
This is the part you’ve been waiting for! It’s time to get building. Using your design sketch, construct a prototype of a space probe.
As you build, you may find that some materials don’t work as you expected. Some pieces may not fit together quite right. Your design may need changes. That’s ok! It’s part of the process.
If something doesn’t work, look carefully to see if you can figure out why. Review your thumbnails for inspiration. Go back to your morph chart for additional possibilities. Dig into your research for new ideas. Look for ways other people have solved similar problems and incorporate those ideas into your design. Each small change can bring you closer to success. That’s what iteration is all about.
The point is, you don’t have to get it right the first time. It can feel frustrating when your plan does work out, but that’s normal in engineering. When you overcome each challenge, you learn something new that improves your design. The most important thing is to not give up.
It is important to test your probe as well.
- Are you meeting all of the basic requirements? Does your probe have a main bus (body), a communication method, an energy source, and a scientific instrument represented?
- Does the moving part work as expected? Does it work consistently?
- Is your probe well constructed? Does it hold together properly? Is it balanced?

Share And Improve
Once you have a prototype you like, share it with others and get feedback. This can feel scary, but it’s an important part of the design process. Getting constructive feedback from others will help you improve your space probe.
One way to get feedback is to ask for “Two Stars and a Wish.”
- Share. Present what you have built to friends and family. Tell them what problem your space probe will solve and how it will do that.
- Two Stars. Ask them to tell you two things they like about your design. What stands out to them? Why do they like those elements?
- A Wish. Ask them to tell you one thing they wish you had included, removed, or changed. What ideas do they have to make your space probe better?
- Reflect. Think about the input you got from people you trust. Consider what you learned while making your space probe. What do you think would improve your design? You don’t have to use all the feedback to make changes. Pick a few strong ideas that make sense to you.
- Improve. This is the best part! Use these new ideas to improve your design. You may want to create a new sketch, do more research, or find new materials. Keep using the design process to improve your space probe.
Be sure to share your space probe with Science Friday. We’d love to see what you make and share it with everyone. Share photos of your project with the hashtag #SciFriSunCamp on social media, send them to educate@sciencefriday.com, or use our easy form to submit your pictures and videos.
Keep Learning And Sharing
Now that you have designed a space probe to explore the Sun, think about how you would modify it for other types of exploration. Try redesigning your probe to solve one of these problems.
- How can you study stars outside this solar system?
- How can you explore one or more of the planets in our solar system?
- How can you monitor space weather like the solar wind or geomagnetic storms?
- How can you monitor auroras or other atmospheric conditions on Earth?
You’ll need to use the engineering design process for each challenge. Consider the requirements and constraints for each problem you want to solve. Brainstorm ideas. Make a sketch to plan your prototype. Then get building. And, of course, don’t forget to share what you’ve made. Good luck!
NGSS Standards
ETS1.A: Defining and Delimiting Engineering Problems
– The more precisely a design task’s criteria and constraints can be defined, the more likely it is that the designed solution will be successful. Specification of constraints includes consideration of scientific principles and other relevant knowledge that are likely to limit possible solutions. (MS-ETS1-1)
ETS1.B: Developing Possible Solutions
– A solution needs to be tested, and then modified on the basis of the test results, in order to improve it. (MS-ETS1-4)
There are systematic processes for evaluating solutions with respect to how well they meet the criteria and constraints of a problem. (MS-ETS1-2), (MS-ETS1-3)
– Sometimes parts of different solutions can be combined to create a solution that is better than any of its predecessors. (MS-ETS1-3)
Models of all kinds are important for testing solutions. (MS-ETS1-4)
ETS1.C: Optimizing the Design Solution
– Although one design may not perform the best across all tests, identifying the characteristics of the design that performed the best in each test can provide useful information for the redesign process—that is, some of those characteristics may be incorporated into the new design. (MS-ETS1-3)
– The iterative process of testing the most promising solutions and modifying what is proposed on the basis of the test results leads to greater refinement and ultimately to an optimal solution. (MS-ETS1-4)
This activity is supported by the NASA Heliophysics Activation Team (NASA HEAT), part of NASA’s Science Activation portfolio.
![]()
Credits:
Written by Sandy Roberts.
Edited by Ariel Zych.
Illustration by Carrie Lapolla.
Digital Production by Sandy Roberts.
Have you registered for Sun Camp yet? Join today! You’ll get a weekly newsletter, access to interactive Q&As with real scientists, and extra resources for learning.
Meet the Writer
About Sandy Roberts
Sandy Roberts is Science Friday’s Education Program Manager, where she creates learning resources and experiences to advance STEM equity in all learning environments. Lately, she’s been playing with origami circuits and trying to perfect a gluten-free sourdough recipe.