Grade Level
All
minutes
15 minutes or fewer
subject
Earth Science
stem practices
Planning and Carrying Out Investigations
Activity Type:
solar eclipse, pinhole projector
Este recurso está disponible en español. This resource is available in Spanish.
Safely observing the Sun is an exciting way to deepen your understanding of its physical features. The most exciting time to view the Sun is during a total solar eclipse when you can observe the its corona, but that isn’t the only time to take a look. Phenomena like sunspots are relatively easy to see with eclipse glasses any day of the year.

[For more information on eclipses, you can take a look at our picture guide.]
But what if you don’t have eclipse glasses? No worries, you can appreciate this solar phenomenon using some simple projection devices you can make at home.
Projection devices work by focusing the sun’s light onto another surface so that you can safely view the sun indirectly. During a partial solar eclipse, projections of the sun’s rays will appear in a crescent shape that changes with the position of the moon! Pinhole projectors are very cool, very old devices that date back thousands of years.
SAFETY NOTE: You should never look directly at the sun without the special type of solar filter found in eclipse glasses. DO NOT use regular sunglasses.
1. The Simple Pinhole Projector
This is probably the easiest and most well-known form of projection. All you need is a piece of card stock (or cardboard) and a pin. Poke a hole in the center of your card stock to make your pinhole projector. Position your projector over a light piece of paper or light sidewalk until you see the small circular projection of the sun appear on the paper. That’s it!
Pro tip—cut a hole in the cardboard and cover it with aluminum foil before poking your holes. The foil makes it easier to get a crisp projection, and you can easily poke multiple holes to project a fancy pattern.
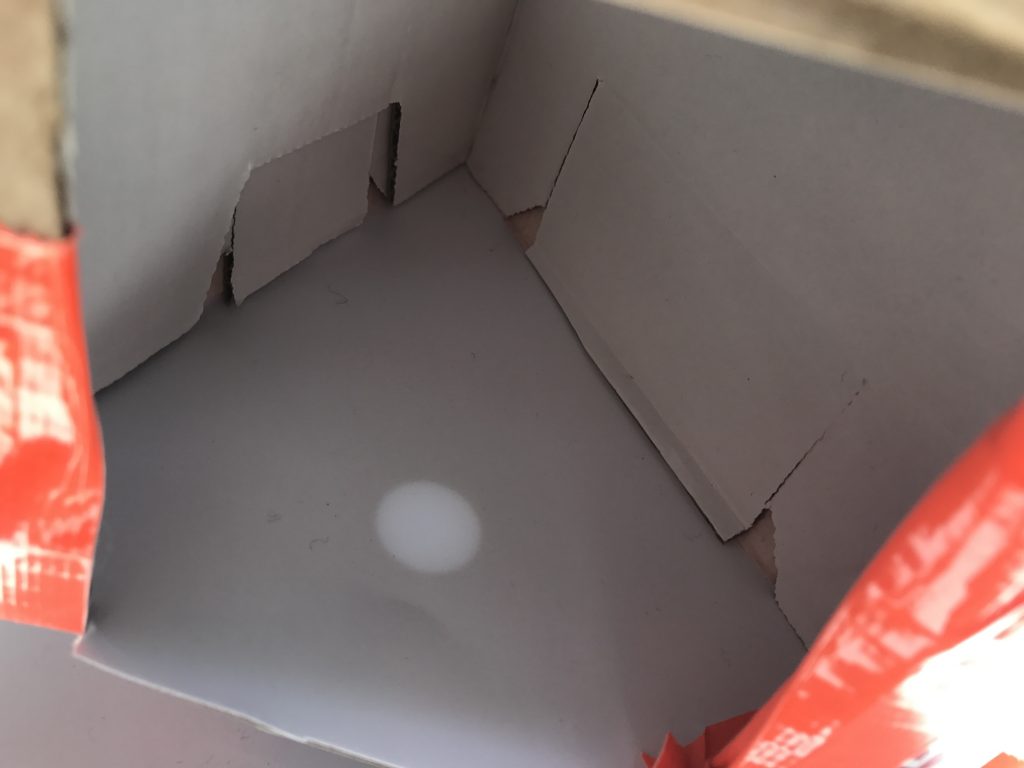
2. The Pinhole Hat
You can create a pinhole viewer that goes over your head. We like to call this a pinhole hat. To create one, you need a large box, some white paper, duct tape, and some aluminum foil.
- Get a very large box. Tape one side closed with dark masking or duct tape. This is the top of your “hat”.
- Identify the two sides of the box that are the farthest apart, and label one side “front” and the other side “back”
- Fold closed the bottom of the box. Create a hole for your head in the bottom the box towards the back (have an adult do this part). It helps to place the hole as close as you can to a corner.
- On the side labeled “back” cut a square hole in the corner towards the top, away from where you’ve cut a hole for your head. Cover that hole with aluminum foil. Secure the foil with dark tape and poke a hole in the center of it with a pin.
- Cover the inside of the front side of your box with white paper to make a viewing screen.
- On a sunny day, stand outside with your back to the sun. Put on your pinhole hat so that the aluminum panel faces the sun and tilt and turn until a small circular dot is projected onto the white paper inside. If you need to, use additional dark tape to block any places where light is leaking into the box. You’re now ready for the day of the eclipse!
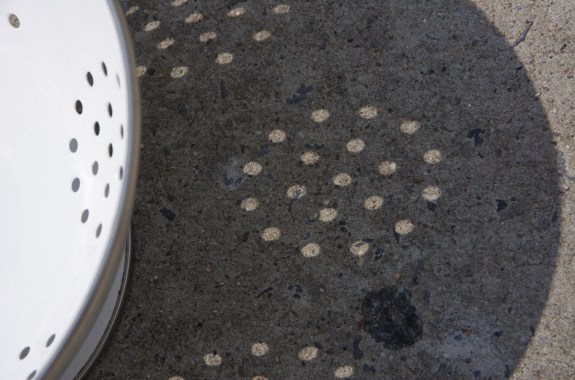
3. Found Object Projector
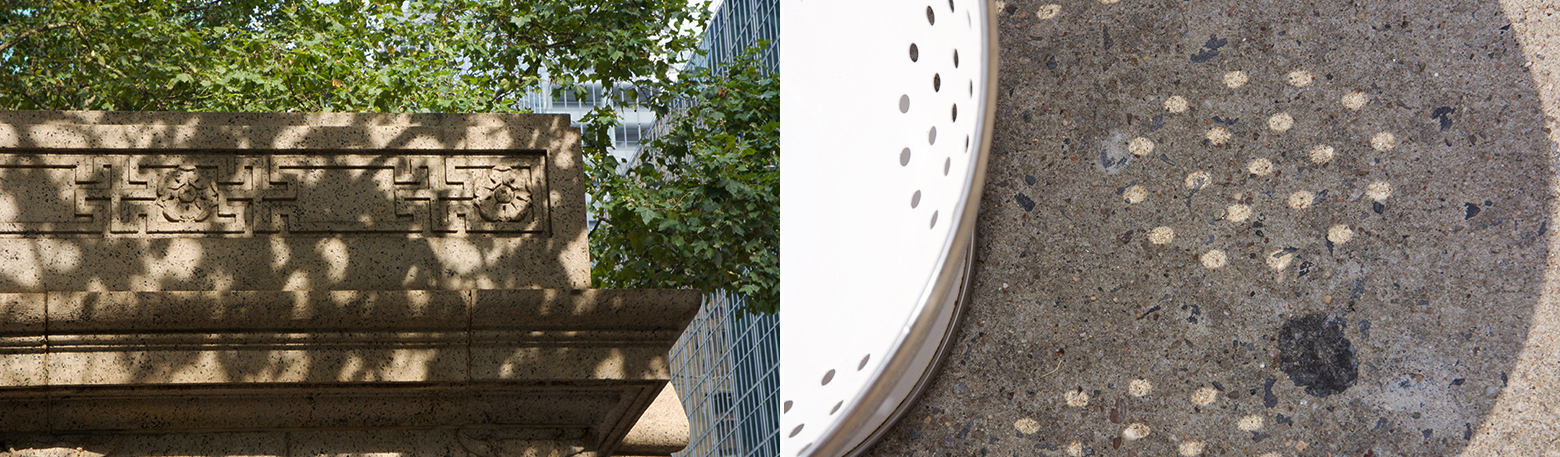
Any object with small holes will work similar to your pinhole projector. See the sunlight shining between those leaves or the holes in that colander above? During an eclipse, those objects will work like pinhole projectors. Simply look for a place where the sunlight shines through them and watch how the light changes* during the eclipse.
4. The Longer Pinhole Projector
 If you have any old shipping tubes, you can create a longer pinhole viewer. Why make a longer pinhole viewer you ask? It creates a larger projection of the sun. You can actually calculate the size that your projection will appear using the dimensions of your projector. To create this viewer you need an old mailing tube, aluminum foil, box cutters (have an adult use this tool), and white paper.
- For a longer viewer (and larger projection), you may want to tape two mailing tubes end-to-end with dark duct tape.
- Cut a 1-inch square out of one end of the tube and cover it with aluminum foil.
- At the other end of the tube, cut a rectangle out of the side of your tube that allows you to see the bottom of the tube.
- Cover the bottom of the tube with white paper to make your projection platform.
- Poke a hole in the center of your aluminum foil.
To aim, position the sun behind you. Position your pinhole projector with the hole pointed towards until the projector casts the smallest shadow on the ground. Look through the hole on the side to see the projection of the sun in the bottom.
5. Telescope or Binocular Projection
All you need to create this viewer is a pair of binoculars or a telescope, an old cereal box, and a light surface to project on.
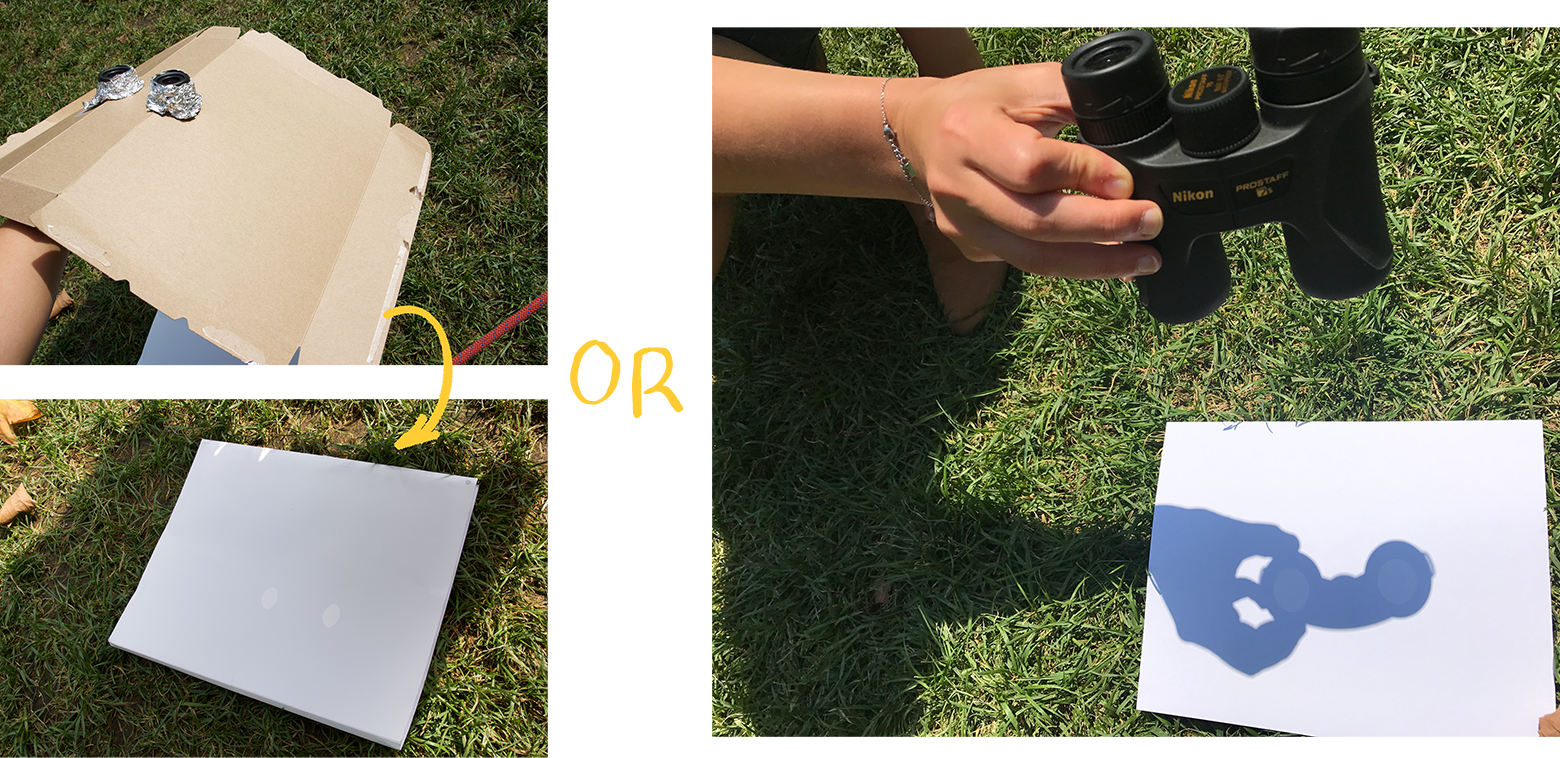
- Fully open your cereal box.
- Create an outline of the eyepieces of your binoculars in the center of your cardboard and then cut an X through the center of each circle.
- Push your eyepiece through the Xs in your cardboard.
- To make the cardboard “light-tight”, surround the outside of each of the eyepieces with aluminum foil and then tape around them to secure the foil.
- Place a piece of white paper on the ground, then point the eyepieces of your binoculars towards the sun so that the rays of the sun pass through the binoculars, casting circles of light onto the paper.
You can use any or all of these to create a great viewing experience for the eclipse with or without glasses. Remember to never look directly at the sun! That includes through pinhole viewers, binoculars, or sunglasses. Instead, always look at the projections created by a pinhole projector.
Meet the Writer
About Xochitl Garcia
@msxgarciaXochitl Garcia was Science Friday’s K-12 education program manager. She is a former teacher who spends her time cooking, playing board games, and designing science investigations from odds and ends she’s stockpiled in the office (and in various drawers at home).