Grade Level
3 - 5
minutes
1- 2 hrs
subject
Life Science
Activity Type:
life science, hydrophobicity, lab investigation
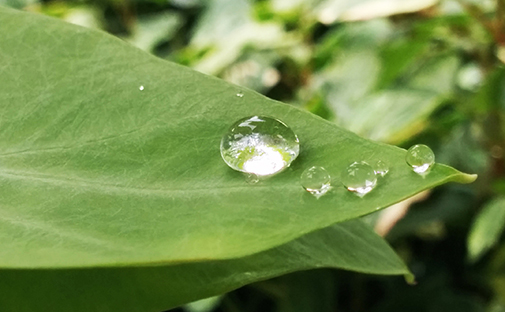
What happens to the water drops that fall on this Colocasia leaf?
- After the water drops have rolled off, what do you notice about the leaf? Is the leaf dry or wet? Is that what you expected?
- How might water-repellent leaves help a plant?
If plants need water, then why is this leaf repelling water? Turns out, in certain climates, the ability to quickly shed surface water provides a survival advantage to some plants. In this investigation, you will examine surface textures and conduct a “tilt test” to compare how materials with different surface textures repel or absorb water.
See the Educator’s Toolbox below for student worksheets.
Plants that live in moist environments like rainforests and wetlands can develop damaging fungal and bacterial infections. That’s because many of these plant pathogens love moisture. Wet conditions can lead to mold growth, just like you might see in a forgotten bag of veggies in your fridge. In moist environments, plants that can keep their leaves dry and clean are more likely to be healthy and to reproduce.
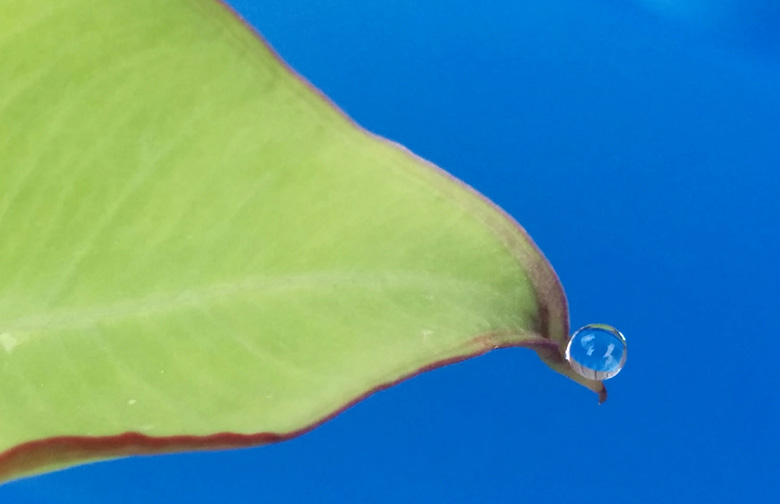
Why doesn’t the water make the Colocasia surface wet?
Surfaces that repel water, like the leaves of the Colocasia plant, are called hydrophobic.
- “Hydro-” is a Greek root word that means water.
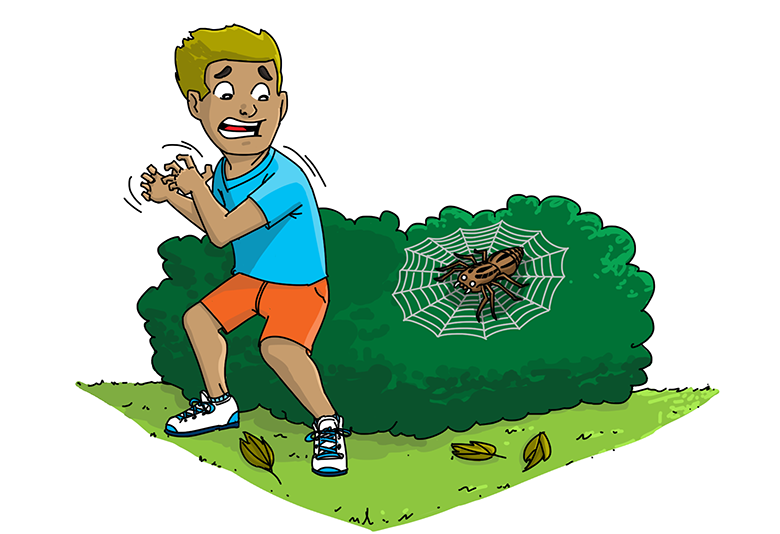
- “Phobia” means fear. Maybe you know someone who is claustrophobic (hates to be in small confined spaces) or is arachnophobic (terrified of spiders).
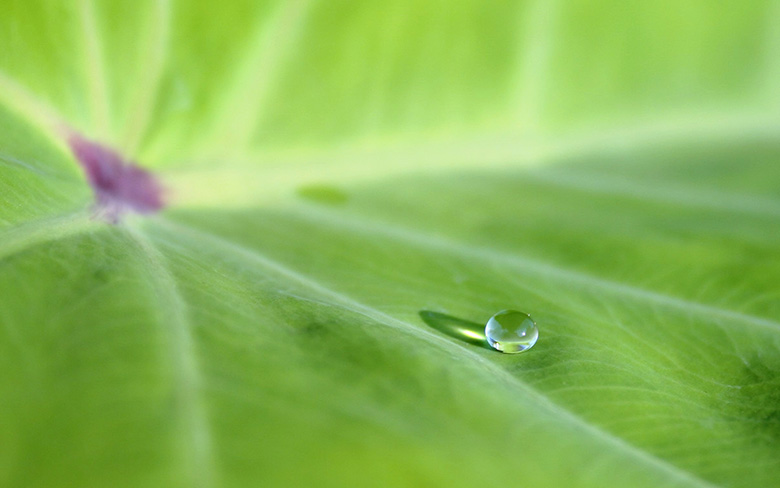
When a water drop lands on the Colocasia leaf, it beads up into a sphere and simply rolls away. Why doesn’t the water make the surface wet? Because this leaf is superhydrophobic!
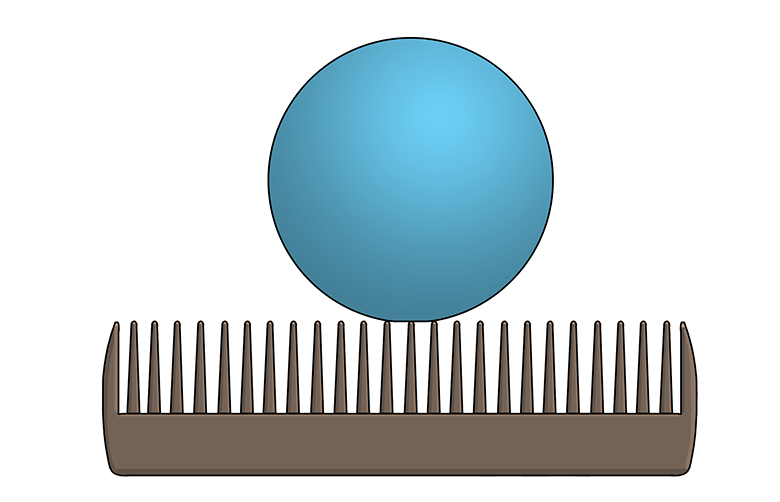
Microscopic textures play a huge role in hydrophobicity. For example, the leaves of the Colocasia plant are covered with waxy, microscopic bumps that prevent water drops from being able to stick, or adhere, to the leaf. (Imagine a Ping-Pong ball balancing on the teeth of a comb—that’s kind of how a water drop sitting on a Colocasia leaf would look if you were to zoom in really close.) As a bonus, the water drops collect dust and dirt as they roll along the leaf—in other words, the leaf surface is self-cleaning!
Inspired by some plants’ ability to stay dry, scientists have designed innovative superhydrophobic metal surfaces. These new metal surfaces can be used to make vehicles that don’t rust and airplane wings that don’t get icy. As you can see in the animation below, not only does water not stick to superhydrophobic metal, it’s repelled by it.
Hmmmm…do you think a surface could be too hydrophobic?
Not all materials repel water.

The opposite of hydrophobic is hydrophilic. We already know that hydro means water.
- What do you think “-philic” means?
- When would a hydrophilic material be helpful to you?
How is a hydrophilic towel helping these girls?
A hydrophilic beach towel consists of thousands of tiny loops of fabric. Those fluffy loops provide ample surface area to absorb water.
Can you think of a part of a plant that would benefit from being hydrophilic?
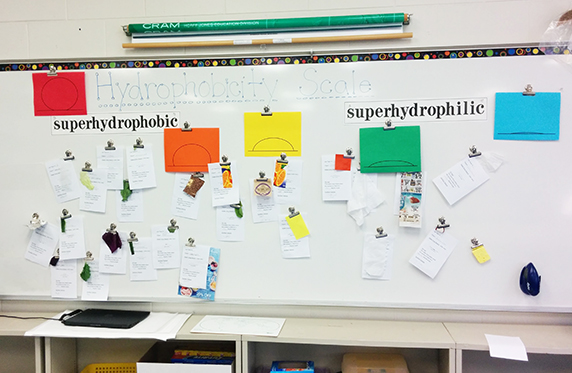
Preparing to Investigate Hydrophobicity
Now we will test different biological and non-biological objects to investigate whether their surface is hydrophobic, hydrophilic, or in between. Before starting, let’s take a few minutes to practice describing different textures and making identically sized water drops.
See the Educator’s Toolbox at the bottom of the page for a printable lab protocol and student worksheets.
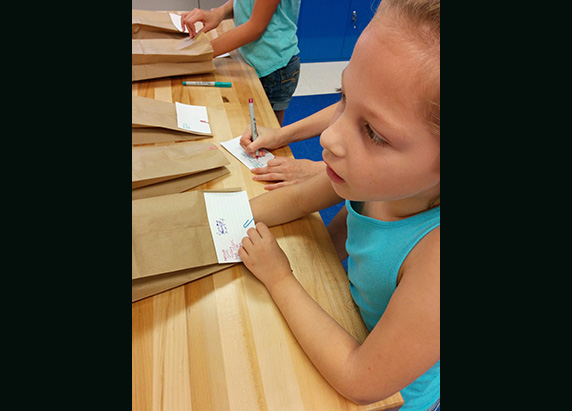
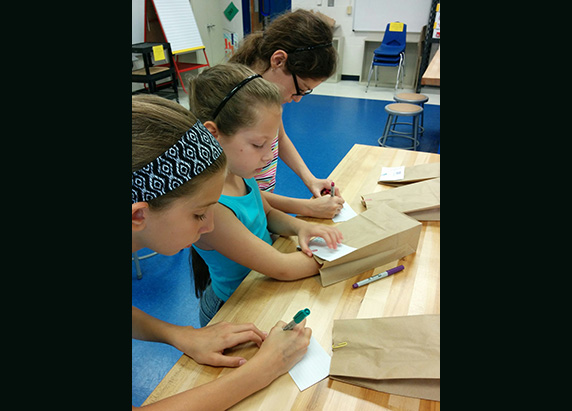
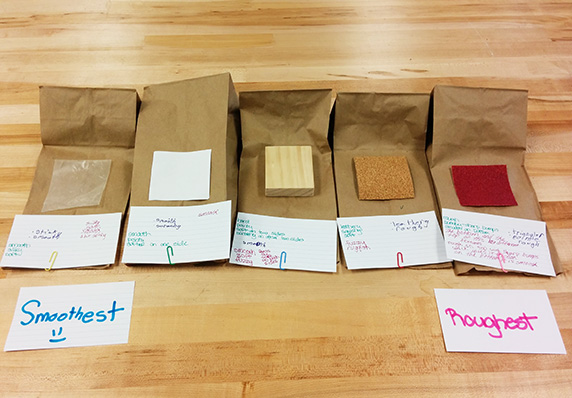
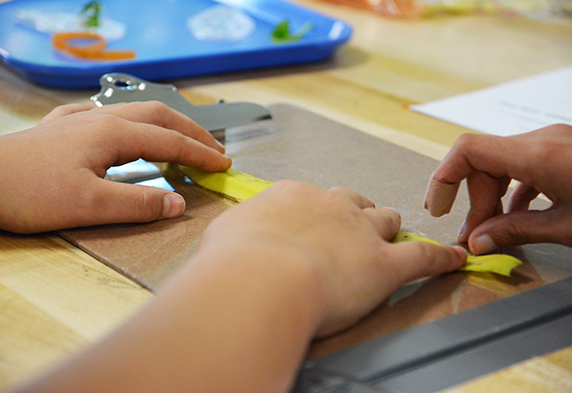
Texture Sort
Sort and describe material samples to establish a common language for discussing and comparing textures.
Texture Sort Materials (per group of 3)
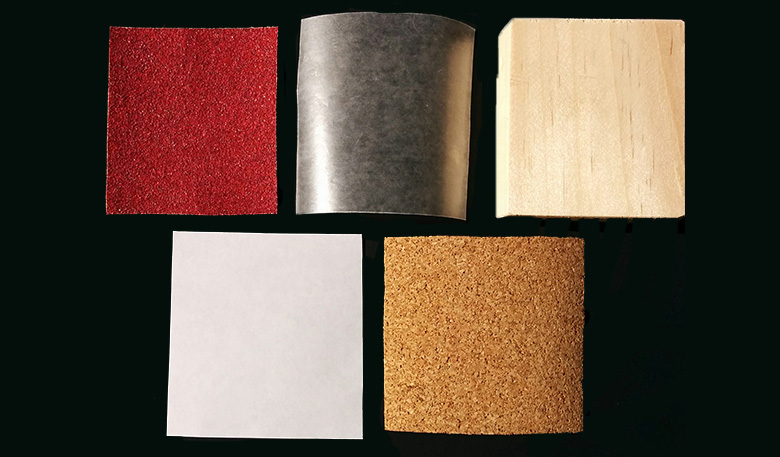
- 5 paper lunch bags, each containing one material sample
- Material samples, cut in 8-cm squares (e.g., #80 sandpaper, wood, cork, printer paper, wax paper)
- 5 index cards
- 5 paper clips for attaching cards to bags
Water Drop Standardization
An important part of an experiment like this is making sure that the same procedure is carried out on all materials being tested. One factor you can control in your hydrophobicity investigation is the size of your water drops. Why is it important in this experiment to make sure all the water drops are similar? This activity will help you become skilled at creating identically sized water drops.
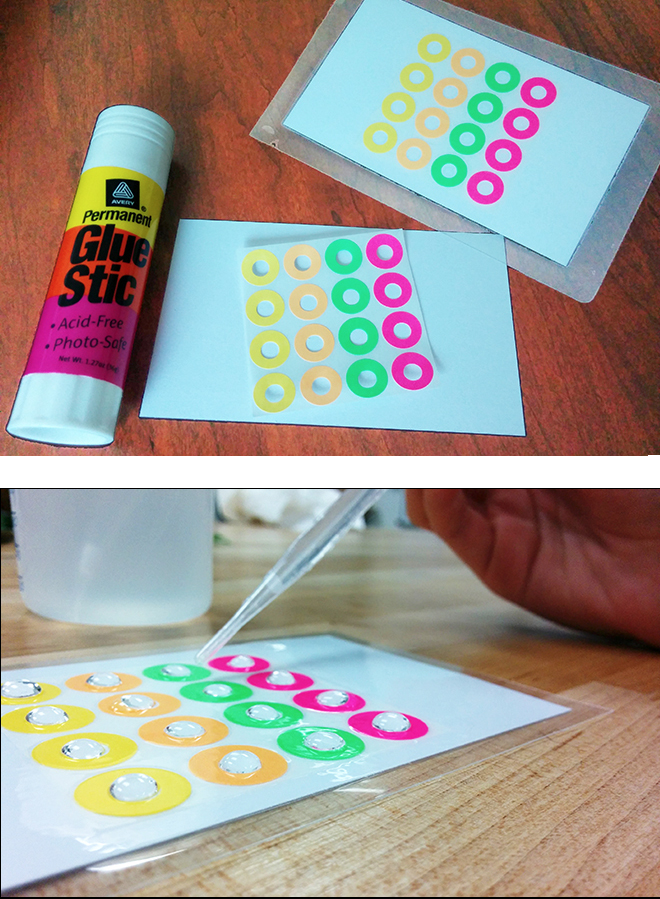
Water Drop Standardization Materials (per group of 3)
- Laminated index card with reinforcement circles
- Pipette or eyedropper
- Water
- Cut a 4×4 grid of reinforcement circles and tape it to an index card. Laminate the card or cover it with packaging tape to make it water-resistant.
- Using a pipette or eyedropper, place two drops of water in the center of each circle to create evenly sized, large water drops.
Investigating Hydrophobicity
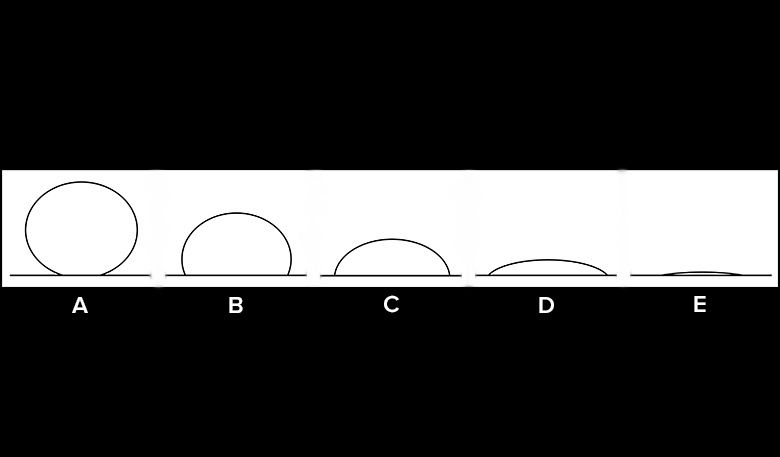
There are a couple of tests we can conduct to gauge the hydrophobicity of a material. By looking at the shape of the water drop profile (side view) and conducting a tilt test, we can get an idea of how much a surface absorbs or repels water.
Lab Materials for Investigating Hydrophobicity (per group of 3)
- Assorted plant materials and other items from your home or classroom (flat things work best)
- Clipboard
- Protractor
- Scissors
- Masking tape and/or duct tape
- Small container of water
- Eyedropper or pipette
- Paper towels
- Hand lens (magnifying glass)
- Observation Datasheet
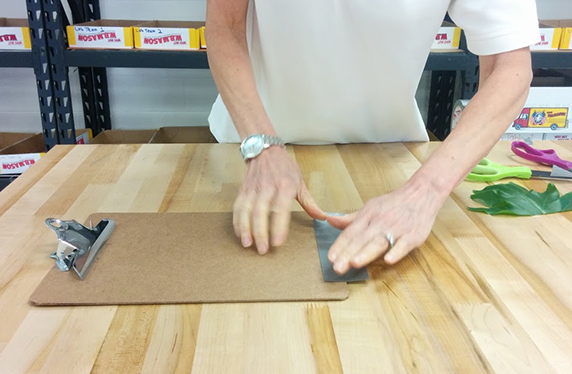
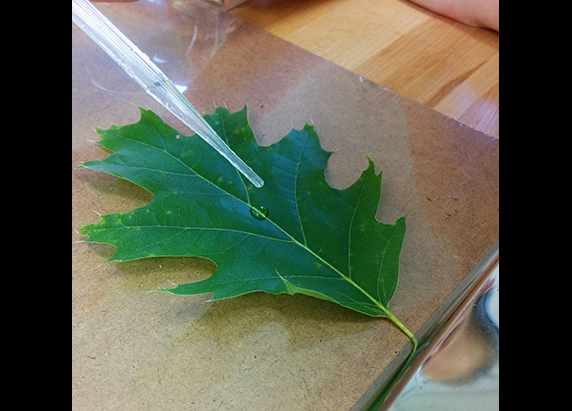
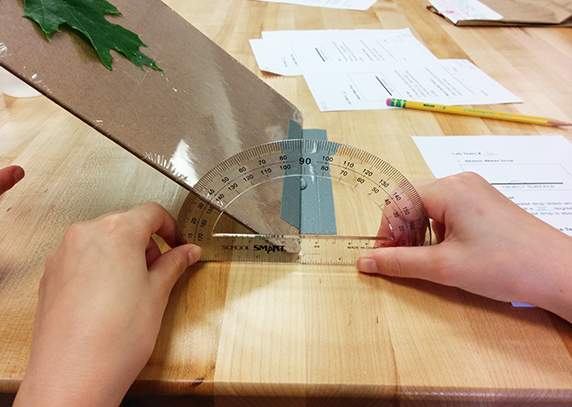
Test Your Items for Hydrophobicity
Sketch Water Drop Profile
- Select a material to test.
- Place two drops of water on the surface to make one large drop.
- Look at the large drop from the side, and sketch the drop’s profile view on your Observation Datasheet.
Do a Tilt Test and Check Texture
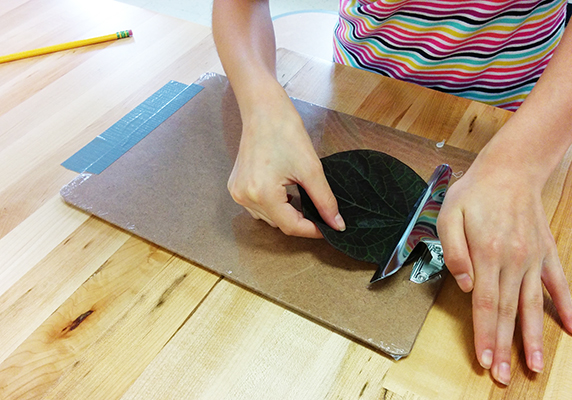
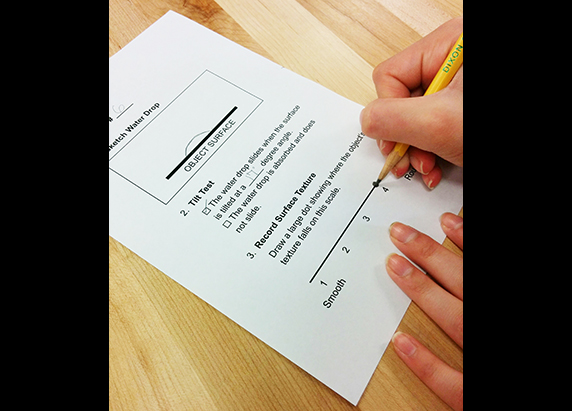
Lab Discussion Questions
- If a water drop begins to slide at a low angle (for example, less than 10 degrees), would that suggest that the surface is hydrophobic or hydrophilic?
- What water drop profile shapes indicate a hydrophobic surface? A hydrophilic surface?
- What other similarities or patterns do you notice among items that are hydrophobic? Hydrophilic?
- Are there any descriptive words about texture that seem to be associated with hydrophobic surfaces? Hydrophilic surfaces? Do you observe any connection between texture and hydrophobicity?
- What parts of a plant tend to be hydrophobic? Hydrophilic? What’s your evidence?
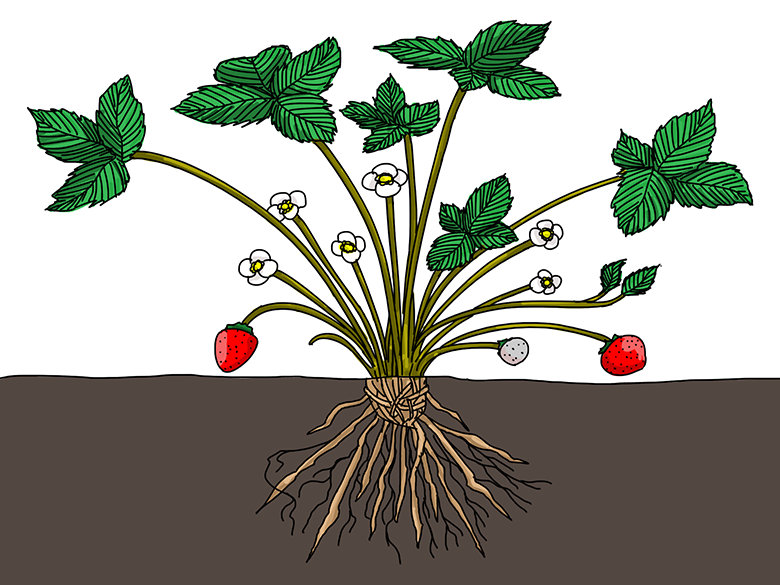
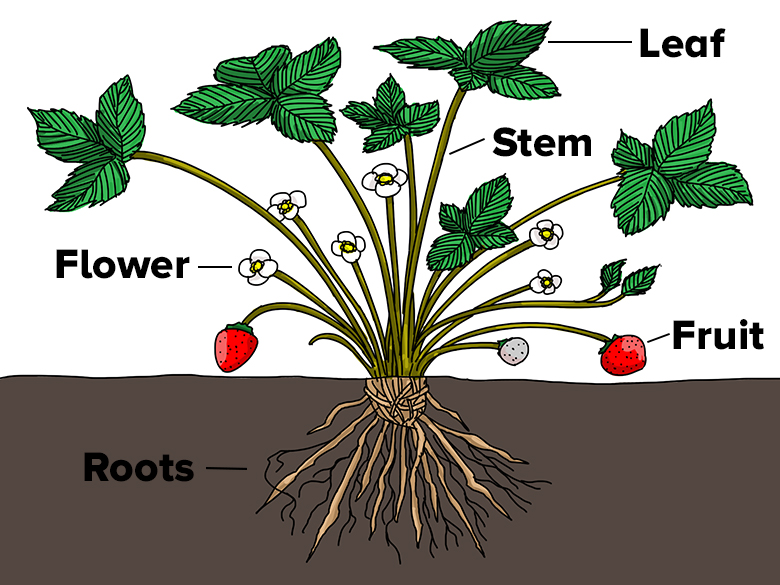
What parts of this strawberry plant are more hydrophobic than others? Illustration by Wesley Gunn - What plant structures would benefit from being hydrophobic? Hydrophilic? For example, would roots function best if their surface were hydrophobic or hydrophilic? How would hydrophobic structures help a plant? Hydrophilic structures? Explain your reasoning.
- Your Water Drop Standardization practice helped you control your water drop size in this activity. What else did you standardize, or control, in the hydrophobicity tests?
- What new, helpful products would you like to create with hydrophobic surfaces? Hydrophilic surfaces?
Closure and Group Assessment
Why do different materials have different hydrophobicity?
Water has two significant properties that affect hydrophobicity: cohesion and adhesion. Cohesion means water molecules like to stick together and form water drops. Adhesion means water molecules like to stick to other surfaces. When a naturally spherical water drop lands on a hydrophilic surface, gravity pulls the drop downward, and the drop tends to flatten like a pancake and make the surface wet. On a superhydrophobic surface, however, a water drop maintains a spherical shape and does not adhere because the surface provides minimal contact area. Remember the ball-on-a-comb analogy? With minimal tilting, the water drop rolls quickly away. For example, University of Rochester scientist Chunlei Guo’s superhydrophobic laser-treated metal surfaces repel water when tilted less than five degrees. By contrast, superhydrophilic surfaces will absorb a water drop.
Make A Wire Critter That Can Walk On Water
Individual Assessment
- Pick an item from the mystery bag.
- Make observations about the look and texture of the item and record the observations on your Exit Slip. You can use a hand lens to examine your item closely. You can also use a labeled drawing that includes a familiar object for scale.
- Predict whether the item will be hydrophobic or hydrophilic.
- If this were part of a plant, where do you think it would work best based on your prediction? Explain your choice.
Vocabulary
- Structure – something built, organized, or put together
- Function – what something does, how it works
- Hydrophobic – “water-hating,” repels water
- Superhydrophobic – extremely water repellent
- Hydrophilic – “water-loving,” water clings to it
- Texture – the feel of a surface
- Pathogen – a microorganism that causes disease, like a bacterium or fungus
- Microstructure – a physical feature that is visible under a microscope
- Nanostructure – a super-tiny feature from 0.1-100 nm in thickness or diameter
Examples to Push Your Thinking
Looking at some of the examples below, how might hydrophobic and hydrophilic surfaces inspire people to create solutions to human problems in different regions around the world?
- Namib Desert beetles’ unique water-collection structures
- Hydrophilic and hydrophobic metals
- Plant structural adaptations: 11 things you didn’t know about saguaro cacti
Related Resources
- Properties of Water: USGS Water Science School
- “The Amazing Micro-Engineered, Water-Repelling Surface That Lives Outside My Window,” by Aatish Bhatia
- “Superhydrophobic and Superhydrophilic Plant Surfaces: An Inspiration for Biomimetic Materials,” by Kerstin Koch, Wilhelm Barthlott
- “Explained: Hydrophobic and Hydrophilic,” by David L. Chandler, MIT News
Extension Activities
● Investigate the self-cleaning properties of superhydrophobic plants. Use a superhydrophobic plant leaf and pepper or sand. Brainstorm and research innovative design applications of self-cleaning surfaces. Test other liquids, such as honey, syrup, or oil.
● Explore the structure of plants that use hydrophobic leaves to collect water, such as bromeliads.
● Measure contact angle to classify hydrophobicity of surfaces. (Use this contact angle image.)
● Explore cell micro- and nanostructures that affect surface wetting. (High school and beyond.)
Where should I go from here?
- Investigate plant adaptations in different ecosystems.
- Why might plants have structures that promote water retention, water absorption, or dryness?
- Make predictions about the hydrophobicity of a plant and its structures using images of different environments.
- What can you infer about a plant’s environment based on its structure. Examples: cactus, mountain plants vs. tropical rainforest plants. Extend to animal adaptations. What adaptations might animals have for using these plants for food, shelter, etc.?
Next Generation Science Standards
NGSS Crosscutting Concepts
NGSS Science and Engineering Practices
Educator's Toolbox
Meet the Writer

About Beth Topinka
@BTopinkBeth Topinka is the S.T.E.A.M. lab teacher for grades 2-5 at Millstone Township School District in central New Jersey. She’s a vocal advocate for interdisciplinary, problem-based learning, and was recently selected as a state finalist for the 2016 Presidential Awards for Excellence in Mathematics and Science Teaching.