
Grade Level
6 - 8
minutes
15 min - 1 hr
subject
Mathematics
Activity Type:
geometry, origami, paper fold, biomimicry, student activity, After School Activity
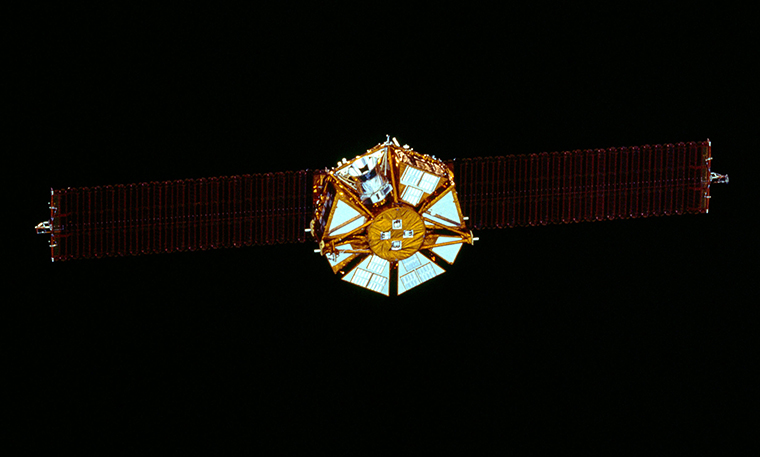
Say you’re going to launch a satellite into space. Once in orbit, it will be powered by an array of rigid solar panels that fan outward. But to launch the satellite, those panels have to be folded up and compact. How would you design them?
In 1985, Japanese astrophysicist Koryo Miura proposed a form of rigid origami, a style of folding paper (or other materials) that allows each section to remain flat—a necessary condition for stiff materials, like some solar panels. The Miura fold, or Miura-ori, was used in Japan’s Space Flyer Unit (a satellite launched in 1995), and has influenced the development of other folds that allow materials to be packed into a compact shape and then unfold in one continuous motion.
Build a Basic Miura Fold
All you need is a sheet of plain letter-sized (8 ½” x 11″) copy paper.
- Fold the paper into five evenly spaced sections, alternating mountain and valley folds to create an accordion fold, also called a concertina fold.
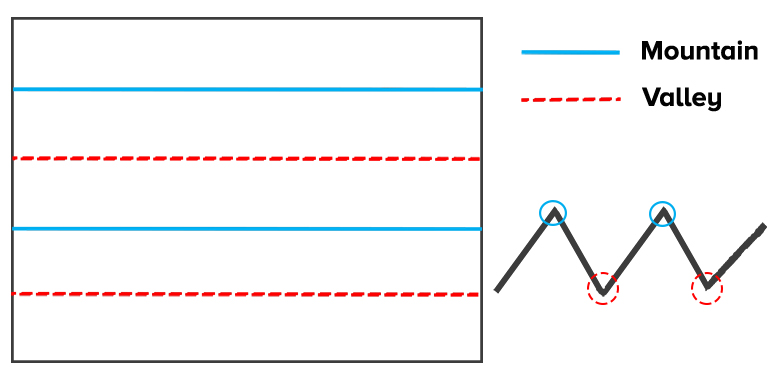
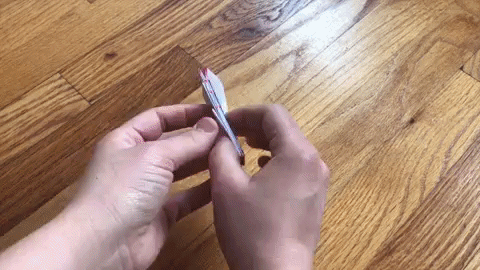
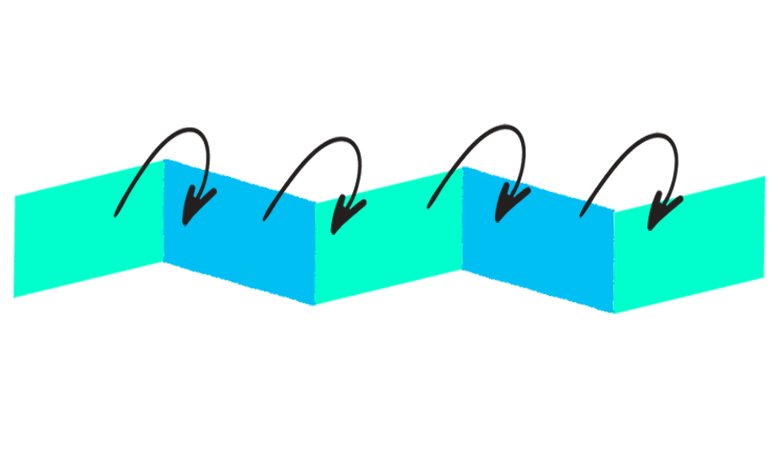
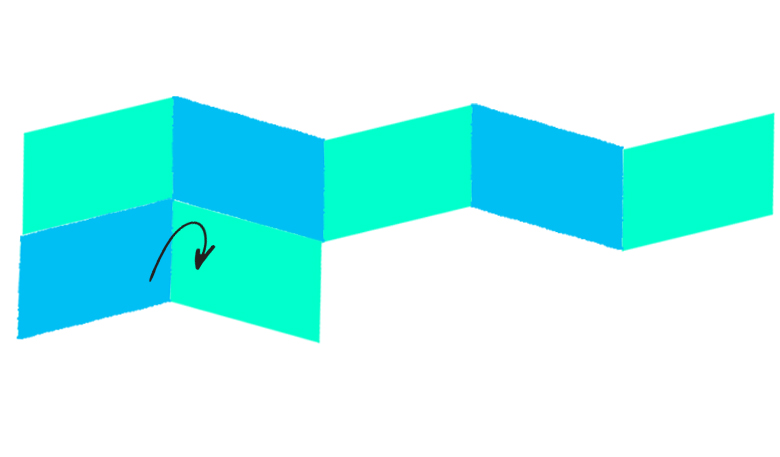
Pattern of mountain and valley folds to create your five columns. - Keeping the paper folded—it should look like a tall, skinny rectangle—you will create seven more sections by alternating mountain and valley folds. To make the first fold, take the bottom of the paper and fold a section up and at an angle to the left, so that the top left corner is about 1 inch from the top of the rest of the paper and ¼ of an inch from the left edge of the rest of the paper (see blue arrow in the image below). Next, fold a portion of the paper that you just folded up back down so that its front right edge is parallel with the right edge of what remains of the original tall, skinny rectangle. You have created your first section. Continue this process until you’ve created seven sections. (You will have to turn the paper over at some point. See the diagram below and the video farther down for visual guides.)

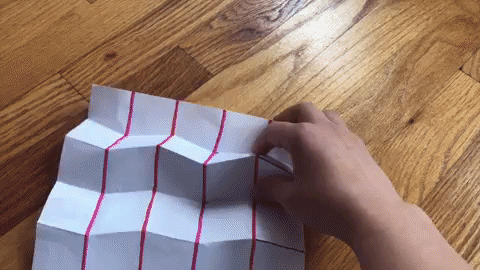
Start of the process to create your seven rows. Notice that each fold up is angled. - Unfold the paper and lay it flat. You will notice seven zigzagging lines running across the page. You will again alternate mountain and valley folds using these lines as guides. If it helps, trace your zigzags with alternating colors to help you keep track of which lines should be mountain folds and which should be valley folds. You can also use your fingernail to reinforce the crease for each of the zigzags on either side of the paper, depending on whether it’s a mountain or a valley fold.

- Push the zigzagging mountain folds together. As you do so, the structure should draw in on itself. This is the compressed structure of your Miura fold. Note: This may be difficult your first time, but keep at it!
- Grabbing the two loose corners on either side of the “accordion,” stretch your paper in and out to work your Miura fold. Every time you do this, it becomes easier to return the structure to its compressed state.
See the whole process in the video below.
Stretch Your Paper Out Flat and Pick Out Some Patterns
What kind of shapes do you see? Where are there parallel lines? Where are there diagonal lines? Where are there straight lines?
If you noticed a pattern of interlocking polygons (any closed figure with at least three straight sides) you have identified the tessellation in the Miura fold. A tessellation is an arrangement of polygons in a repeated pattern without gaps or overlap. You might have seen art that is inspired by tessellations, like pieces created by M.C. Escher. The type of polygon that comprises the Miura fold tessellation is a parallelogram.
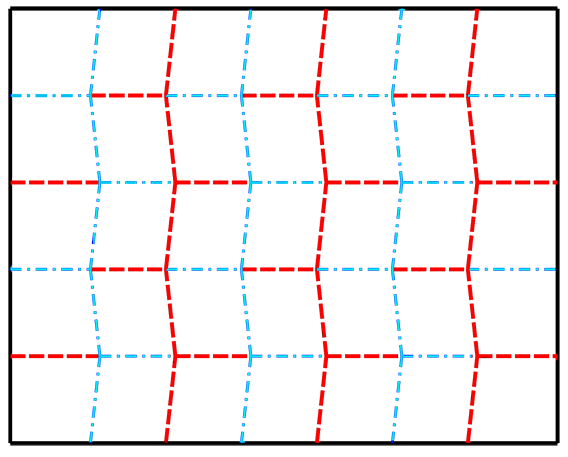
Examine the repeated polygon further by using a protractor to measure the angles at each vertex. What do you notice about the angles you found? Are there repeated angles?
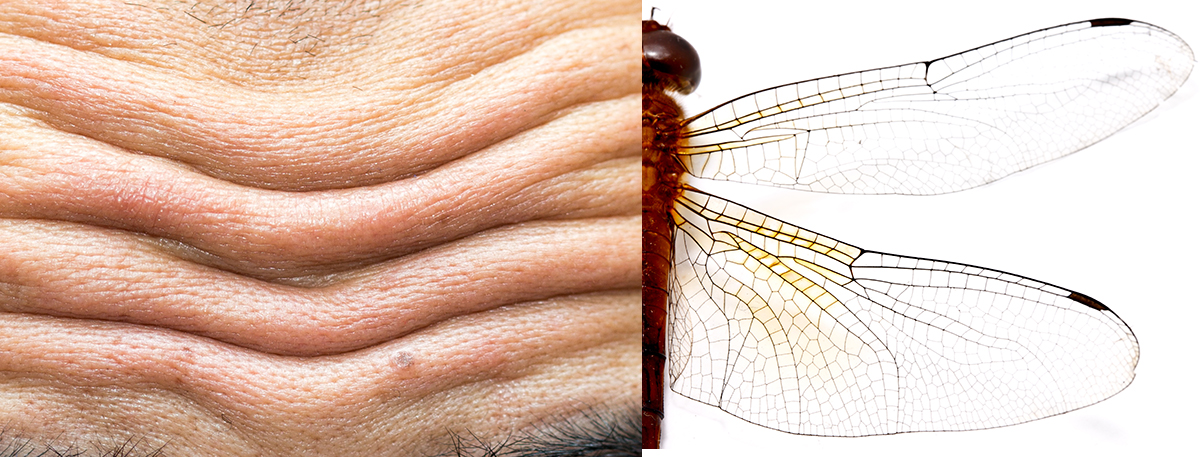
Aside from the outer edges of your paper, you probably did not find any right angles. Miura did this on purpose—he proved that omitting right angles reduced the stress on the construction, thus increasing its durability. He was inspired by patterns he had observed in nature that don’t have right angles, like forehead wrinkles or the veins of a dragonfly’s wing. Since then, the Miura fold has been used as inspiration for foldable solar panels, surgical stents, and furniture that can be stowed away until needed.
You may have noted in your previous observations that opposite angles of each polygon in the tessellation are equal, which is a feature of parallelograms. The straight creases separate each parallelogram from its mirror image (reflection), while the zigzagging creases separate each parallelogram from an identical translation (copy) of itself.
Reverse-Engineer a Miura Fold
In the previous exercise, you created a Miura fold by folding paper. In this activity, you’ll make a Miura fold by first creating a tessellation of parallelograms using reflection and translation.
- Create a single parallelogram to use as a template for your tessellation. Be sure to adhere to these three basic traits of parallelograms:
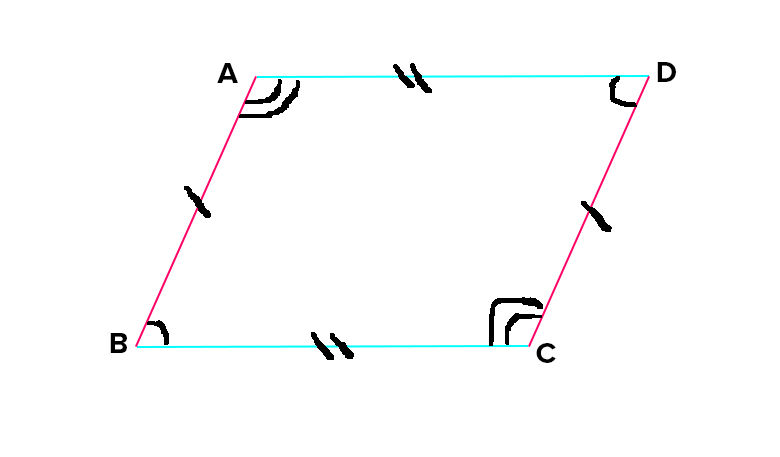
— Opposite sides are parallel and equal in length.
— Opposite angles are equal.
— Two consecutive angles are always supplementary (add to 180°)
- In a Miura fold, straight lines separate each parallelogram from its mirror reflection. Create a row consisting of five parallelograms across by tracing your parallelogram template you created in step one and then reflecting it across at the straight line.
- Continue to add rows to the bottom until you have a total of seven rows.
- Cut your reverse-engineered fold by following the outer lines of your drawing.
- Create creases between each of your columns, alternating the creases on either side of the paper so you can create mountain and valley folds.
- Crease the zigzags, again alternating on either side of the paper, then push the zigzagging mountain folds together.
You can create a Miura pattern on a coordinate plane to practice translation and reflection. (CCSS.MATH.CONTENT.8.G.A.3, CCSS.MATH.CONTENT.HSG.CO.A.5).
Mess Around With the Basic Miura Fold
- Using a new sheet of 8 ½-inch by 11-inch paper, change the number of rows and/or columns, and then fold the paper using the same method as the original Miura fold. Document your results. What happens to the size and angles of your parallelograms? Fold and unfold your construction a few times. Which iteration of the Miura fold has the best shape memory?
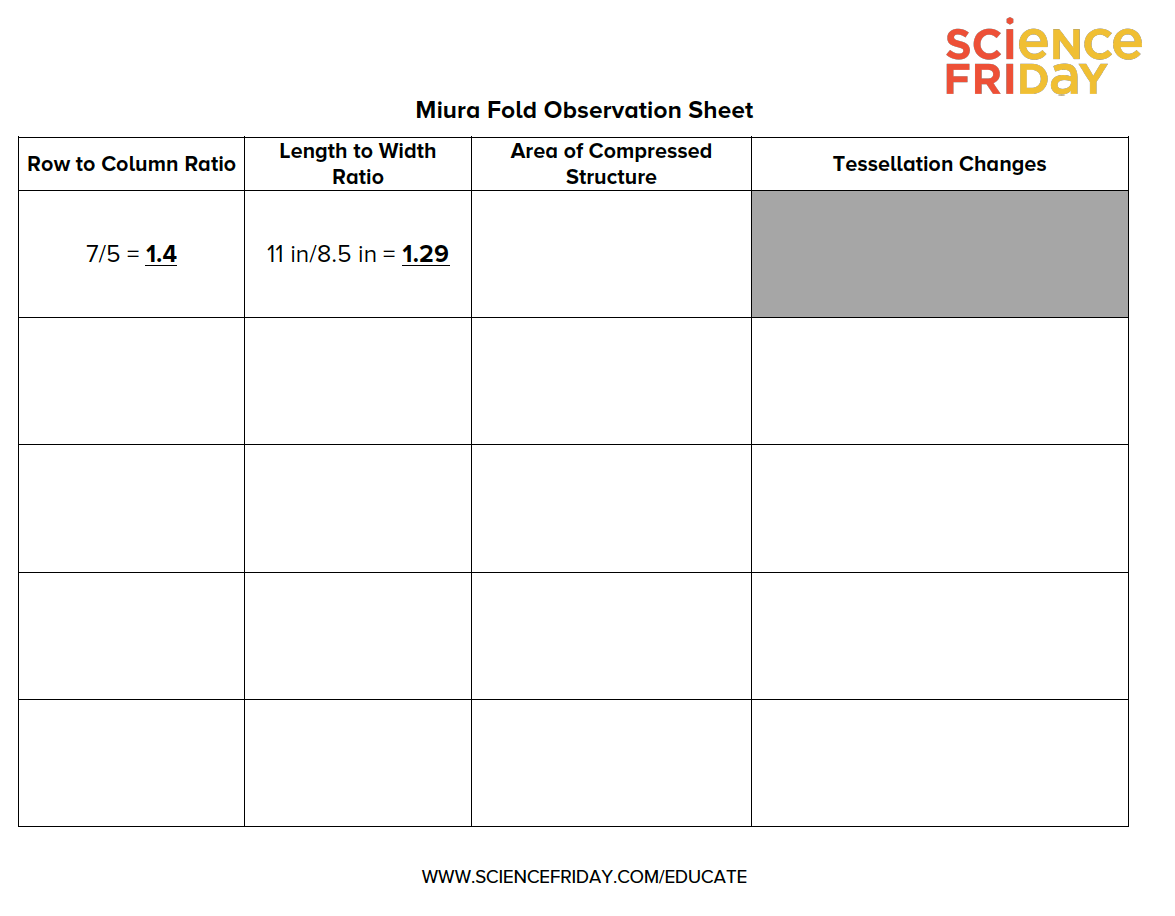
- Calculate the decimal value of the ratio of zigzagging rows to columns, and calculate the decimal value of the ratio of length to width of your paper. Compare those values. Create new Miura fold constructions that bring those values closer together and then further apart by changing the length to width ratio of your paper. For each new structure, add the ratios for rows to columns and length to width of your paper to your Miura Fold Observation Sheet. For each iteration, calculate the area of your compressed structure (when the construction is folded up) and add this to your Miura Fold Observation Sheet. What changes do you notice in the tessellation? How does the area of the compressed structure change as the ratios get closer and further apart?
- Try making Miura folds with thicker and thinner paper. What effect does the paper’s thickness have on how it folds and compresses?
Resources
— This program introduced students to Miura folds using thin wooden blocks and cloth tape to create their constructions.
— Nishiyama, Yutaka. “Miura Folding: Applying Origami to Space Exploration.” International Journal of Pure and Applied Mathematics 79.2 (2012): 269-79.
— Download this printable Miura-ori pattern from Ingenia.
Standards
CCSS.MATH.CONTENT.4.G.A.1: Draw points, lines, line segments, rays, angles (right, acute, obtuse), and perpendicular and parallel lines. Identify these in two-dimensional figures.
CCSS.MATH.CONTENT.4.G.A.2: Classify two-dimensional figures based on the presence or absence of parallel or perpendicular lines, or the presence or absence of angles of a specified size. Recognize right triangles as a category, and identify right triangles.
CCSS.MATH.CONTENT.8.G.A.2: Understand that a two-dimensional figure is congruent to another if the second can be obtained from the first by a sequence of rotations, reflections, and translations; given two congruent figures, describe a sequence that exhibits the congruence between them.
CCSS.MATH.CONTENT.8.G.A.4: Understand that a two-dimensional figure is similar to another if the second can be obtained from the first by a sequence of rotations, reflections, translations, and dilations; given two similar two-dimensional figures, describe a sequence that exhibits the similarity between them.
Educator's Toolbox
Meet the Writer
About Xochitl Garcia
@msxgarciaXochitl Garcia was Science Friday’s K-12 education program manager. She is a former teacher who spends her time cooking, playing board games, and designing science investigations from odds and ends she’s stockpiled in the office (and in various drawers at home).