Grade Level
6 - 8
minutes
15 min - 1 hr
subject
Earth Science
Activity Type:
making models, astronomy, ratios and scale, solar system, analyze and interpret data
Drawing Planetary Orbits
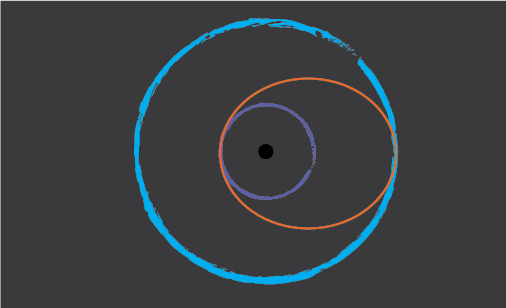
All objects with mass pull things towards their center, that pull is called gravity. The more massive an object is, the more its gravity “pulls” on other objects nearby. In space, the gravitational pull of large objects (like planets, stars, or galaxies) influence how other smaller objects like space shuttles, moons, and satellites move around them. Distance also matters— gravity gets weaker the farther apart objects are from one another.
The orbiting of objects around one another in space is caused and maintained by gravity. Gravity is what keeps the moon orbiting around the Earth, and the planets (and other objects like comets and asteroids) in our solar system orbiting around the sun. Some orbits can be nearly circular, moving at a relatively constant speed, like Earth’s path around the sun. However, most orbits are at least slightly elliptical, taking oval pathways and moving at varying speeds depending on their proximity to large objects.
In this activity, you’ll learn how to make scale drawings of solar system orbits, learn about a team of women engineers who launched a satellite mission to orbit Mars, and then plot your own path to another planet. You will define a scale for your orbit drawings and will have worksheets and animations to help you in your calculations.
Materials (per student or group):
- Pushpins
- Pencil and eraser
- Ruler
- Thick string and scissors
- Cardboard or foam board
- Optional: Scale Orbit Drawing Worksheet
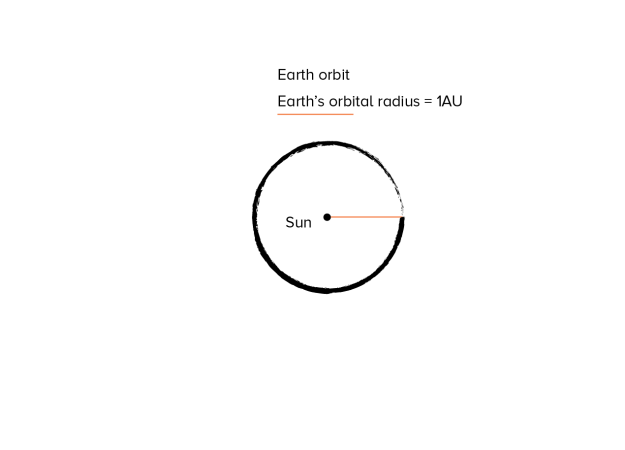
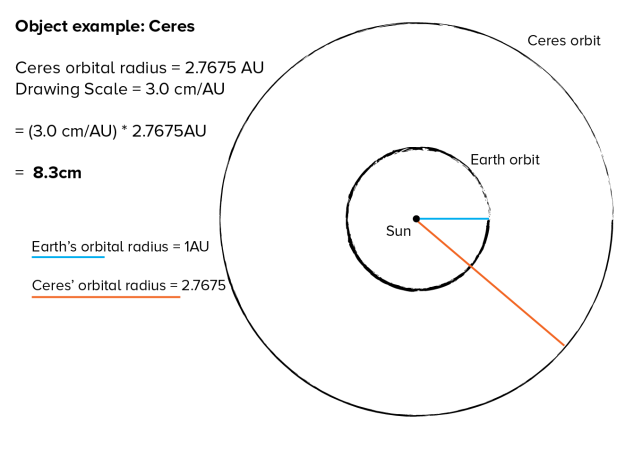
Before you begin, you’ll want to practice drawing circles and ellipses with two push pins or small nails, some string, a pencil, and a thick piece of cardboard. To draw a circle, place a loop of string over a single pin, then use the loop to guide your pencil in a smooth circle. To draw an ellipse, use two pins to do the same:
How To Make Scale Drawings Of Solar System Orbits
You can draw circular and elliptical orbits easily using a piece of string, paper, cardboard, and a couple of pushpins. Use this printable Scale Orbit Drawing Worksheet as you work.

Get To Know These Meteorites
How Do You Move Something From One Orbit To Another? A Hohmann Transfer!
On November 5, 2013, India’s Space Research Organization, ISRO, launched a satellite into space to orbit Mars. Called the Mars Orbiter Mission (MOM), the orbiter was built in just six months on the smallest budget of any Mars mission before it. In spite of the tight turnaround and limited funds, MOM became the only successful first attempt by any space agency to orbit Mars. The orbiter arrived at the Red Planet on September 4, 2014 and represented a monumental accomplishment for India; it was a triumph of thrifty engineering and precise mathematical reasoning.
 The travel path that ISRO’s Mars orbiter took to reach the Red Planet was inspired by a maneuver described nearly a century earlier by Walter Hohmann, an architect whose hobby was celestial mechanics. Hohmann demonstrated mathematically that in many cases, the most efficient flight path between two different orbits was along an elliptical path from one side of the sun to the other, beginning and ending at each orbit’s furthest distance from the sun.
This elliptical spaceflight maneuver, now called the Hohmann transfer in Hohmann’s honor, uses the angular velocity of the earth’s orbit as well as the sun’s own gravity to “throw” a satellite into an elliptical orbit that intersects the orbit of the target planet.
Watch the Breakthrough video Snapshots From Afar to see the incredible triumph of the Mars Orbiter Mission and learn a little more about how the mission was executed:
Breakthrough: Snapshots from Afar
Chart A Hohmann Transfer Orbit
You can chart a Hohmann transfer like the one used by ISRO for the MOM mission using the same tools you used to create a scale drawing of solar system orbits, plus a little bonus math. You’ll have to assume that the orbits you want to travel between are circular (most solar system orbits are at least a little elliptical) and that they travel around our the sun on the same flat plane (in reality many do not). Relax, assumptions help simplify complex problems enough so that they can be reasonably understood and solved. Use this Hohmann Transfer Worksheet to help you as you go.
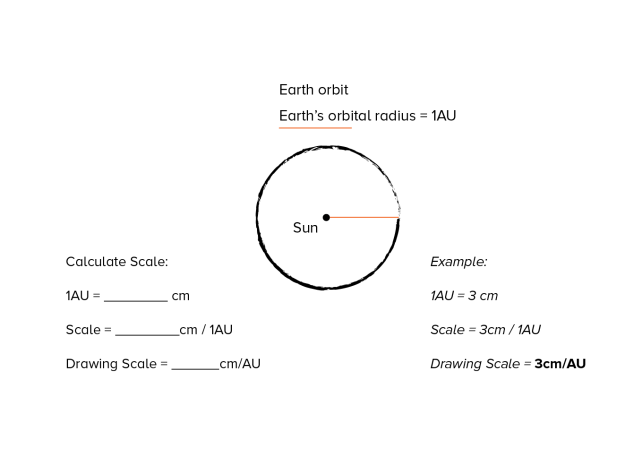
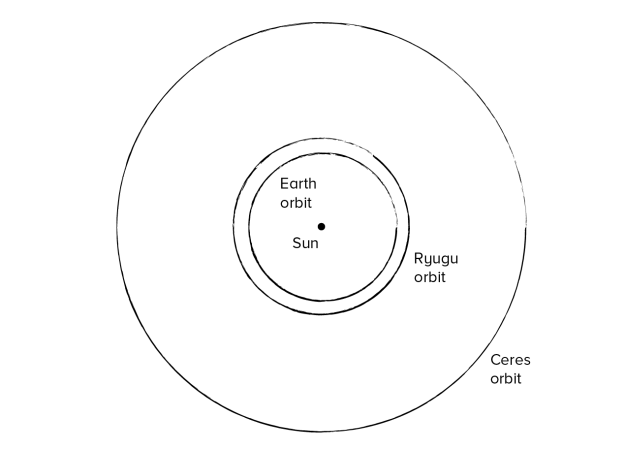
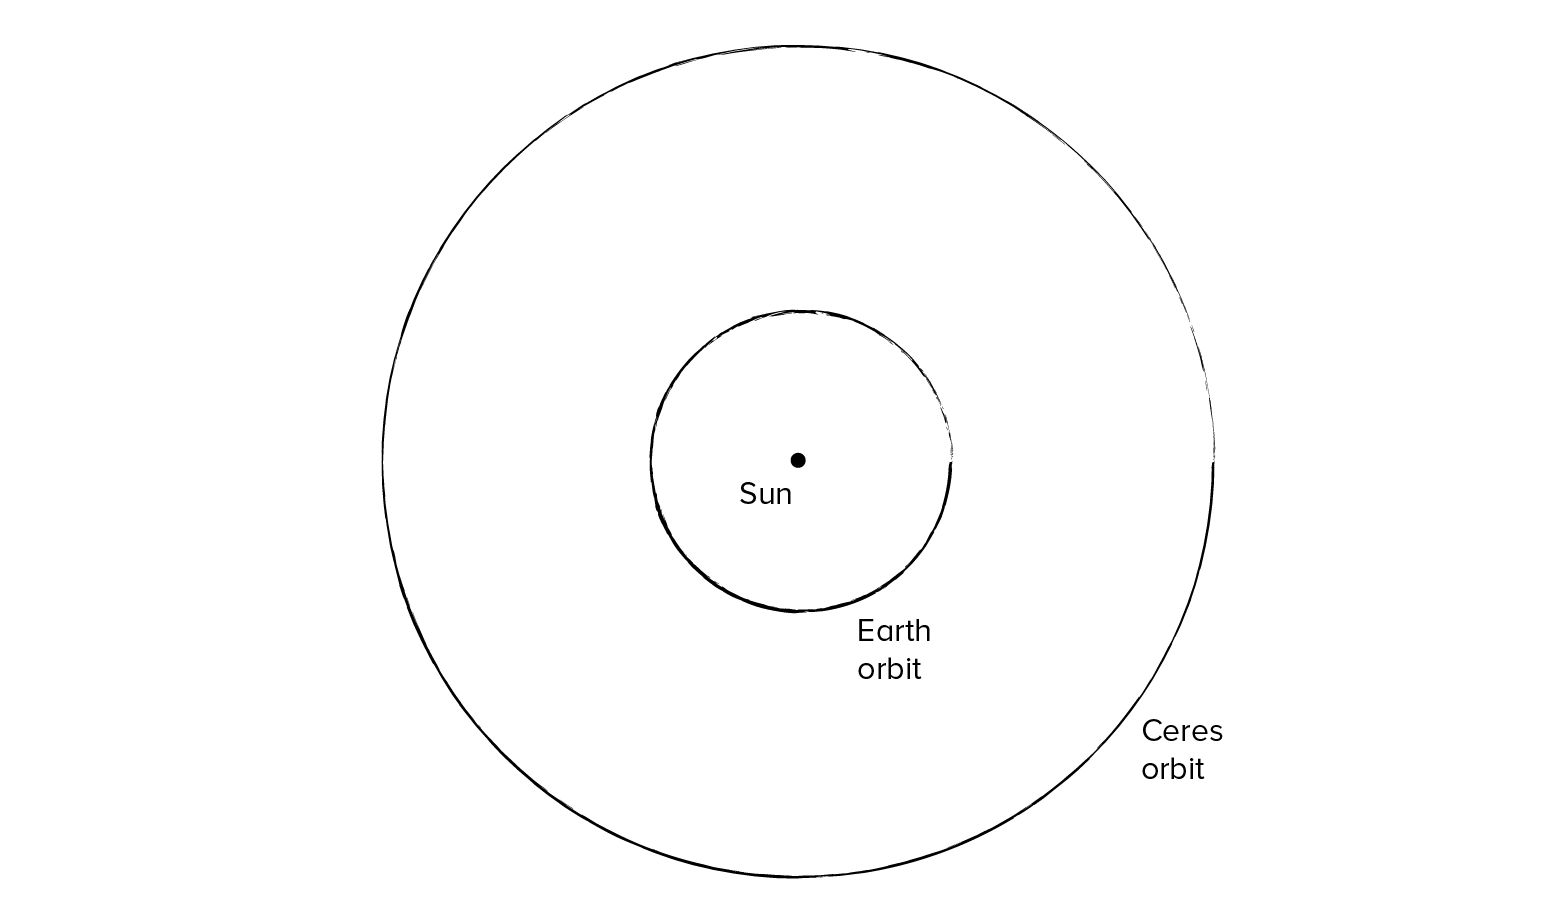
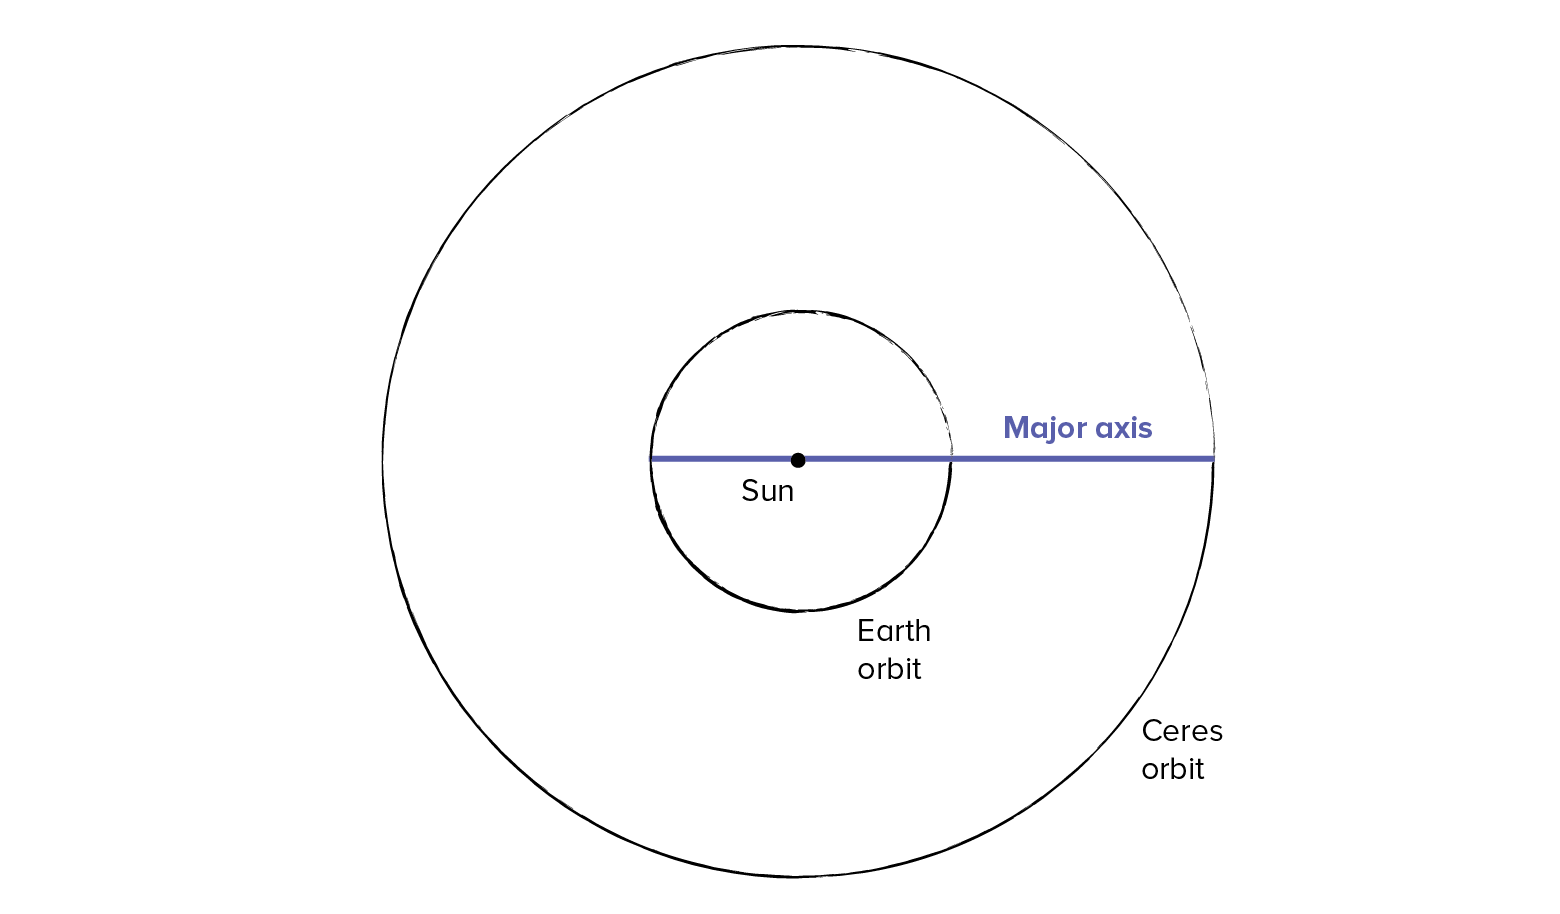
1. Draw Scale Orbits Of Two Objects Orbiting The Sun That You Want To Travel Between
Just like you did in the first half of this activity. Choose two orbits, calculate their scaled size, and draw them, making sure to label the sun, each orbit, and note the size of each orbital radius.
2. Draw The Major Axis Of Your Hohmann Ellipse
Use a ruler to draw a horizontal line through your solar system illustration, from the far side of one orbit through the sun, to the opposite side of the other orbit. This line spans what will be the widest part of your finished Hohmann ellipse, called the “major axis.”
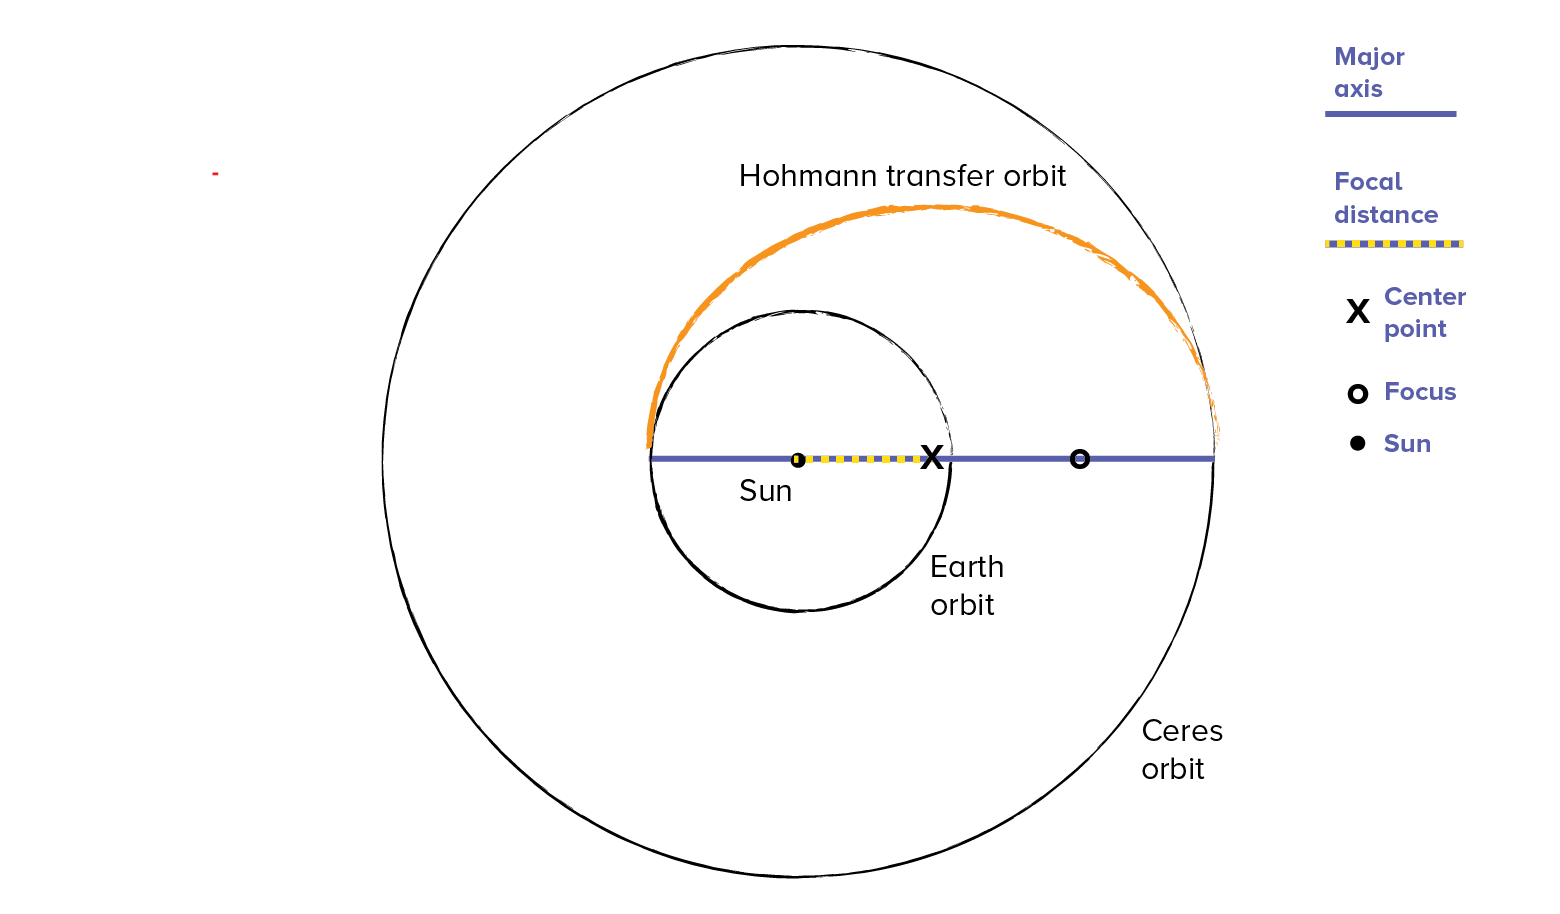
Essential Features You Need In Order To Draw Your Hohmann Ellipse
Ellipses have a unique property: every ellipse has two foci (foci is the plural of “focus”) along its major axis and the sum of the distance between any point on the path of the ellipse and the two foci is the same. This property is that enables us to draw an ellipse with just a single loop of string and two push pins.

The sun is used as a focus to draw the Hohmann ellipse simply because the sun is the single most massive object in our solar system. Its gravity pulls a great deal on other objects that orbit or travel around it, including whatever object you transfer from one orbit to another. A second focus is needed to generate an elliptical path that spans the two orbits. Each focus is the same distance (called the focal distance) from the middle of the ellipse along the major axis.
![]()
3. Label Your Orbit Diagram With The following
- Length of the major axis (one orbital radius + the other orbital radius) in AU
- Place an “X” at the center and middle of the major axis
- Color and measure the focal distance (distance from the sun to the center point)
- Place an “o” at the position of the second focus, located on the opposite side of the center point from the sun, one focal distance from the center point.
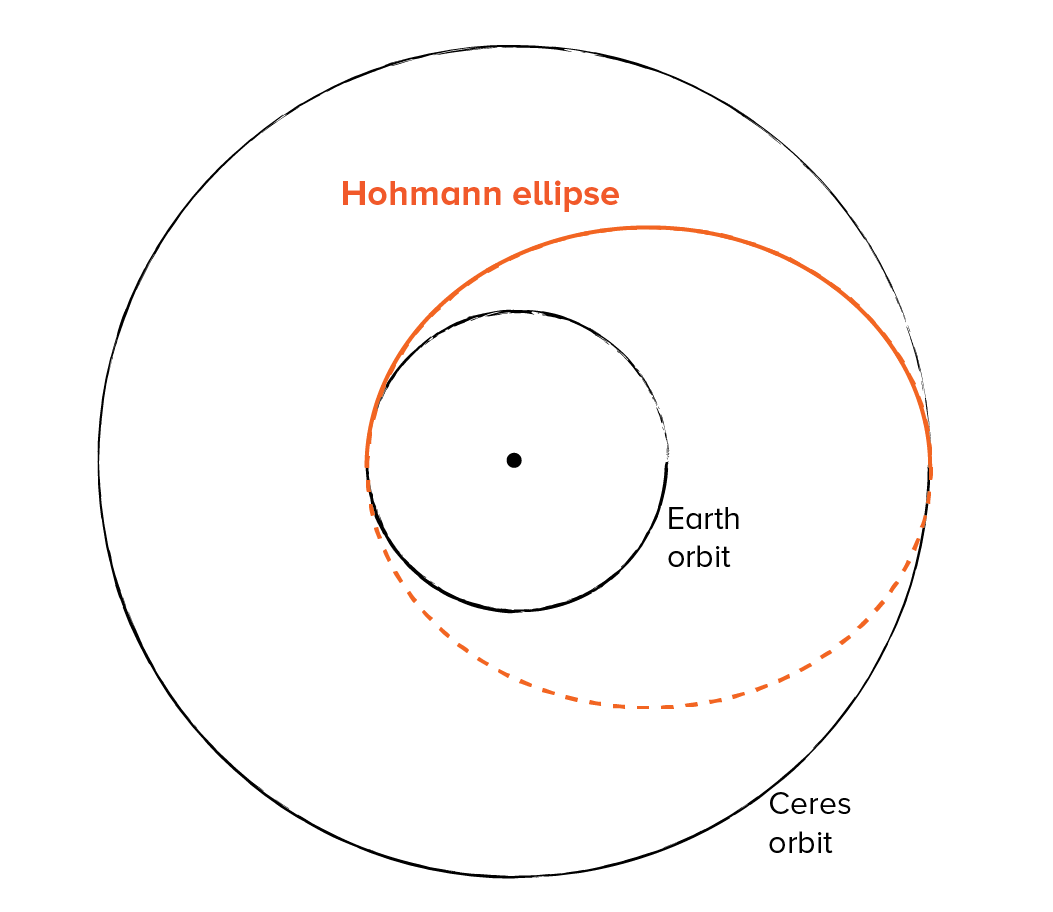
4. Draw The Hohmann Ellipse
- Measure a loop of string that when taped or tied reaches from one focus, through the center, to the opposite side of the Hohmann ellipse
- Place a pin at the position of the two foci (the sun and the second focus), place your loop over both pins, then draw the ellipse:
![]()
5. Complete Your Hohmann Transfer Calculations
- Convert all of the distances in your Hohmann transfer illustration to AU by dividing each distance (in cm) by the scale factor (in cm/AU) of your illustration that you calculated. You can keep track of the drawing measurements you made and their AU equivalents in this Hohmann Transfer Worksheet.
- Erase or recolor the second half of your Hohmann transfer ellipse—a Hohmann transfer only goes halfway around the sun.
- Label each of the orbits with information about the planets or other objects that you chose
6. Optional: Get artsy!
Use scratch art to recreate your orbit diagram. Trace the orbits with glue and sprinkle with texture materials like colored sand. You can even use glow-in-the-dark markers to make your scale orbit and Hohmann illustrations into art!
Reinventing The Wheel (For Mars)
I’ve Got A Flight Path, Now What?
Well, it might not surprise you to find out that there’s a lot more that goes into planning a flight to Mars, or any other planet or asteroid, than sketching circles and ellipses. Check out the following resources to learn more about how to take the next steps to planning your flight mission:
- How long will the journey take, and when should it leave?
Let’s Go to Mars! Calculating Launch Windows – NASA Jet Propulsion Laboratory - How does the gravity of a planet influence the size and shape of the satellite’s orbit when it arrives?
Gravity And Orbits Simulation – Phet Interactive Simulations - What happens if you miscalculate?
Your mission could burn up in the Martian atmosphere – Wired - What if I want to become a rocket scientist right now?
You can start by taking a free, open MIT course in flight dynamics online that has a whole lecture just on orbit transfers! MIT Open Courseware
Resources for building your own satellite:
- Build your own artificial satellite – AstroEDU
- NASA Space Place Build Your Own Satellite Guide
- Develop and launch a real cube satellite with the CubeSat Program
A Hohmann transfer to study and sample the asteroid Bennu: OSIRIS-REx
- NASA’s Osiris-Rex Arrives at Asteroid Bennu After a Two-Year Journey (NYTimes)
- Reaching for a Space Rock, Nanoparticles in the Brain, and a Missing Audio Jack
(Science Friday)
Next Generation Science Standards
Common Core State Standards
CCSS.MATH.CONTENT.6.RP.A.3.D
Use ratio reasoning to convert measurement units; manipulate and transform units appropriately when multiplying or dividing quantities.
CSS.MATH.CONTENT.6.RP.A.3.D
Use ratio reasoning to convert measurement units; manipulate and transform units appropriately when multiplying or dividing quantities.
CCSS.MATH.CONTENT.7.RP.A.2.A
Decide whether two quantities are in a proportional relationship, e.g., by testing for equivalent ratios in a table or graphing on a coordinate plane and observing whether the graph is a straight line through the origin.
CCSS.MATH.CONTENT.7.RP.A.2.C
Represent proportional relationships by equations. For example, if total cost t is proportional to the number n of items purchased at a constant price p, the relationship between the total cost and the number of items can be expressed as t = pn.
Credits
Resource created by Ariel Zych with background and technical support from Xochitl Garcia and Dennis Kane
Illustrations and animations: Ariel Zych
Editing: Brian Soash
Educator's Toolbox
Meet the Writer
About Ariel Zych
@arieloquentAriel Zych was Science Friday’s director of audience. She is a former teacher and scientist who spends her free time making food, watching arthropods, and being outside.