Grade Level
All
minutes
1-3 hours
subject
Earth Science
stem practices
Planning and Carrying Out Investigations, Constructing Explanations and Designing Solutions
Activity Type:
STEAM, Engineering design challenge, space, space exploration, Family activity
Welcome to the Artemis Generation—a generation of new explorers, engineers, scientists, and inventors who will help people around the world reach into space to create outposts on the Moon and, one day, on Mars.
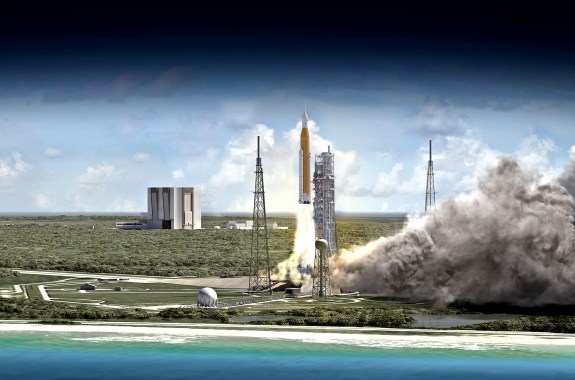
The Artemis I launch is NASA’s first step in its ambitious project to test the powerful new Space Launch System (SLS) rocket and send the Orion spacecraft nearly a quarter-million miles from Earth and into lunar orbit. Though this first mission is unmanned, it paves the way for many other exciting explorations over the next decade.
A new space station, Gateway, will serve as an orbital outpost. From there, astronauts will conduct landing expeditions to investigate the surface of the Moon. Scientists and engineers will use the information they collect to develop new technologies that will someday lead future generations to Mars and beyond.
But you don’t need to wait! Grab some supplies and try these four hands-on STEM activities right at home. You’ll simulate the most important stages of the Artemis mission. Using official NASA resources, you’ll build your own SLS rocket prototype, design an Orion spacecraft to orbit the Moon, experiment with ways to deliver a lunar lander to exactly the right spot, and learn to identify the Moon’s natural structures so you can navigate the surface.
So get ready to grow your science and engineering skills as you train to explore space. You’re part of NASA’s Artemis Generation now!
The Countdown Begins For Humanity’s Return To The Moon
Model The Artemis Launch
The first step in the Artemis I mission is the launch of the Space Launch System (SLS) rocket and Orion spacecraft. So why not try your hand at aeronautics engineering? Start by exploring an interactive online Space Launch System to learn about the most powerful rocket in the world.
Now put your new knowledge to use by building your own rocket and putting it to the test. For the body of your rocket you’ll need about 12 inches of foam pipe insulation or an old pool noodle. You’ll also want to find and reuse some kind of material for your rocket fins—like a styrofoam tray, poster board, a paper plate, or plastic container. To propel your rocket and provide the thrust it will need to move, you’ll need a thick rubber band, some string, and a ruler or yardstick. Grab some duct tape or cable ties to help you put it all together. Watch the video below for basic construction instructions.
Remember! You don’t have to build it the way it was built in the video. How would you change the design to use materials you have on hand? How would you make it more aerodynamic? What other ways can you improve upon the design? Get creative.
Now it’s time for testing. You’ll want to go outside, if you can, or work in a room with a high ceiling. To launch your rocket, place the rubber band at the top of your ruler. Holding the string at the back of the rocket, gently pull, stretching the rubber band. Angle the ruler into the air and release the string. What happens?
Try stretching the rubber band more or less to see how that changes the distance your rocket flies. Or change the angle at which you launch. How does that affect the motion of your rocket? You can even swap out your rocket fins for different shapes and sizes to see how that changes your rocket’s flight. Set yourself a goal. How far do you want your rocket to travel? 10 feet? 20?
Want to collect some official scientific data? Learn to accurately measure and record launch angles with a quadrant pattern.
Design An Orion Spacecraft
One of the toughest challenges when designing for space is creating structures that are both lightweight and strong. NASA uses a variety of different materials–aluminum, stainless steel, titanium, carbon fiber, and more—to construct its spacecraft. But we can practice with items found at home!
Here’s what you’ll need: 25 strands of uncooked spaghetti, a toilet paper tube or soda can, either clear tape or a low-temperature glue gun with cool-melt glue, an index card or scrap cardboard, and some coins for weights. Build the strongest spaghetti space module frame you can around the upright tube or can without actually touching it. Explore different shapes to see what work best. Think about how weight will place stress on your spacecraft. Consider ways to reinforce your structure to make it stronger.
When you are ready, test your structure. Place the index card or cardboard on top of your spacecraft. Make sure it’s level. Then slowly add coins until a piece of spaghetti bends or breaks or the structure fails in some other way.
Don’t stop there! NASA engineers depend on iteration of their designs to improve them. Use a few more pieces of spaghetti to repair or reinforce your structure where needed. Or try building multiple structures using different shapes to see what works best. Maybe you have linguini, chopsticks, or toothpicks on hand. How do different materials change the strength of your space module?
Need more ideas? No problem. Check out this mission briefing!
Practice Landing On The Moon
Though the first launch won’t include a crew, later Artemis missions certainly will. And they’ll need to be able to accurately dock in the Gateway Station, land on the moon, and revisit Earth. That requires a lot of math, planning, and testing. Just like the engineers and astronauts at NASA, we can practice and make our skills better.
Let’s start with a zip line to simulate the descent from Gateway to the lunar surface. Tie a piece of fishing line or smooth string between two chairs set about six feet apart. Make sure the line is at a steep angle and stretched tightly. Now grab a disposable cup, a paper clip, and some tape. Modify your cup so that it can travel drop the zip line and drop your lander—an object like a marble or a small marshmallow—accurately onto a target. Look around the house. What supplies can you find to help you release the lander at just the right time?
You may need to adjust the angle of the zip line to make your lander move slower or faster. If the marble falls out too easily, try using a bit of tape to hold it in place or tilt your cup to keep the lander inside. Maybe your marble refuses to release at all. Could some kind of shoot or funnel help? Keep experimenting until you can drop your lander on the target the same way every time.
Interested in the science behind this project? Learn about acceleration, kinetic energy, and more.
Transform The Lunar Surface
Even though humans have been on the moon before, there is still so much to explore! Ancient, shadowed craters mark the landscape and newly discovered ice deposits may lay waiting for exploration near the South Pole. Your team will need to understand the natural features of the lunar surface to be able to safely investigate.
Craters come in many depths, shapes, and sizes. Why do you think that is? Let’s find out! Find a plastic, cardboard, or aluminum pan or box. It should be about as wide and long as a piece of copy paper and 2-3 inches deep (but don’t use glass for this activity!) Fill your pan about halfway with all-purpose flour. Smooth it out and then add a light layer of cocoa or powdered drink mix, something that contrasts with the flour. This will be your lunar surface. You’ll also need a few different items such as marbles, rocks, golf balls, or beads to simulate “impactors,” for example meteorites, that hit the Moon billions of years ago.
Time to get messy! Cover your kitchen table with newspaper and place your pan in the center. Drop your impactors over the pan. Observe the crater ejecta pattern created by each impact. Now try dropping the impactors at different heights or angles. You can smooth over and recoat your lunar surface as needed. What patterns do you notice in the size, shape, and depth of the craters you create?
Want to learn more about these important geological features? Read up on Moon impact craters.
Ice-Hunting Lunar Rover Robot Gets A Landing Site
Reflection Questions
Think about these questions and discuss them with your family or friends.
- Thrust is the force that moves a rocket through the air and through space. You generated thrust for your rocket by stretching and releasing your rubber band, storing potential energy and transforming it into the kinetic energy of motion. How did stretching the rubber band more or less affect the distance your rocket traveled?
- When you built your space module out of spaghetti, you used a toilet paper tube or can to set the size. Would the challenge be more difficult with a larger or smaller cylinder used as a size constraint? Why?
- You used a zip line to deliver your lander to the Moon. What were the best strategies you found to ensure your lander accurately hit the target each time it was released?
- When you made craters on the Moon, you tried different impactors as well as different drop distances and angles. What conditions were most likely to create deep craters?
- The Artemis project will happen in stages with many missions over the next 10 years, and each stage will test something new. Why do you think NASA scientists and engineers plan big projects in stages?
What’s Next?
Now that you’ve tried some space science and engineering activities, you may want even more projects to explore. After all, as part of the Artemis Generation, it’s going to take a lot of creativity, determination, and skill to get us to the Moon and beyond. Here are some recommended resources with more fun projects you can try:
- Artemis Camp Experience
- NASA STEM Forward to the Moon
- On the Moon
- Jet Propulsion Laboratory STEM Activities
Credits:
Written by Sandy Roberts.
Edits by Ariel Zych.
Digital production by Sandy Roberts.
Meet the Writer
About Sandy Roberts
Sandy Roberts is Science Friday’s Education Program Manager, where she creates learning resources and experiences to advance STEM equity in all learning environments. Lately, she’s been playing with origami circuits and trying to perfect a gluten-free sourdough recipe.