Grade Level
8-12
minutes
2 hours
subject
Mathematics
Activity Type:
geometry, engineering and design challenge, art


This resource was created as part of the Science Friday Educator Collaborative. If you are implementing this in the classroom, please check out the Educator’s Guide for tips for classroom use.
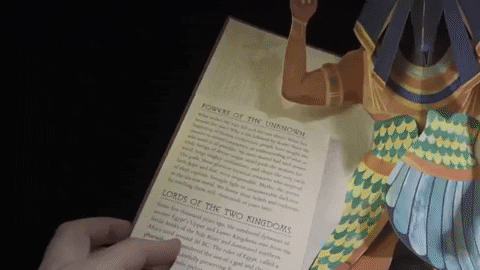
How does the dinosaur pop out of the page? Is it magic? Hint: it’s not magic—it’s math and engineering! Pop-up book artists like Matthew Reinhart, who created the dinosaur above, combine art with principles of math and engineering to design pop-up books that delight readers of all ages. It doesn’t just stop there. The principles of pop-ups transcend disciplines: they have inspired the development of nanodevices that manipulate light, microelectromechanical systems (MEMS), paper robots, and furniture.
In this activity, you will learn how to make pop-ups by building two different pop-up mechanisms, pick out mathematical patterns that will help you predict pop-up motion, and then apply those ideas to build a card inspired by your favorite Science Friday story.
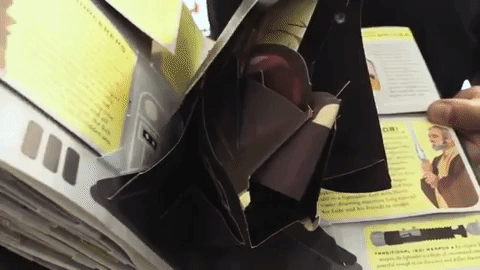
Using scissors, tape, and reams of creativity, Matthew Reinhart engineers paper to bend, fold, and transform into fantastic creatures, structures and locales. By adjusting the angles of folds and the depth of layers, Reinhart animates his subjects to tell dramatic stories that literally pop off the page. Watch to see how Reinhart creates his amazing feats of paper engineering.
We will use short time-stamped clips from this video throughout the resource to help you build your paper engineering skills!

Hey educators! How has the school year been for you? Tell SciFri your stories and feedback for our future STEM education coverage in a short survey!
Let’s Explore Some Pops
How do pop-ups work? How does Reinhart get his pop-ups to pop, or rise, so high off the page? Like skyscrapers and bridges, pop-ups need specially engineered supports. When used on the base of a card, these supports provide a solid foundation that carries and distributes the forces that are created by the moving attachments. Supports that are built on top of each other work together to increase the strength of the card so attachments can reach above and beyond the edges of the page. Look carefully at Reinhart’s pop-ups.
Can you find the support structures?
In engineering, triangles are frequently used to distribute forces and increase the strength of structures like skyscrapers, buildings, and bridges. Do you see any triangles? What other shapes do you notice? Are there differences based on the size or direction of the pop-up?
It’s Time To Build Some Popup Cards!

Do you recognize this object? It’s a pop-up card! Well, it’s the foundation of a pop-up card—without any decorations. Watch how all the shapes move together when the card is opened and closed. What could we turn this card into? A dinosaur, like the one in Matthew Reinhart’s video, perhaps?
In the time-stamped version of the video below, Reinhart explains two of the support structures that he frequently uses, the v-fold and layer. These support structures are called pop-up mechanisms—elements that cause movement on the surface of the page. In this activity, you will build v-fold mechanisms and explore the geometry that makes them pop. You will explore the layer mechanism in a later activity.
Materials
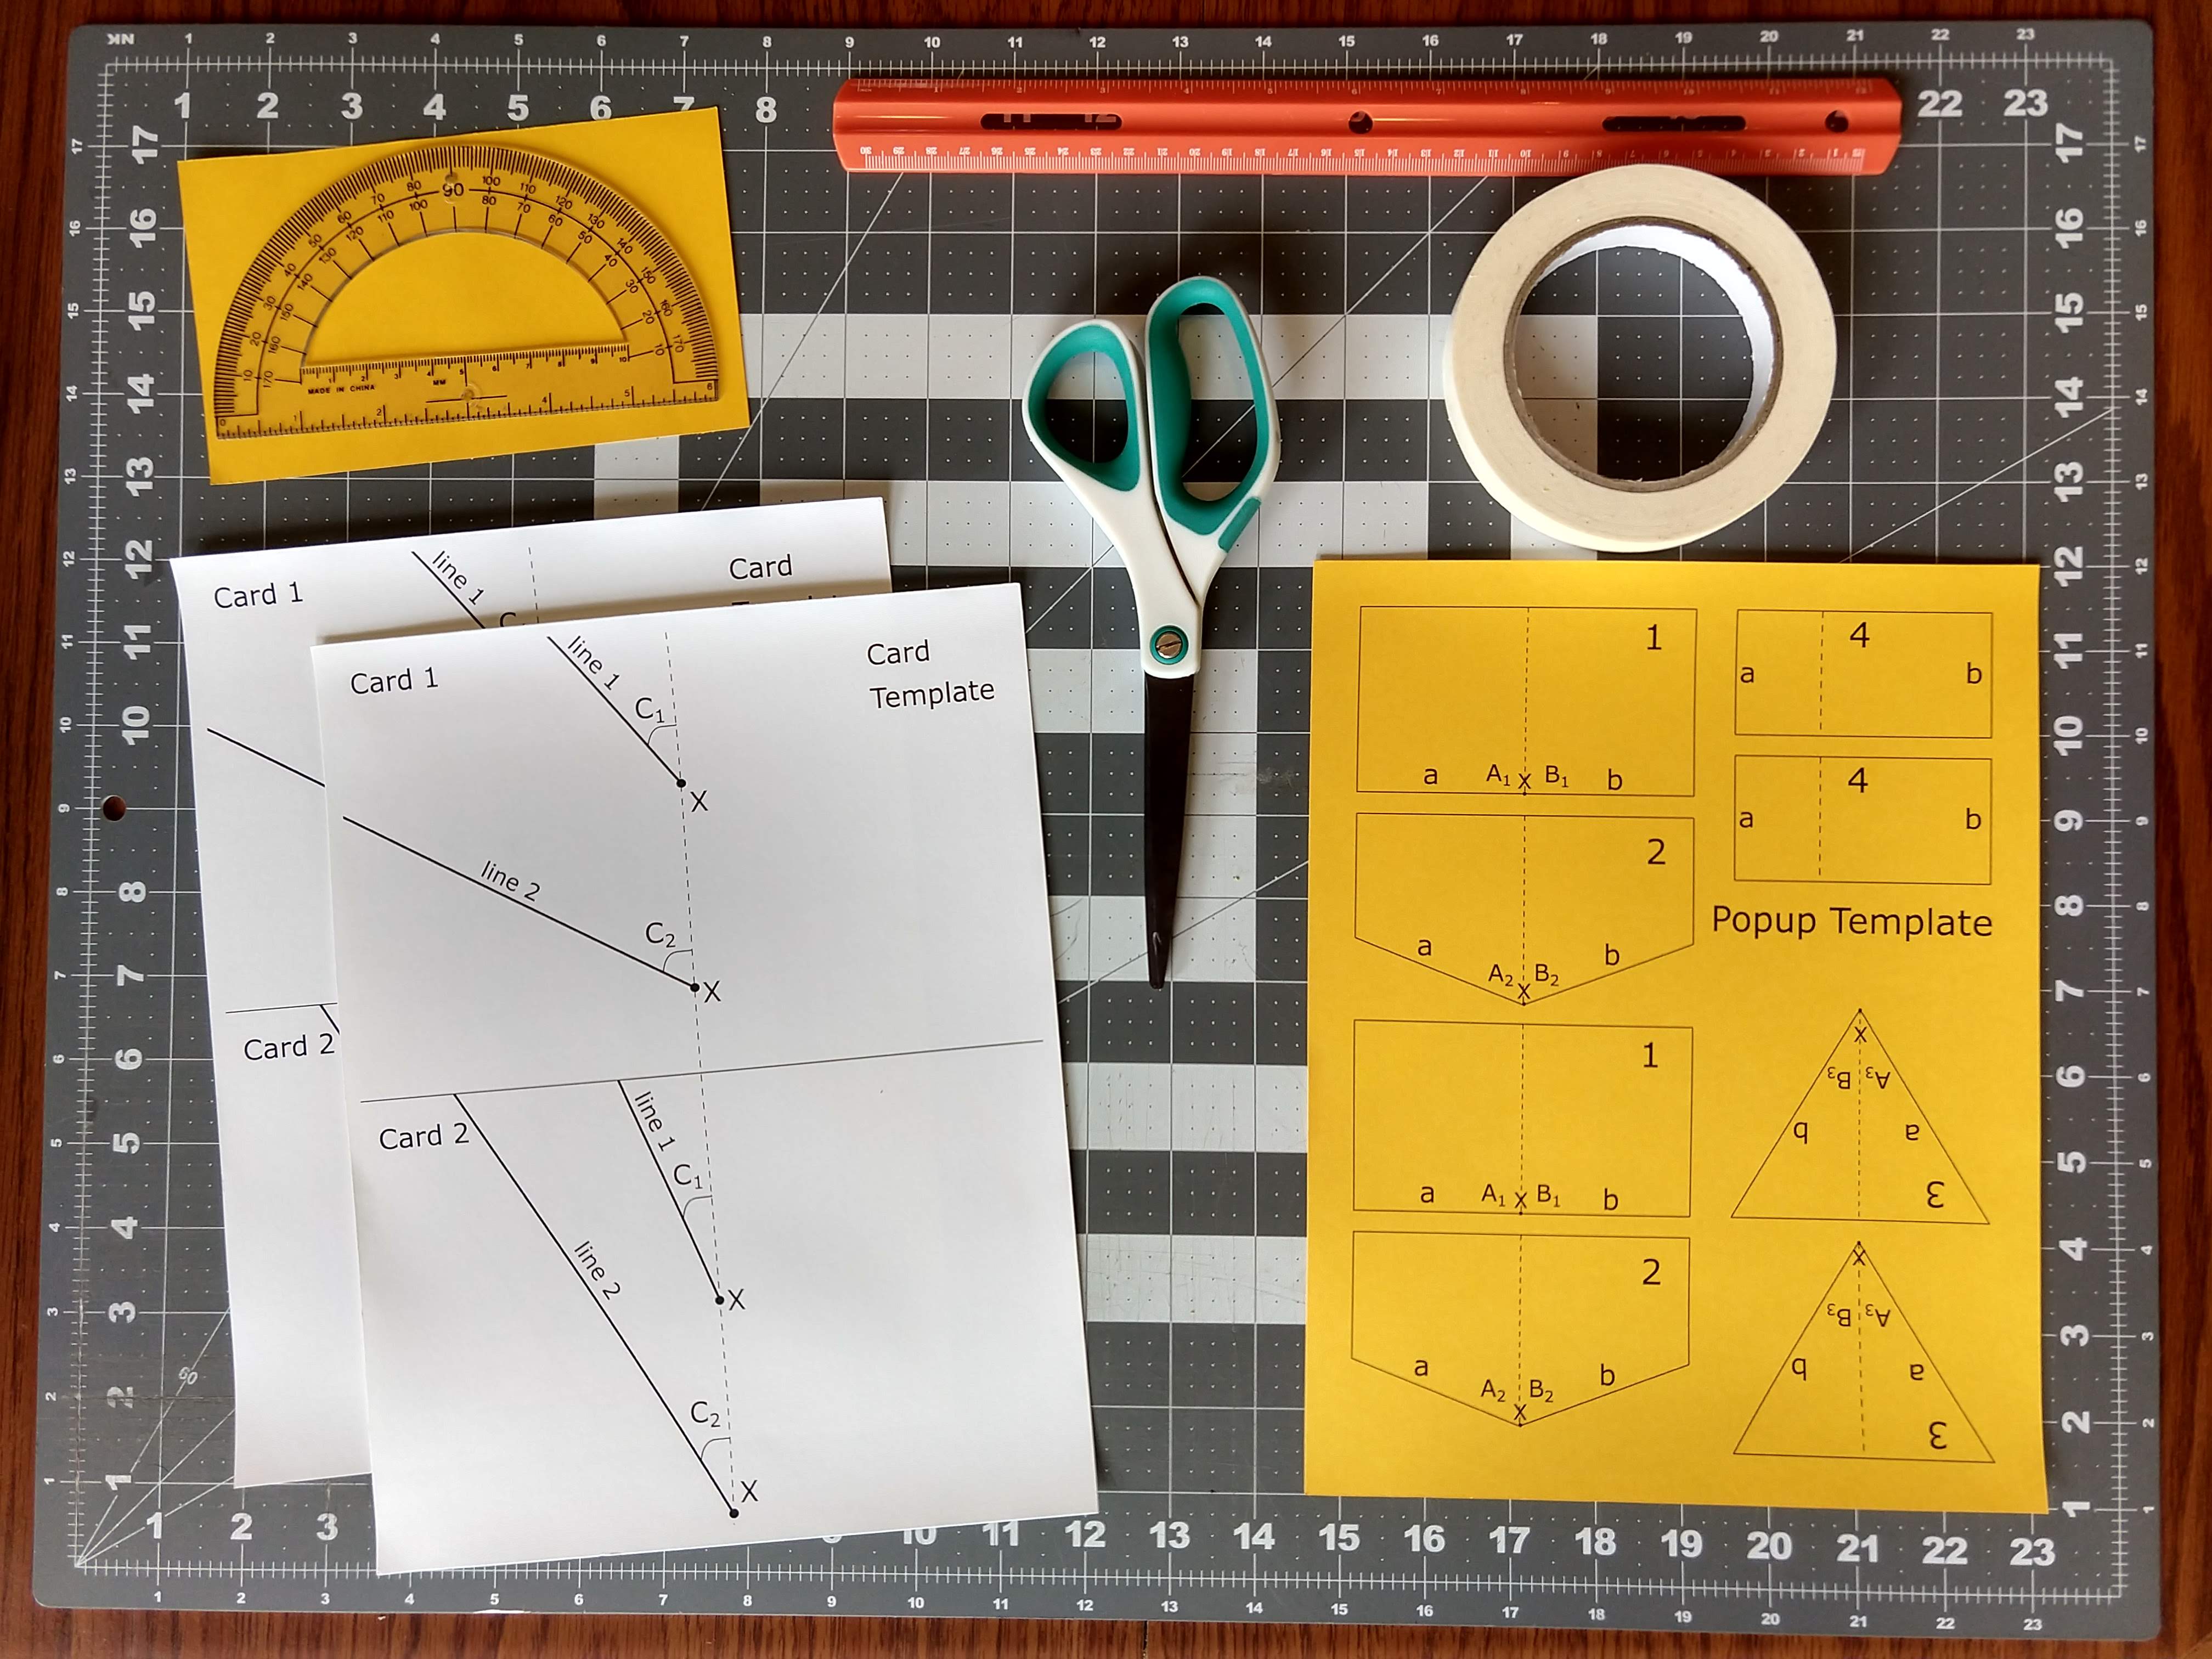
- Light Cardstock
- One copy of the Pop-up Template
- Two copies of the Card Template
- Scissors
- Artist/drafting tape or transparent tape
- Protractor (Here is a printable protractor you can use!)
- Ruler
- Pencil
- Pop-up Observation Sheet
- Optional: A craft knife.
Remember to be careful when using sharp tools and always cut on a cutting mat or other layer to protect your table.
Note: Copy paper can be used in lieu of cardstock, but is more likely to tear if pop-ups are repositioned.
Prepare And Build Your First Pop-up Card
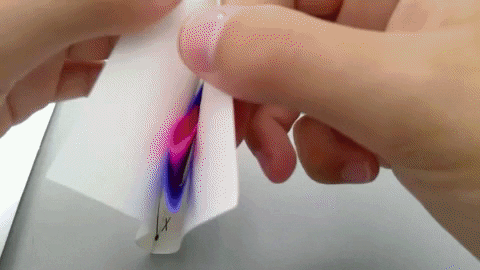
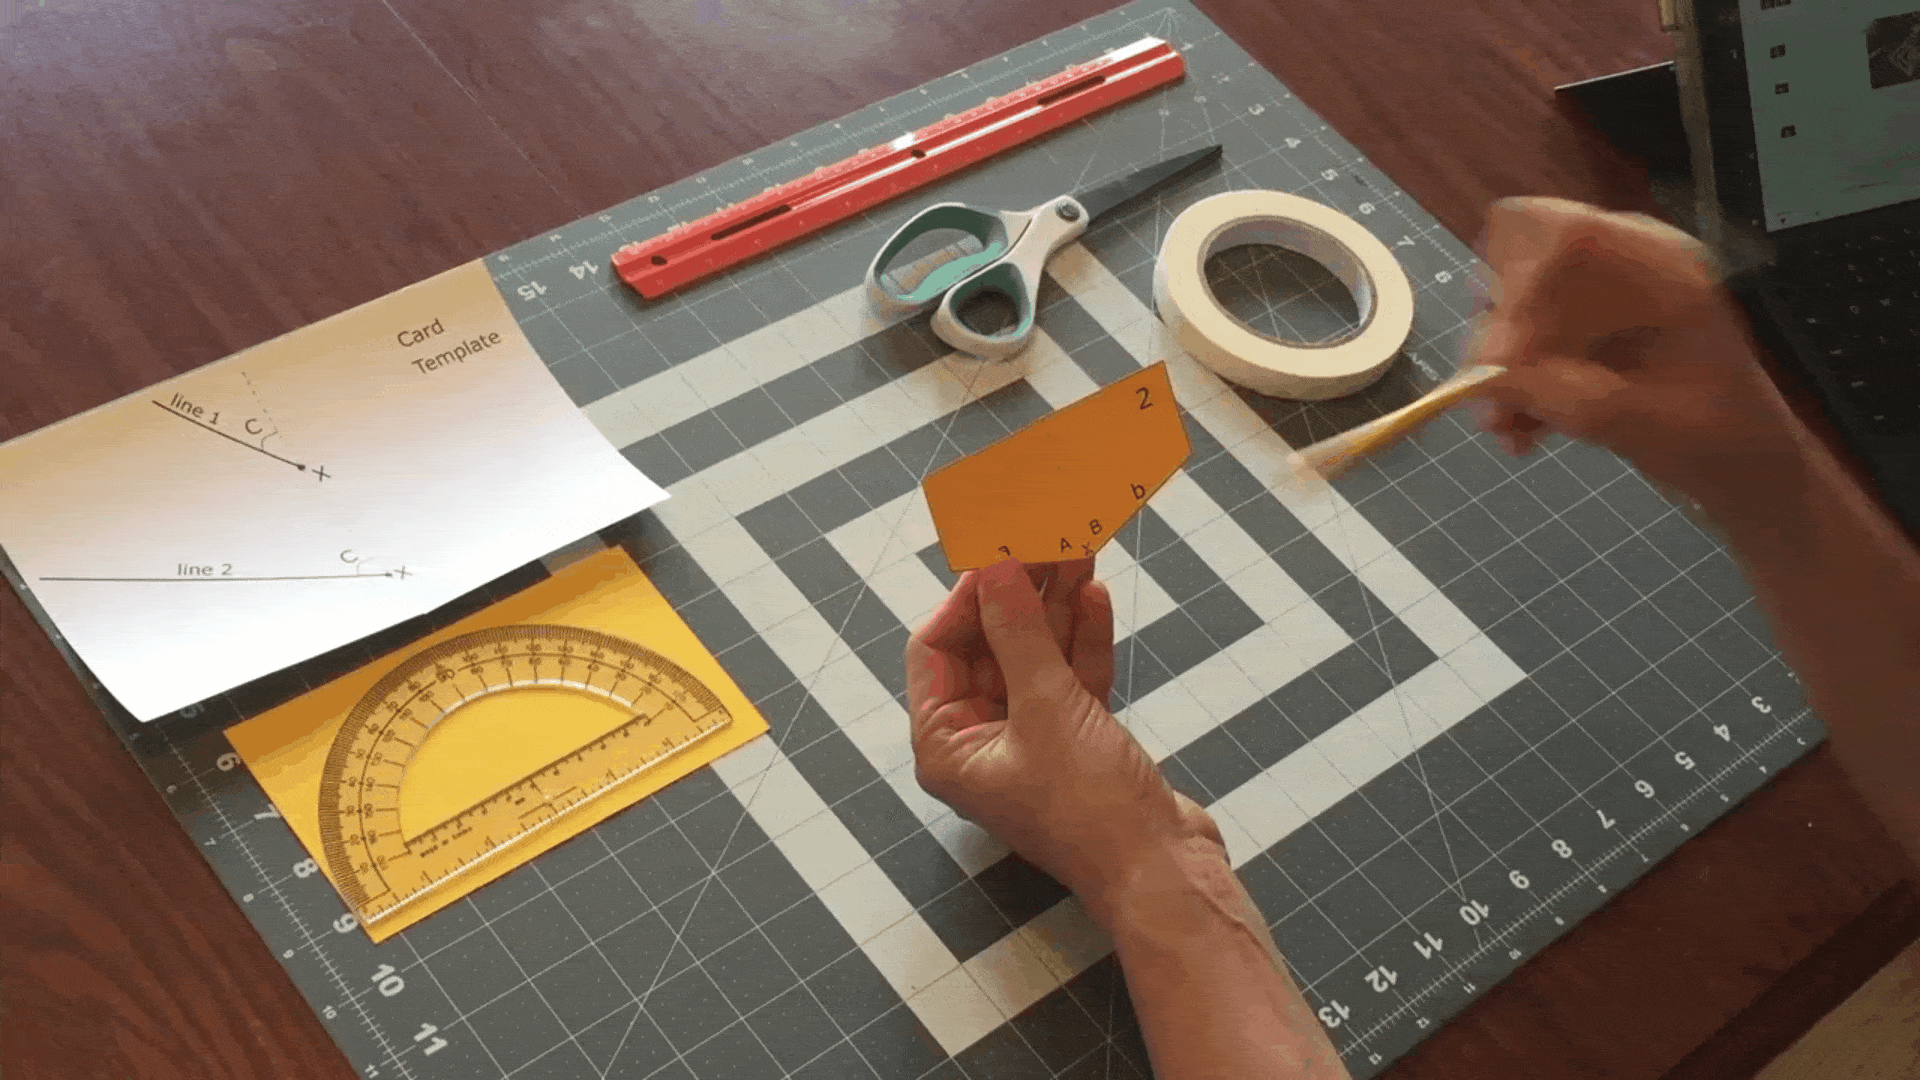
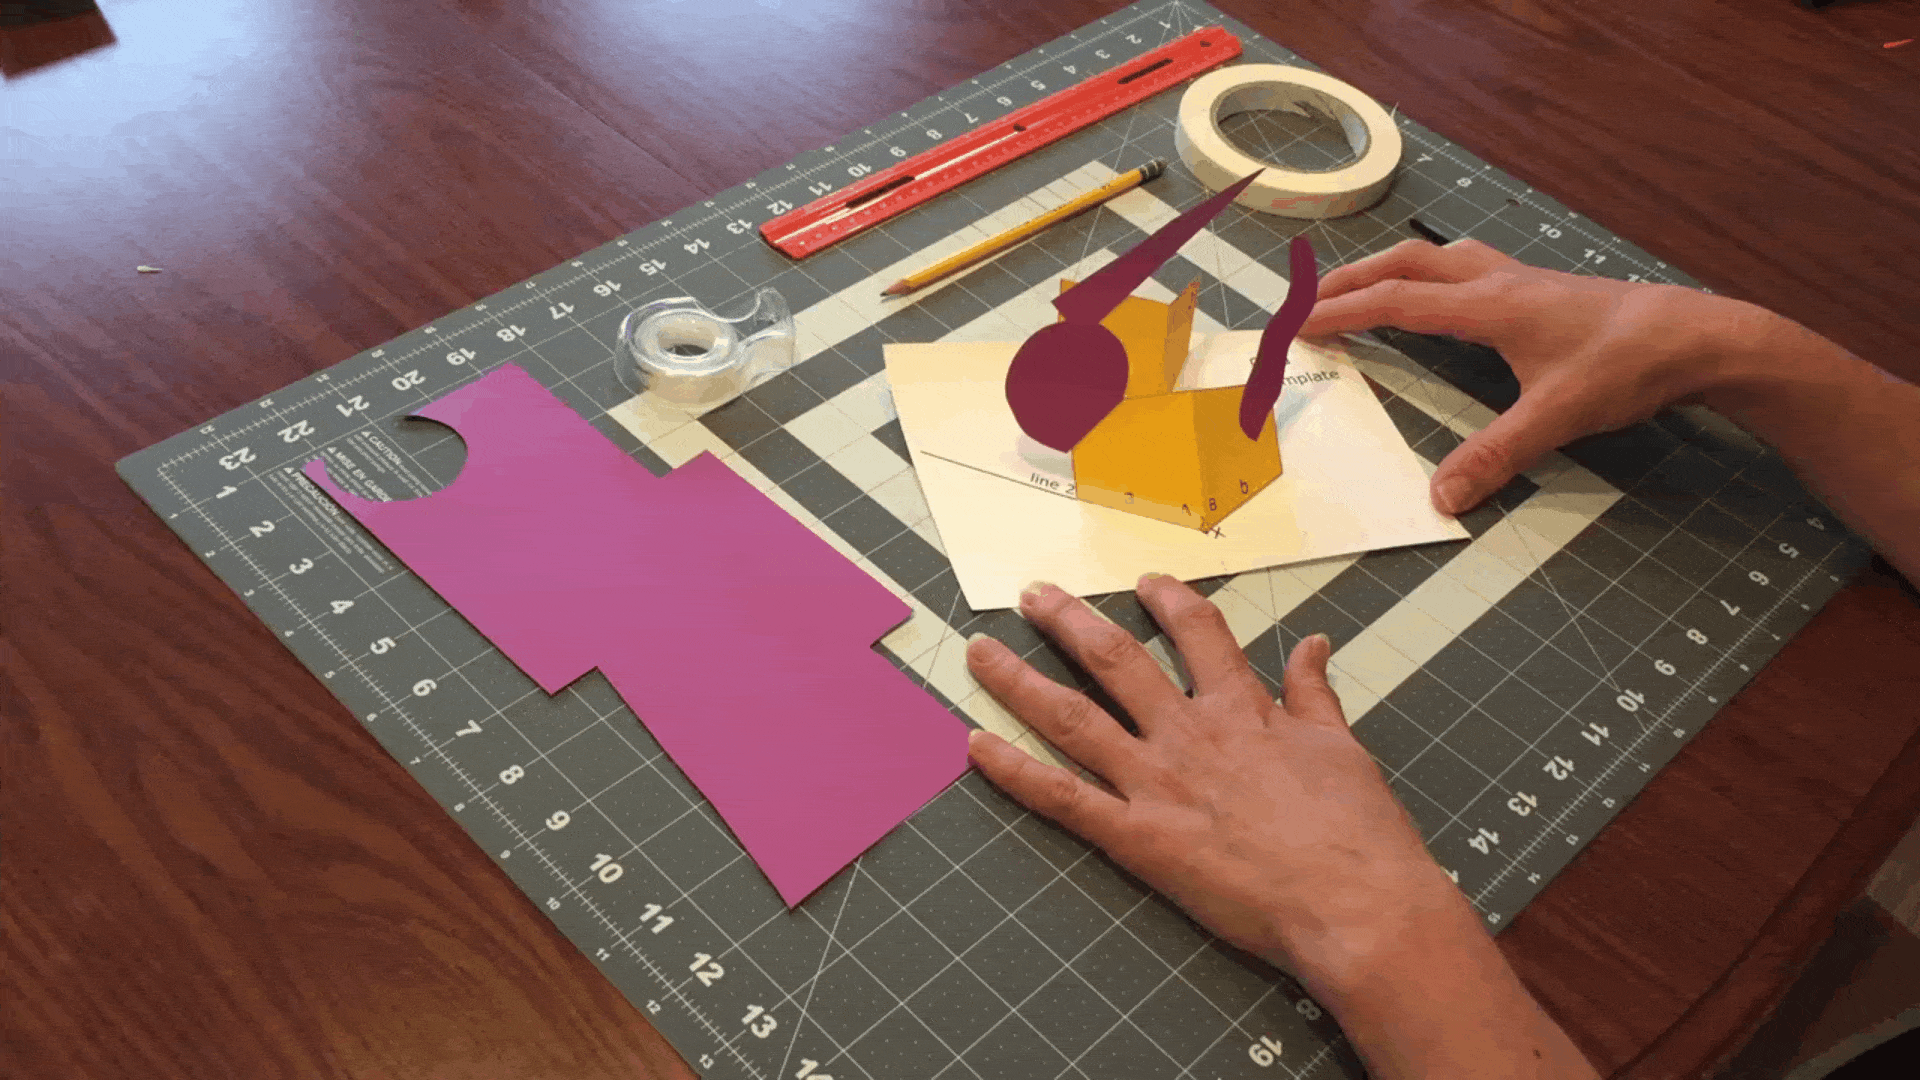
- Cut out the shapes from the Pop-up Template by cutting along the solid lines. On the Card Template, create two cards by cutting along the labeled cut line. Fold each card and popup back-and-forth along the dotted lines so that each crease is sharp. At the end of this step, you should have four cards and eight shapes. These eight shapes will be our pop-ups, and we will refer to them by the number printed on the shape. Tip: Stack your cards and pop-ups by type for later work.
- Use a protractor to measure angles A and B on one copy of popups #1, #2, and #3. Write each angle measurement in Table I of your Pop-up Observation Sheet. How are angles A and B on each pop-up related? Do you notice a pattern?
Build Your Remaining Pop-ups
Now that you’ve built your first pop-up card, grab your remaining stacks of cards. Follow the directions below to build three different pop-up cards. As you work, record your measurements in Table II of the Pop-up Observation Sheet.
Observe
- Does every pop-up stay inside the card when the card is closed?
- How do the measures of angles C1 and D1 compare?
- How do the measures of angles C2 and D2 compare?
- How do line 1 and line 2 make each pop-up look different?
When finished, your three pop-up cards should look something like this:
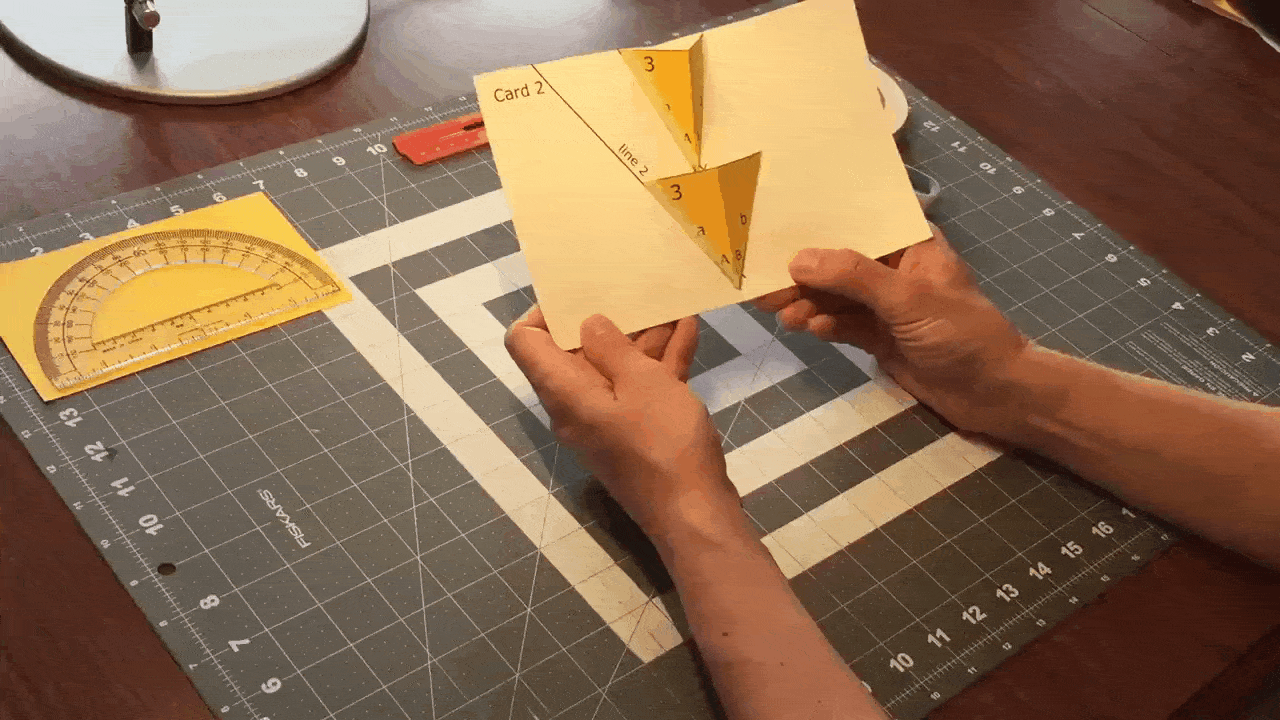
Note: You will have one extra copy of Card 2, this is for later.
Develop Your Theory: How Do Pop-ups Work?
Mathematicians, like scientists, use observations to make educated guesses. In mathematics, these educated guesses are called conjectures. Let’s look at your Pop-up Observation Sheet and your three completed cards to make conjectures about the geometry that makes v-fold mechanisms pop. Start by focusing on symmetry. Parts of objects have symmetry when one part has the same size and shape as another after a flip, turn, or slide.
- Where do you notice symmetry on your pop-ups and cards? What data from Table I or Table II supports your observations?
- Can you describe how symmetry might be important to the movement of the pop-ups?
Your conjectures about symmetry might look something like this:
V-folds have a line of symmetry. The dotted line on each v-fold mechanism is a line of symmetry. This explains why angles A and B on each v-fold mechanism have the same measure—the line of symmetry divides each pop-up into two parts of the same size and shape.
Cards have a line of symmetry. The center fold of the card is a line of symmetry. Closing the card reflects line 1 to the other side of the card, making angles C and and D the same measure.
On pop-ups, the line of symmetry of the card and the v-fold are aligned. When we placed our v-folds on the card, the line of symmetry of the v-fold was directly above the center fold of the card. When the two lines of symmetry are aligned, the card and pop-up open and close together.
Other ideas you should think about:
- What could be controlling the height of a pop-up?
- If a pop-up extends outside the closed card, what changes could you make to the pop-up or card to keep the pop-up inside the card?
What Else You Can Do?
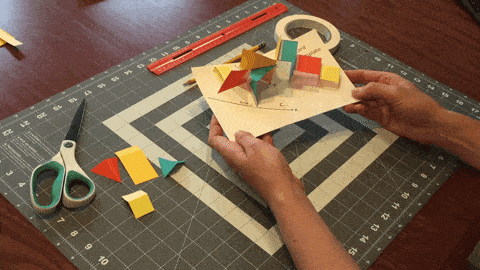
Keeping these observations in mind, play around with the way the v-fold mechanisms are attached to your three cards. You might try to re-attach the pop-ups to lines that are drawn at different angles or lines that extend in a different direction from the center of the card. You might change the size or shape of the pop-up. You might even try other ways to attach the pop-up to the card. As you play, try to:
- Alter the height of a pop-up.
- Make a large part of a pop-up extend outside the closed card.
- Make two pop-ups crash into each other as the card opens or closes.
- Observe what happens when you place a pop-up so that its fold is not directly above the center of the card.
V-folds are just one of the many types of mechanisms used by pop-up artists. In the next activity, we will use a layer mechanism to help build up our pop-up. Watch the video below to learn how to create simple layers.
Combining Popups
Most of the scenes in a pop-up book are built using multiple pop-up mechanisms that work together to create height and motion across two pages.
Any pop-up mechanism that is taped to a card creates a fold at the taped edge that can power another mechanism. By attaching pop-ups to each other, you can create supports for wider and taller designs. Let’s try it!
Materials
- Three completed pop-up cards from the previous activity
- One copy of pop-up #4 from your stack of pop-ups
- Scissors
- Artist/drafting tape or transparent tape.
Procedure
What shape does pop-up #4 create?
You probably noticed that this pop-up has a different shape than the others—it looks more like a box. This is the layer, or parallelogram, mechanism. They don’t have to be attached to another pop-up. They can also be attached directly to the card.
What could pop-up #3 be used for? Where could you add other v-fold or layer mechanisms to make your pop-ups taller or wider?
Experiment by attaching more pop-ups to others. Use pop-ups from the Pop-up Template or cut out some of your own in similar shapes and custom sizes. Don’t forget to incorporate things you learned during your experimentation with v-folds!
How Does Paper Move When Attached To A Popup Mechanism?
As Reinhart explained, different pop-up configurations cause attachments to move differently. Let’s experiment with our cards.
Materials
- Three completed pop-up cards from the previous activities
- Colored paper (e.g., construction, copy paper)
- Scissors
- Artist/drafting tape or transparent tape
- Double-sided tape or adhesive dots
Procedure
- Cut rectangles, squares, circles, and other shapes out of copy or construction paper. Use double-sided tape to attach the shapes to any of your pop-up mechanisms.
- Open and close the card and observe how the shapes move. Move or trim shapes that extend outside the card.
- What is the largest or longest shape that can be attached to a pop-up before it extends from the card?
- Do some attached shapes move more than others? How does a shape’s movement change if you connect it to a different position on the pop-up?
Your answers to these questions will vary based on the size of the shape, the type of pop-up, and the location of the pop-up on the card. Try cutting pictures out of magazines and see how you might make those images move and pop off the page.
Attachments are not the only way to tell a story — the mechanism can tell a story, too. You can cut a pop-up to slightly alter its shape or draw on it to change its look. It is best to do this before attaching the pop-up to the page. Use your imagination!
Engineering Your Perfect Pop
Get ready to put together everything you learned about pop-ups! Your challenge: choose a Science Friday story and use art, math, and engineering to create a pop-up that responds to or is inspired by the story. Maybe you want to create a pop-up card that tells a story. Great! Perhaps you prefer to invent a device that uses pop-up principles to solve a problem. Awesome! The choice is yours.
Materials
- At least four sheets of cardstock (You can use copy paper, but it is more likely to tear when repositioning.)
- Scissors
- Artists tape or transparent tape
- Double-sided tape or adhesive dots
- Colored copy paper or construction paper
- Markers, crayons, or colored pencils
- Engineering Your Perfect Pop Checklist
- Optional: an additional copy of the Pop-up Template, and craft knife (be careful when using sharp tools and always cut on a cutting mat).
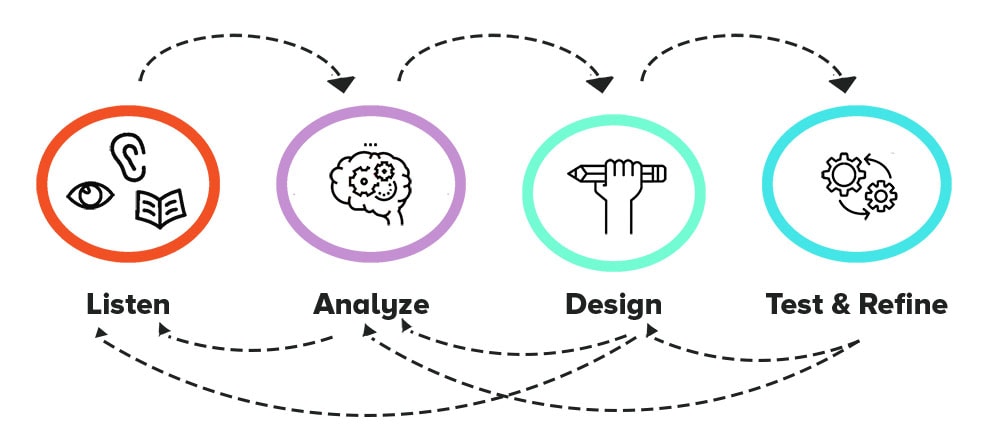
When solving a problem, it’s important to follow a design process. As a paper engineer, you are going to break up your work into design process stages. Keep in mind that the design process is not linear. As you move from one stage to the next, you may find that you need to revisit a previous stage. Use the Engineering Your Perfect Pop Checklist as you work through the design process.
Get inspired by a story!
Here’s a selection of Science Friday stories you can choose from:
- The Bots and The Bees
- The Complicated Sex Lives of Venus Flytraps
- The Seriously Silly Science Cartoons of Rosemary Mosco
- Egypt is Building a Massive 1.8-Gigawatt Solar Park
- How to Grow Coral
- Want more options? Search Science Friday’s website.
Interested in diving deeper to make a bigger global impact? Align your pop-up creation with one of the UN Global Goals for Sustainable Development. Brainstorm how pop-ups could be used to inexpensively solve a problem relating to the human health and environmental goals that are championed by the United Nations. As an example, get inspired by the Prakash lab and simplicity by design, especially the Foldscope, an inexpensive microscope that is made from cut, folded, and assembled paper.
Analyze your story!
What about the resource motivates or inspires you? What do the people in the story need? What is the problem they are dealing with? How might pop-ups be used to help solve your selected issue or to tell your story? Identify information that might inform your design. Define the idea you plan to convey with your pop-up or the problem you want to solve.
The next two stages, Design and Test, are closely linked. You will spend a lot of time moving between these stages until your pop-up device or card works correctly. Remember that you don’t have to wait to test until you have all the pieces in place. You should test and adjust as you go.
Design: Let the engineering begin!
- Create a rough sketch of the layout of your card. Where will you place and combine mechanisms? Do you need to learn more building techniques? What resources will you use to learn them?
- Build your design on a foundation that is made from a piece of 8.5” x 11” cardstock or copy paper, folded in half. For the pop-ups, either make copies of the Pop-up Template or cut your own similar shaped and custom sized pop-ups.
- Check out the resources below to learn different techniques for creating pop-ups.
Test: Try out the mechanics of your card.
Does your prototype open and close smoothly? Do all pieces fold flat when the card is closed? Do all decorations stay inside the card when it is closed? Does the card convey your idea or address the issue you selected?
Show Off Your Creation
It’s time to show off your hard work! Refer to your Engineering Your Perfect Pop Checklist as you prepare your presentation. Share pictures of your work with Science Friday on Twitter or Instagram, using the hashtag: #SciFriPop.
Take a few minutes to reflect on your experience. What did you learn? What challenges did you face? How did you overcome them? What would you do differently next time? What would you like to learn more about?
Now that you’ve explored the basics of pop-ups, keep experimenting and creating more perfect pops!
Resources
- Want to learn how to make, cut out, and combine other types of pop-up mechanisms? Take a few of Matthew Reinhart’s Pop-up School Lessons or Pop-up Master Classes or head to pop-up artist Duncan Birmingham’s YouTube channel.
- Interested in exploring the geometry of more pop-up mechanisms? Pop-up design and paper mechanics by pop-up artist Duncan Birmingham beautifully explains the theory of pop-ups and shows how to create more complex mechanisms, step-by-step or you can take check Matthew Reinhart’s Pop-up School on YouTube or Duncan Birmingham’s channel.
- Want to know how pop-up books are manufactured? This video shows how Matthew Reinhart designed a page in one of his books, and this video explains how a pop-up page is printed and assembled in a factory.
- Check out kirigami, the Japanese art of paper cutting. This art form has inspired some recent engineering innovations.
Standards
- HS-ETS1-2 Engineering Design: Design a solution to a complex real-world problem by breaking it down into smaller, more manageable problems that can be solved through engineering.
- MS-ETS-1 Engineering Design: Define the criteria and constraints of a design problem with sufficient precision to ensure a successful solution, taking into account relevant scientific principles and potential impacts on people and the natural environment that may limit possible solutions.
- CCSS.MATH.CONTENT.HSG.MG.A.3: Apply geometric methods to solve design problems (e.g., designing an object or structure to satisfy physical constraints or minimize cost; working with typographic grid systems based on ratios).
- CCSS.MATH.PRACTICE.MP3: Construct viable arguments and critique the reasoning of others.
- CCSS.MATH.PRACTICE.MP4: Model with mathematics.
- CCSS.MATH.PRACTICE.MP5: Use appropriate tools strategically.
- CCSS.ELA-LITERACY.RST.11-12.3: Follow precisely a complex multistep procedure when carrying out experiments, taking measurements, or performing technical tasks; analyze the specific results based on explanations in the text.
Special Thanks To:
Josh Back, for filming all of the videos
Catherine Phillips, for testing the lesson and providing feedback
Josh Back, Alex Back, and Dave Back for testing revision after revision of this activity
Credits:
Written by Jamie Back
Mentored by Katharine Hinkle
Review by Science Friday Educator Collaborative Cohort 6
Editing by Shirley Campbell, Xochitl Garcia, and Katharine Hinkle
Digital Production by Xochitl Garcia
Educator's Toolbox
Meet the Writer

About Jamie Back
Jamie Back is a high school STEAM Teacher and Makerspace Coordinator at Cincinnati Country Day School in Cincinnati, Ohio. Jamie is a “maker” and a lifelong learner who enjoys bringing engineering design, making, computational thinking, and 3D printing into her classroom.