Grade Level
3 - 5
minutes
1- 2 hrs
subject
Life Science
Activity Type:
animal adaptations, marine biology, cephalopod, camouflage

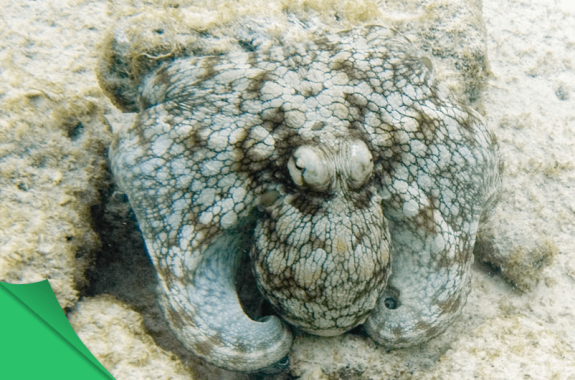
Cephalopods like the octopus depicted above are considered to be masters of camouflage. In other words, they are really great at blending in with their environment. How do they do it? Let’s take a close look at cephalopod skin to understand the mechanisms of camouflage.
A Many-Layered Thing
Severus Snape once told Harry Potter, in Harry Potter and the Order of the Phoenix: “The mind is a complex and many-layered thing.” The same might be said of cephalopod skin. Well, it may not have as many layers as your mind, but it does have at least three distinct layers. Going from the outside in, we find a chromatophore layer, an iridophore layer, and a leucophore layer. The chromatophore layer uses spots of pigment to paint patterns; the iridophore layer bends and bounces light to display shimmering colors; the leucophore layer serves as a reflective background for everything above it. Each layer of cephalopod skin contributes its own little bit of artistry to the overall painting.
In this lesson, we will look at the first layer, the chromatophore layer, in detail.

The Chromatophore Layer
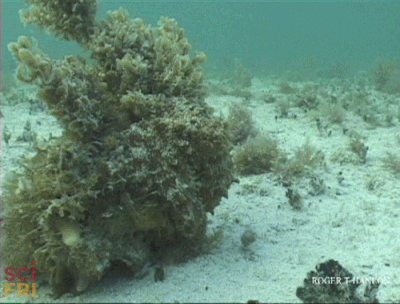
Let’s take a close look to see what’s going on in the skin of a cephalopod:
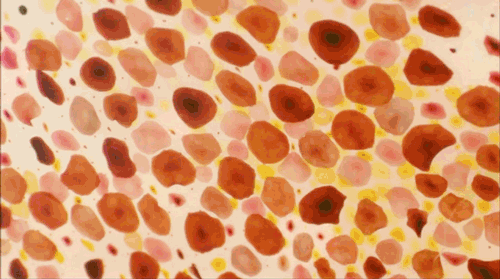
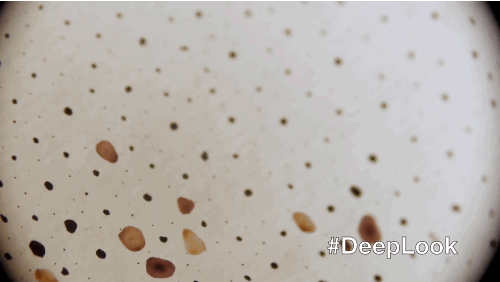
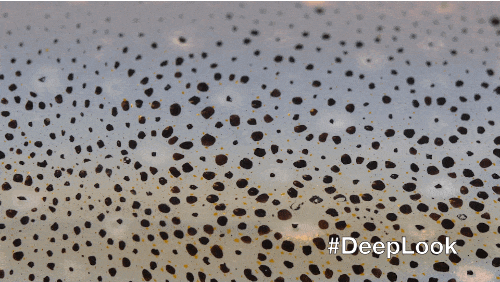
 What colors and shapes do you see in these close-up views of cephalopod skin? What details can you make out? How do you think these tiny changes affect the larger view of the cephalopod?
The first layer is called the chromatophore layer. (The word chromatophore means “bearer of color”). A chromatophore is an organ that contains pigments. In cephalopods, those pigments are limited to the colors yellow, red, and brown.
We humans have pigment in our skin too, primarily in the form of melanin. Unlike cephalopods, however, we can’t really change the color of our skin (except maybe by blushing, bruising, getting a tan or a sunburn). So how do cephalopods do it?
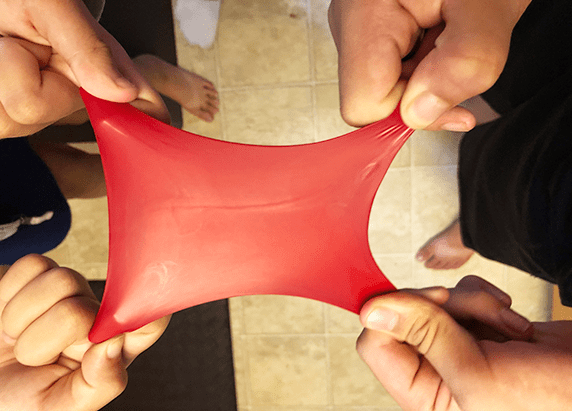
To understand this, we need to take a close look at the structure of a chromatophore. Each chromatophore is like a microscopic balloon filled with pigment. There are tiny muscles (called radial muscles) attached to all sides of this balloon. When the radial muscles are relaxed, then the chromatophore is like a shriveled, deflated balloon. Although it has some color in it, it is so small that it’s difficult to see. When nerve signals stimulate the chromatophore, the radial muscles pull this balloon from all sides, stretching it out, and covering more area of the skin with the pigment. Suddenly, the chromatophore is a visible spot on the skin! And since that single chromatophore is joined by an army of other chromatophores, you get all kinds of color changes—from a solid patch of red, to a mottling of brown and white, to a strange yellow shape on a dark background.

Model The Texture-Changing Structures of Cuttlefish Skin: Papillae
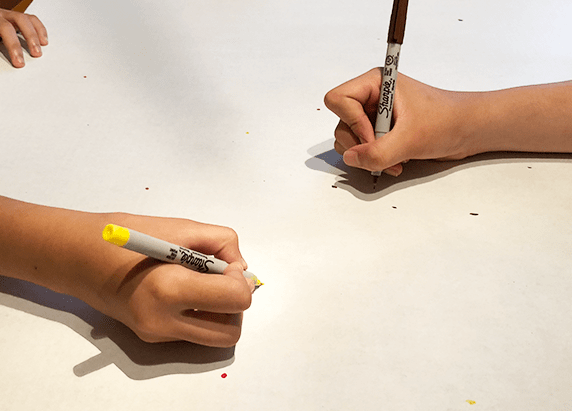
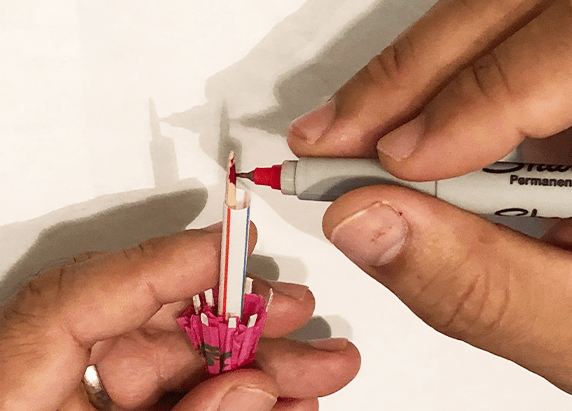
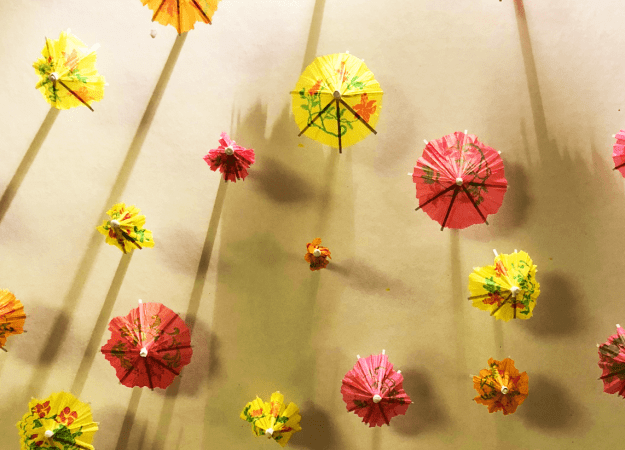
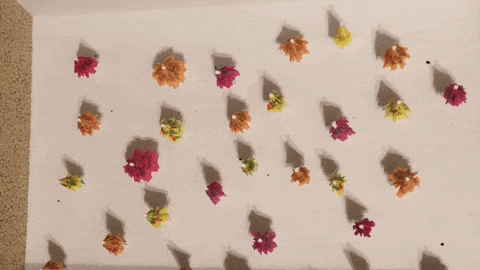
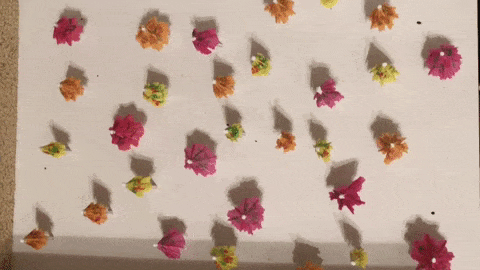
Let’s Make Some Chromatophores!
Activity 1
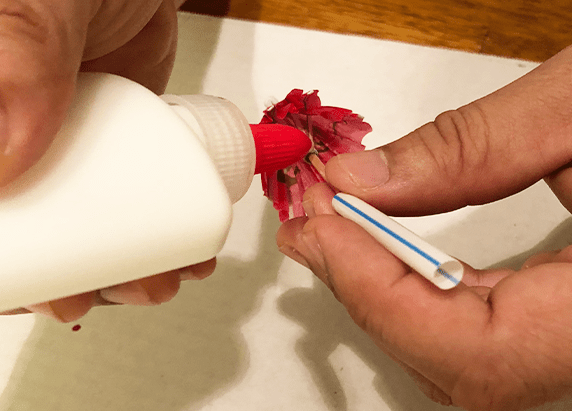
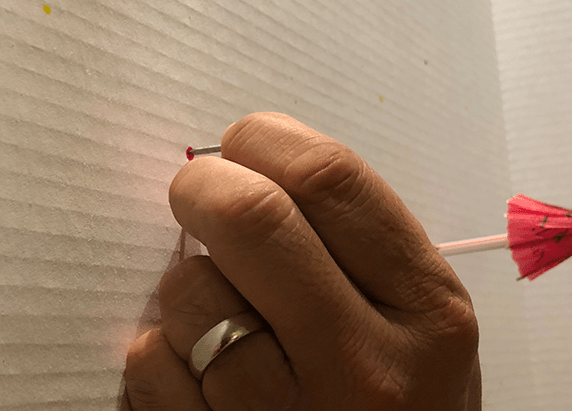
You will need:
- A tri-fold board (like for Science Fairs)
- Red, orange, and yellow cocktail umbrellas (at least 10 of each color; orange umbrellas will be used instead of brown ones because brown cocktail umbrellas are not common)
- Red, brown, and yellow Sharpie fine-tip or extra fine-tip pens
- A small nail
- Some plastic straws (8 mm or 9.5 mm diameter straws will work, but Smoothie and Boba straws are too wide)
- Scissors
- Glue

Phenomenal Cosmic Power, But Only Three Wishes
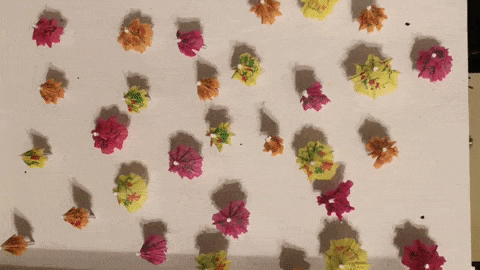
- Can you think of any modifications that you can make to speed things up when you change colors on this chromatophore layer model?
- Cephalopods can open and close millions of chromatophores instantly. How do you think cephalopods manage to do this?
Cephalopods are like the genie from the story of Aladdin. They have this incredible power built right into their skins. However, in the same way that the genie is limited to fulfilling only three wishes, cephalopods effectively limit their use of their “phenomenal cosmic power” to three basic options. Cephalopod camouflage can be classified into only three basic patterns: uniform, mottled, and disruptive.
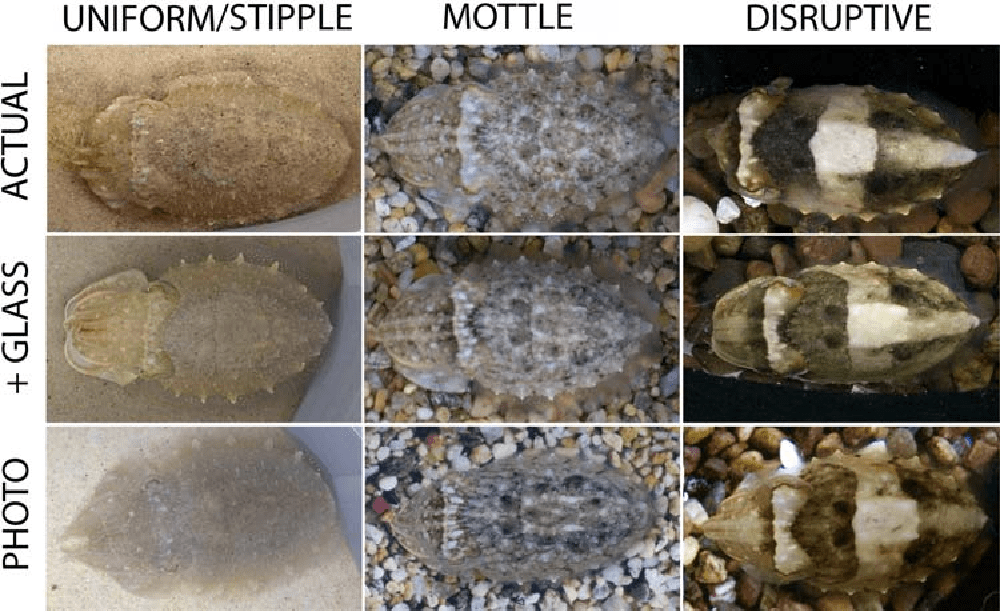
Uniform camouflage appears as though it were one color. For example, the left column of pictures depicts a cuttlefish that is generally a single color, beige. There may be visible spots of a different color, but they are very tiny.
Mottled camouflage involves the use of visible splotches of multiple colors. In the middle column of pictures, the cuttlefish uses splotches of black, white, gray, and beige in order to blend into a background of small pebbles.
Disruptive camouflage involves the use of high contrast colors to form distracting shapes and patterns. When you first think about it, this type of camouflage doesn’t seem to make sense. After all, isn’t camouflage all about blending in? Wouldn’t the use of high contrast colors and weird shapes make a cephalopod stand out?
Well, first of all, some backgrounds do have high contrasts and weird shapes, so the best way to blend in would be to use similar high contrasts and weird shapes. For example, in the right column of pictures, the cuttlefish is over a background of large, multi-colored pebbles. Both uniform and mottled camouflage wouldn’t serve the cuttlefish well, because the relative evenness of its coloring would make it stand out. However, by using disruptive camouflage, the high contrasts and weird shapes would make it look just like the pebbles around it.
Another reason disruptive camouflage might be effective is that it might serve to confuse predators just long enough to allow a cephalopod to escape. Look at the pictures in the Disruptive column. Can you tell which part of the cuttlefish is the head, and which part is the arms? It’s difficult, right?
Even if a predator was to “see” a cuttlefish using disruptive camouflage, it might not recognize what it was looking at, or it might not recognize what part was the head, or the arms. The inability to identify the part of the cuttlefish it is looking at could create a moment of hesitation and confusion on the part of the predator. That moment might just be long enough for the cuttlefish to escape successfully.
Secrets of Cephalopod Camouflage
Let’s Make Some Chromatophore Layer Patterns!
Activity 2
For EACH student, you will need:
- A plastic sheet protector
- Red, brown, and yellow Sharpie fine-tip or extra fine-tip pens
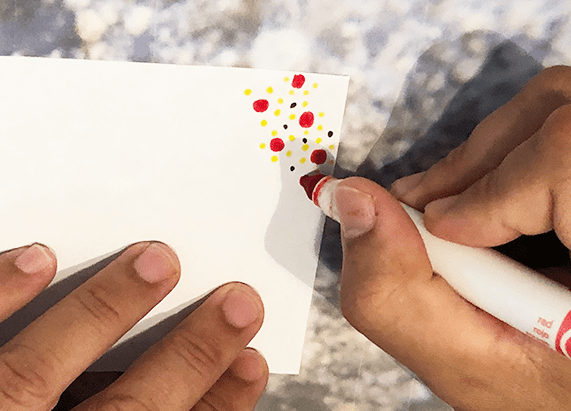
- A printout of this template sheet
- A copy of Student Handout for Activity 2
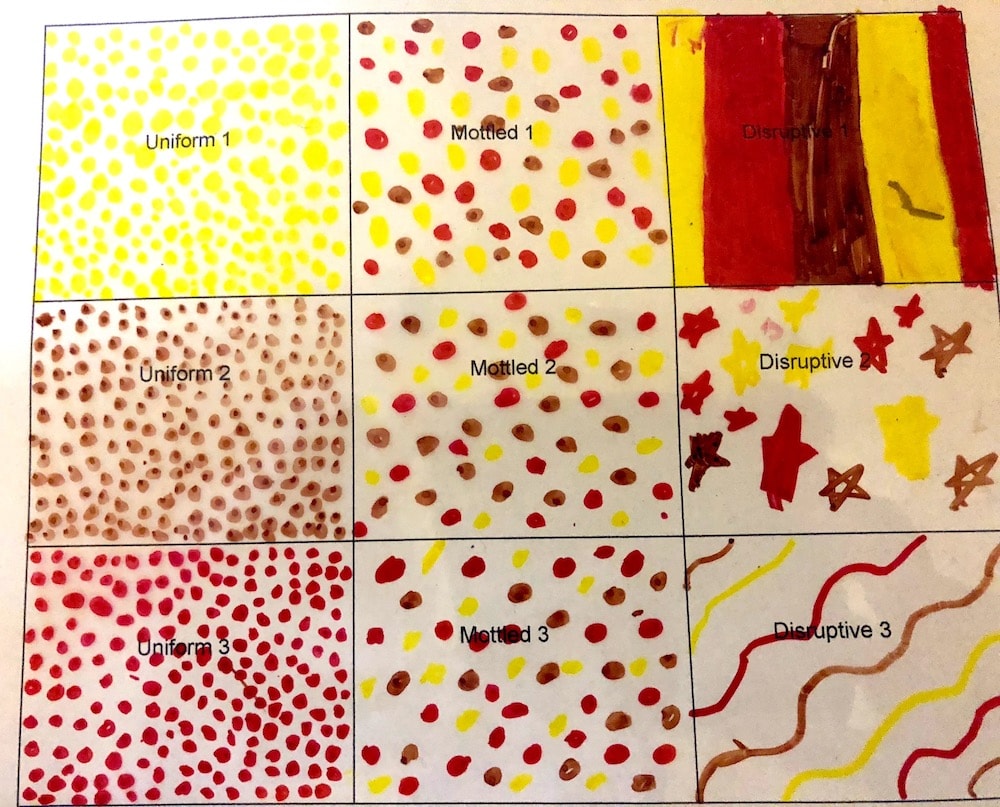
Place the template sheet into the sheet protector. Use the Sharpie pens to draw chromatophore patterns. Draw three Uniform patterns, three Mottled patterns, and three Disruptive patterns. You can look at pictures of the camouflaged cuttlefish above for ideas. One student’s examples are pictured above.
After you complete your chromatophore patterns, then please answer the questions on your Student Handout for Activity 2.
Let’s Camouflage Like A Cephalopod! (Chromatophore Layer Only)
Activity 3
For EACH student, you will need:
- Your chromatophore patterns from Activity 2
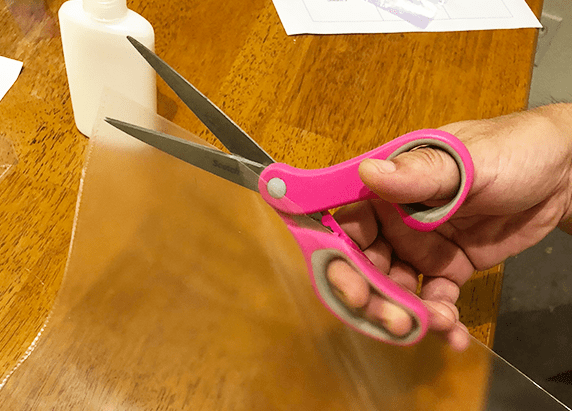
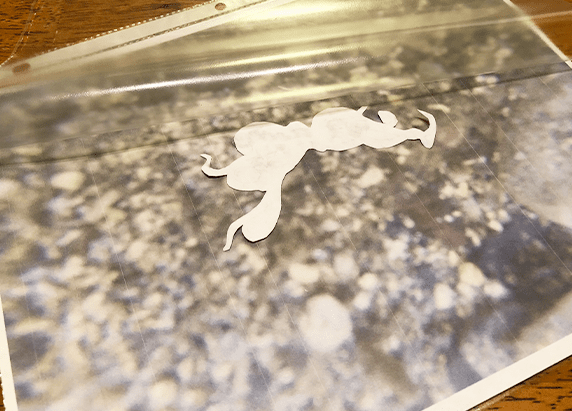
- A blank sheet protector
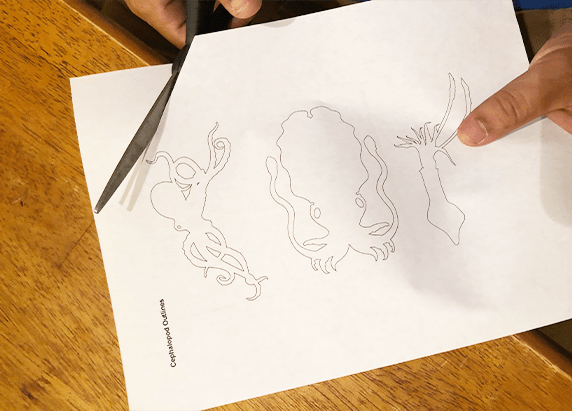
- A scissors
- Scotch Tape
- A glue stick
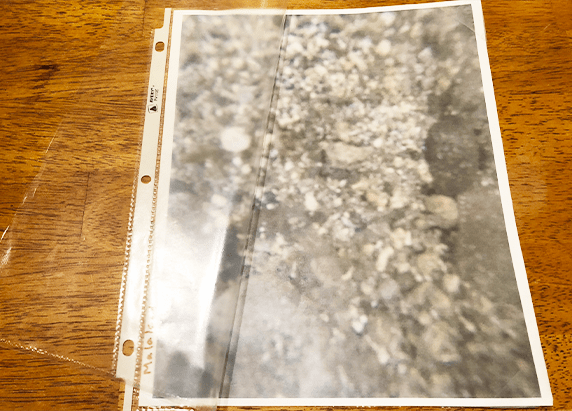
- An outline of a cephalopod Cephalopod Outline sheet
- A color printout of one of these undersea backgrounds
- Red, brown, and yellow Sharpie fine-tip or extra fine-tip pens
- Red, brown, and yellow watercolor pens (optional)
- White post-its or white paper cut into 3” x 3” squares (optional)
- A copy of Student Handout for Activity 3
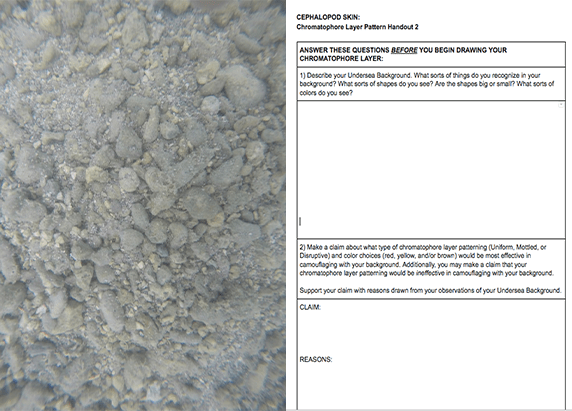

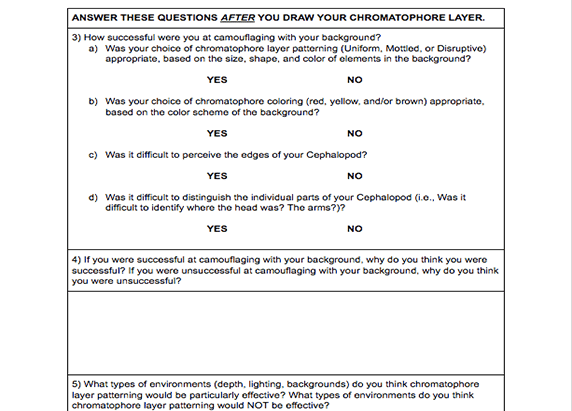
You may have come to the conclusion that chromatophores are not as effective when camouflaging over blue or green backgrounds. Yet many cephalopods (particularly squids) are pelagic (which means that they live in the open ocean), and are surrounded by blue or green backgrounds all of the time. How do these cephalopods camouflage? Use this Student Reflection page to help you summarize how this layer is so important to cephalopods.
Extensions
- In this lesson, we have discussed the capability of cephalopod skin to change color. But cephalopod skin also has the capability of changing texture. Click here to learn more about this amazing ability. You can also click here to do an activity in which you can make a model of the shape-changing structures of cuttlefish skin!
- Some cephalopods also use bioluminescence to help them camouflage. Click here to learn about the incredible Hawaiian Bobtail Squid, and the symbiotic relationship it has with a bioluminescent microbe.
- Did you know that cephalopods are color-blind? If so, how can they process visual information so quickly and accurately when camouflaging? One theory is that their skin can actually “see!” Learn about this theory here.
Next Generation Science Standards And Notes From The Field
4-LS1-1: Construct an argument that plants and animals have internal and external structures that function to support survival, growth, behavior, and reproduction.
Teachers who field tested this resource had the following advice for teachers adopting this resource:
Kristen from New Jersey says: Pre-open the umbrellas so that they are less likely to come apart when the kids use them.
Robyn from Arizona says: Break it into steps not just try and make it so that the lesson fits within 1-2 hours. We are in Arizona and many of my students had little or no experience with cephalopods which is what made this even more meaningful.
Credits
Written by Randy Otaka
Editing: Ariel Zych and Shirley Campbell
Digital Production: Lauren J. Young and Brian Soash
Undersea backgrounds created by Randy Otaka
Cephalopod Skin Layer diagram by Ariel Zych
Cephalopod Outline vectors from Supercoloring.com (CC-BY-SA 4.0)
- Squid silhouette created by Bob Comix from Longfin inshore squid by SEFSC Pascagoula Laboratory
- Octopus silhouette created by Natasha Sinegina from DSCN1454 by SaraYeomans
- Cuttlefish silhouette created by Natasha Sinegina from Cuttlefish 1 by Pearson Scott Foresman
Special thanks to Tom Iwanicki of UH Manoa for his ideas and support during the development of this resource.
Educator's Toolbox
Meet the Writer

About Randy Otaka
Randy Otaka is an elementary school special education teacher and robotics coach for Wahiawa Elementary School in Wahiawa, Hawaii. He has a passion for STEM education and implements interactive and engaging lessons, such as using Minecraft to model the cardiovascular system to creating scale model solar system orbital paths.