Grade Level
3 - 5
minutes
1-2 days
subject
Life Science
Activity Type:
animal adaptations, camouflage, cephalopod, marine biology
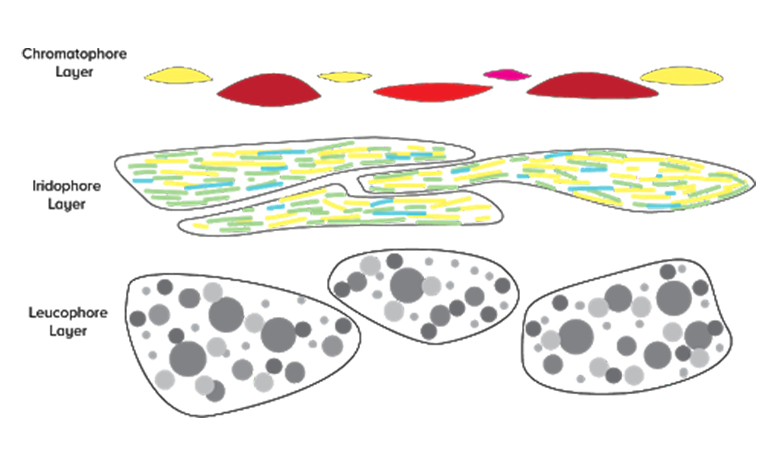
Cephalopods (octopuses, squids, and cuttlefish) are considered to be masters of camouflage, blending in with their environment effortlessly. In another Science Friday Educate resource, we learned about how the chromatophore layer allows cephalopods to instantly generate one of three types of patterns (uniform, mottled, or disruptive) using only three colors: red, yellow, and brown. In this activity, we’ll investigate the two deeper layers of cephalopod skin, the iridophore layer, and the leucophore layer, and how they contribute to the remarkable camouflage capabilities of cephalopods.
Introducing The Iridophore Layer
Take a look at this squid skin:
In this gif, you can see some red chromatophores pulsing. You can also see a shimmering area that starts off looking like pale gold, then shifts to bright blue, and finally ends with emerald green. That shimmering area is an iridophore (“iridophore” means “bearer of rainbows”), a reflective type of tissue found in the second layer of cephalopod skin, known as the iridophore layer.
Let’s take a closer look at the structure of an iridophore:
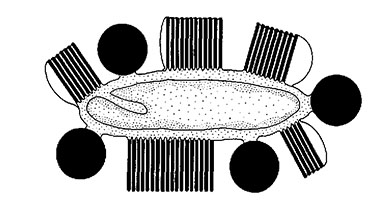
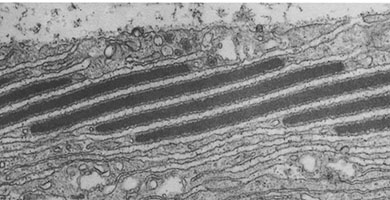
Each iridophore organ is surrounded by several stacks of plates of chitin. Chitin is a translucent, somewhat tough material found in many organisms, including the cell walls of fungi, the scales of fish, and the shells of crustaceans (like crabs). When a ray of light strikes the top surface of chitin, some of it reflects, while the rest of it passes through. The light that passes through strikes the bottom surface of chitin, and again, some of that light reflects while the rest of it passes through. This process repeats itself through all of the plates in a stack.
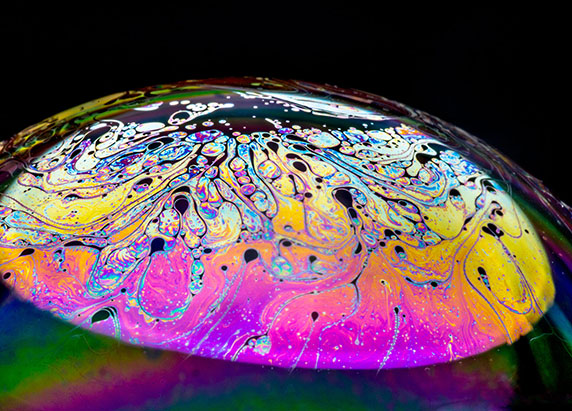
The many rays of light that reflect off of the plates of chitin combine through a process called thin-film interference. In thin-film interference, some colors get canceled out, resulting in the visibility of other colors. You can see thin film interference in soap bubbles…
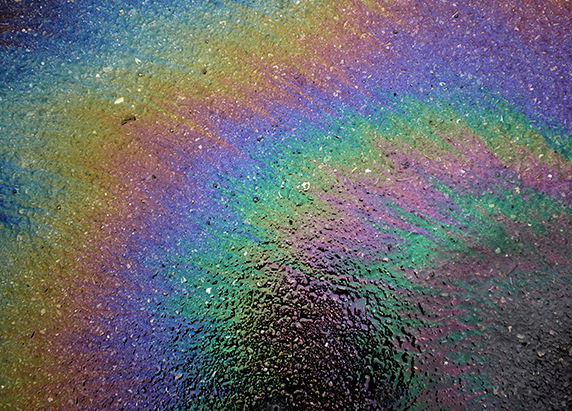
…oil slicks…
…and CDs.
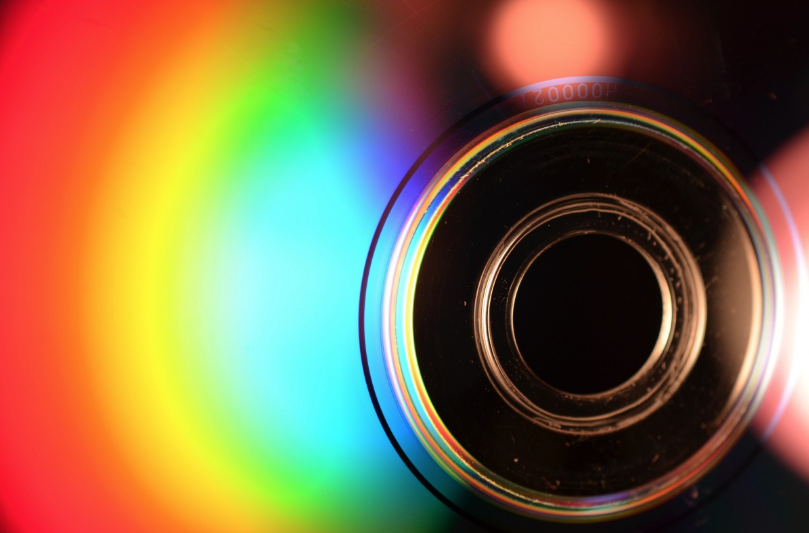
Each has a thin semi-transparent film of some substance overlying an object and in the iridophore, it is chitin.
Cephalopod Camouflage: A Beauty That’s Skin Deep
How Does Thin Film Interference Work?
When light strikes the top surface of a transparent or semi-transparent film, some of the light reflects off of the surface of the film and bounces off, while the rest of the light penetrates into the film itself. The light that manages to penetrate through the top surface refracts or bends slightly because it travels a bit slower through the film. Of the light that penetrates into the film, when it reaches the bottom side of the film, some of it will reflects off of the bottom while the rest of the light passes through the bottom surface and exits the film. In the image below, follow the different paths that light can take when it hits a semi-transparent film.
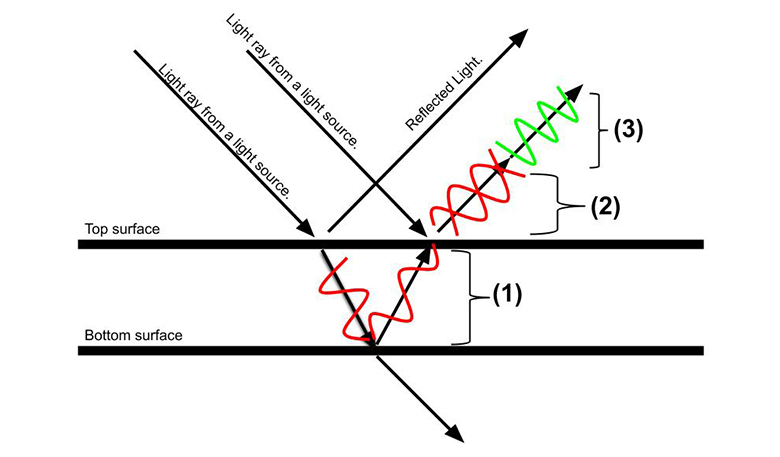
When a light ray encounters the top surface of a semi-transparent film, some of it penetrates through to the bottom surface, where some of it reflects. If the distance traveled by the ray at (1) is an odd number (1, 3, 5, …) multiplied by half the wavelength of a given color (350 nm for red), then when it combines with another light ray at (2), there is destructive interference of that color, resulting in the visibility of the complementary color (in this case, green) at (3).
The rays of light that reflect off the bottom surface (let’s call these bottom rays) travel a bit further than the rays of light that reflect off the top surface (let’s call these top rays), because they must pass through the thickness of the film twice: once going in, and once going out. That extra distance is important. It offsets the wavelengths of the bottom rays from the wavelengths of the top rays when they combine. If that offset is equal to a distance that is half of the wavelength of a given color, then that color is effectively canceled out, removing that wavelength (color) of light.
This is called destructive interference. When particular colors are canceled out, then the complementary colors (their opposites) predominate. So when red is canceled out, then the complementary color green becomes visible.
Scientists are still trying to figure out how cephalopods manipulate iridophores to control their color changes, but a current hypothesis is that cephalopods might be able to change the thickness or angle of the chitin plates in their iridophores to change their color. Changing either the angle or the thickness of the chitin plates would change the distance traveled by rays of light that pass through the chitin, causing destructive interference, and thus altering the colors displayed by the iridophore.
Let’s Simulate Iridophores!
Activity #1 Materials
Iridescent Cellophane, cut into at least three 3” x 3” sheets (Iridescent Cellophane can usually be found in Craft Supply Stores)
Scotch Tape or Masking Tape (both, if possible)
A digital camera (preferably on a phone or other handheld device)
9 plastic cups (we used red Great Value 9 Fluid Ounce Party Cups, but any cup that you can easily cut with scissors or a box cutter would work)
Scissors
An Exacto knife, box cutter, or sharp scissors
A desk lamp with an adjustable head
A dark room, to cut down on ambient light
A table-top that is not reflective, or colored black or white
A Black Sharpie Pen
A printout of the Activity 1 Worksheet
A set of color markers
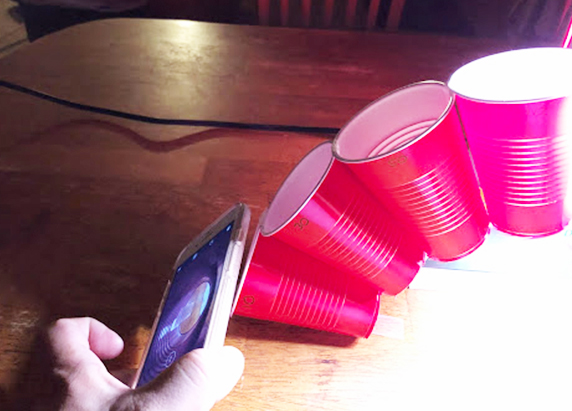
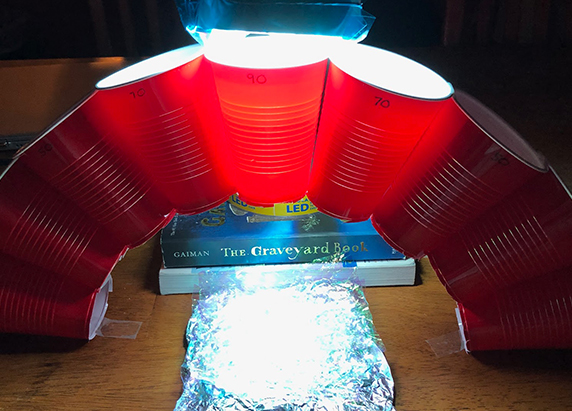
Construction Of The Viewer
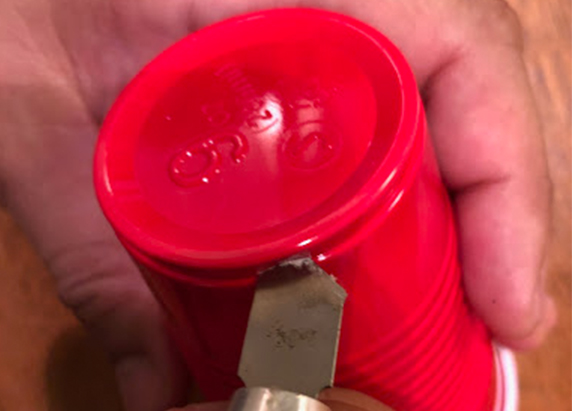
- An adult should do this step to prevent injury. Use an Exacto knife or box cutter to make a hole near the bottom of each plastic cup. The hole should be just beneath the first raised area on the side of the cup, and should be large enough to allow a scissor blade to pass through.
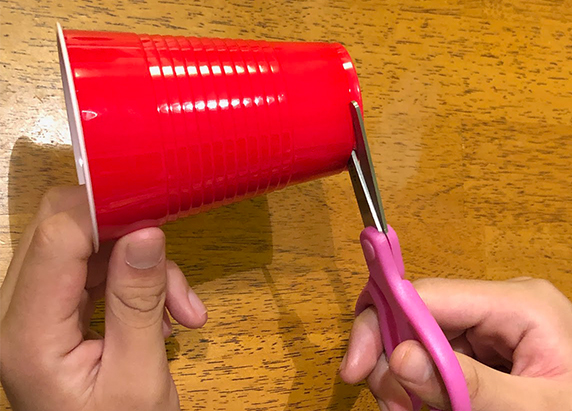
- Use the scissors to cut off the bottoms of all 9 plastic cups.
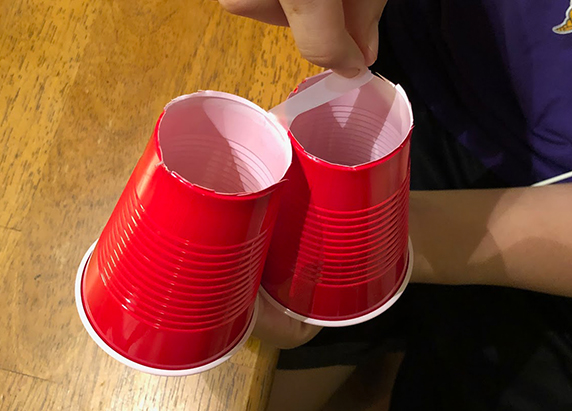
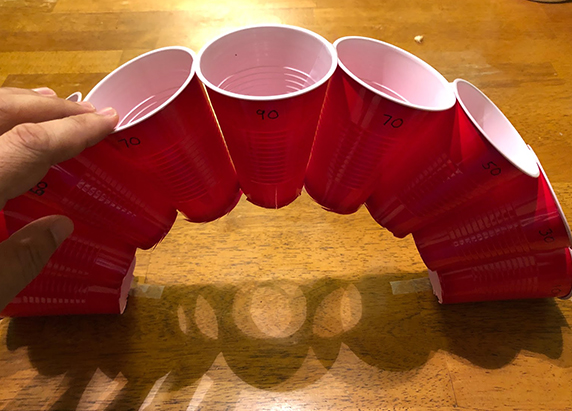
- Tape two cups together at their sides. Use small pieces of tape to hold both the tops and bottoms together.
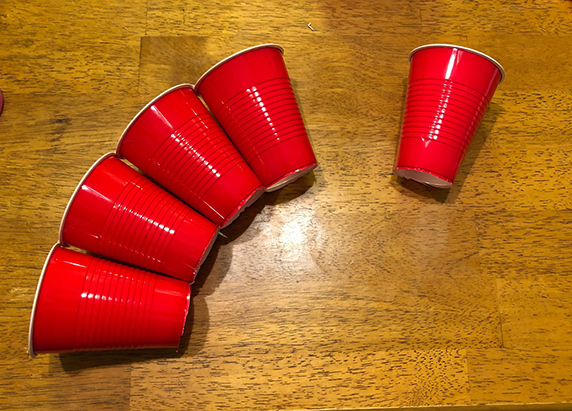
- Continue to tape the cups together at their sides, such that they form an arch or “rainbow” shape. Lay the cups on a flat surface as you tape them together.
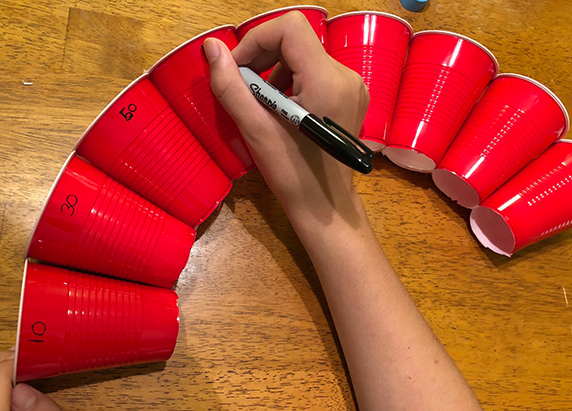
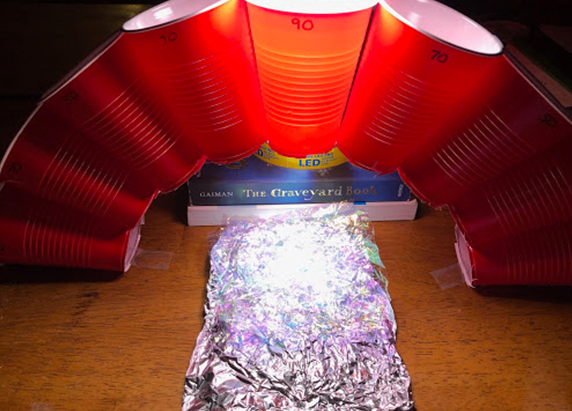
- Label the cups with the black Sharpie pen. Starting from the left, label the cups: 10, 30, 50, 70, 90, 70, 50, 30, 10. The numbers represent the approximate angle of viewing through each cup. This is your Viewer.
- Prop your Viewer upright onto a table surface, and tape both ends of the “rainbow” onto the table.
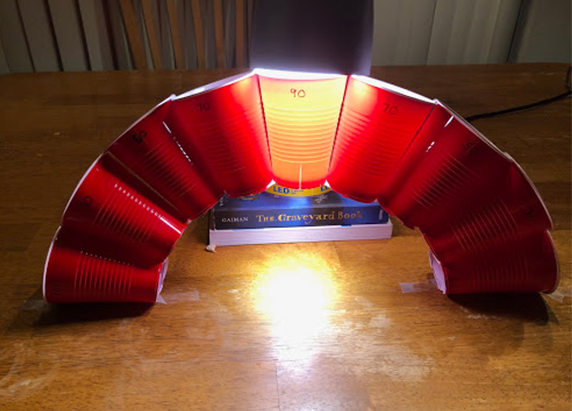
- As the Viewer may be a bit unstable, set up your desktop lamp so that the adjustable head lines up with and partially supports the center top cup. If necessary, use a book or two under the lamp to raise it to a good position. Plug the lamp in and turn it on. Adjust the Viewer and Lamp so that there is a focused spotlight from the center of the arch. This spotlight represents the sunlight that shines directly above the ocean.Teacher Note: Please monitor the heat given off by the lamp, as it is close to a plastic cup. Turn the lamp off periodically and when not in use.
How Big Was This Squid?
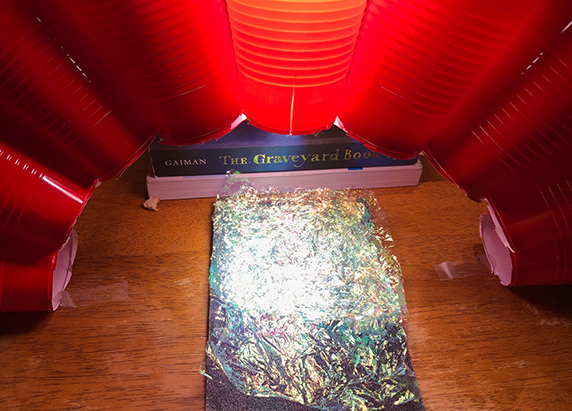
Steps To Simulated Iridophore Layer
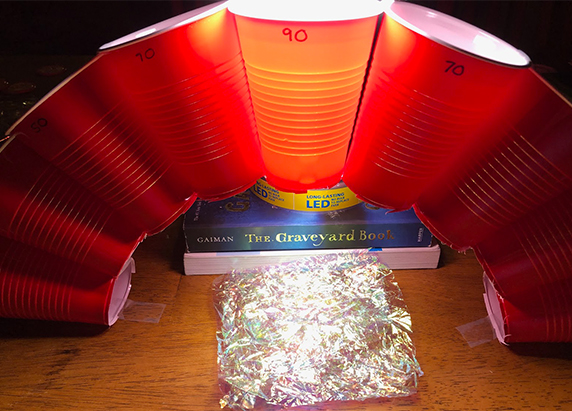
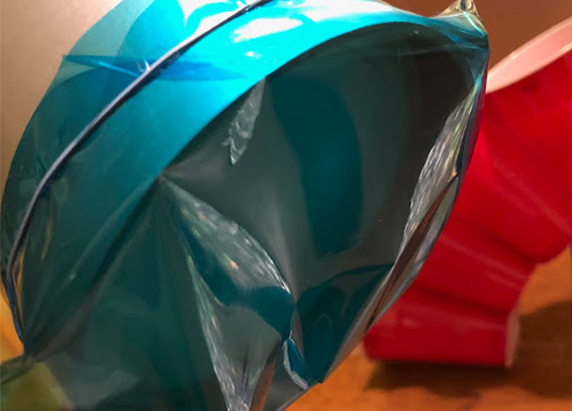
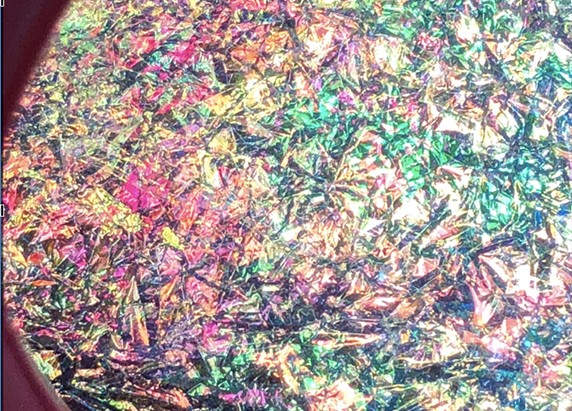
- Place 3 sheets of iridescent foil (crumpled to create more texture) onto the table surface, in the spotlight of the Viewer.
- With your camera, take pictures through each cup in the Viewer, from the left 10-degree cup through the right 10-degree cup (skip the 90-degree cup). As you go, illustrate your observations on the Activity 1 Worksheet using color markers.Tips:
It is best to do this in a dark room, because it will cut down on the ambient light and allow you to see colors clearly.Try to zoom in to the point where you do not see the circular outline of the cup. Allow your camera to focus before taking the picture.
After you’ve finished, complete the Reflections section of the Activity 1 Worksheet.
- What patterns did you notice between the viewing angle and the colors that you observed?
- Based on what you know about thin-film interference, why do you think you saw certain colors at certain angles?
- This was a model of a set of microscopic structures in the skin of cephalopods. In what ways do you think this was a good model? In what ways did this model fail? Are there any ways you could improve this model to make it more valid?
Introducing The Leucophore Layer
Rays of light that manage to pass through the chromatophore and iridophore layers are either absorbed by the relative darkness of the cephalopod’s body or (if they are in the right place) are reflected back by leucophores in the leucophore layer.
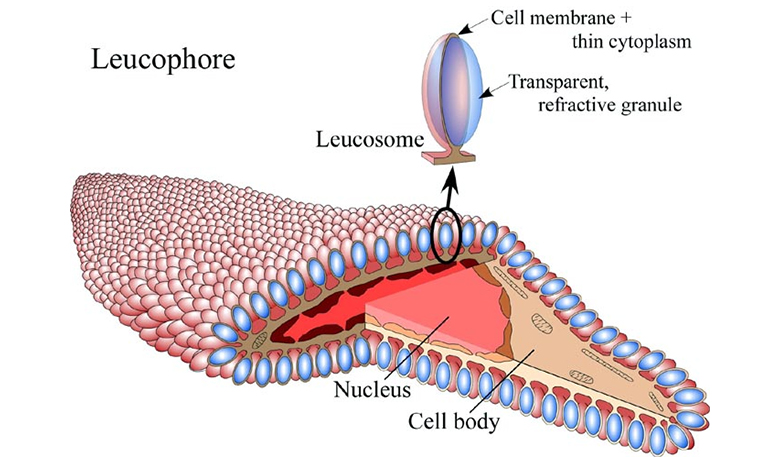
Leucophores are cells covered with rice-shaped reflective granules called leucosomes. Like disco-balls, leucophores reflect light back in many different directions without changing the color of that light. Oftentimes, leucophores appear as white spots (“leuco” means “white”). However, leucophores actually take on the color of whatever light shines upon it. Under blue light, leucophores would make the cephalopod look blue; under white light, leucophores would make the cephalopod look white. Leucophores help cephalopods to camouflage by reflecting whatever color of light is already in the environment. Leucophores can’t be directly controlled by cephalopods. However, by controlling the chromatophore and iridophore layers above, leucophores can alter the amount of light that reaches them.
Let’s Simulate Leucophores!
Activity #2
- Your viewer and all materials from your iridophore layer
- Your worksheet from the previous activity
- Black construction paper
- Aluminum foil
- A printout of the Activity 2 Worksheet
- Colored cellophane (preferably blue)
- A rubber band
Complete the Reflections section of the Activity 2 Worksheet.
- What were the differences you noticed between your observations of the Iridophores with the black construction paper and the Iridophores with the aluminum foil (Simulated Leucophore) under ordinary light?
- How do you account for the observed differences between the Iridophores with the black construction paper and the Iridophores with the aluminum foil?
- Under colored light, what differences did you notice between your observations of the Iridophores with the black construction paper and the Iridophores with the aluminum foil (Simulated Leucophore)?
- How might it be beneficial for a cephalopod to have a Leucophore Layer, based on your observations?
Model The Texture-Changing Structures of Cuttlefish Skin: Papillae
Let’s Camouflage Like A Cephalopod! (Iridophore And Leucophore Layers)
Activity #3
You will need:
- Photographs taken in the previous activities, uploaded to a student’s or teacher’s Google Drive
- Computers or Chromebooks with access to Google Draw
- A set of undersea backgrounds


Steps To Set Up Your Palette
- From any open Google document, click on File → New → Drawing. This should open up a new untitled drawing in Google Draw.
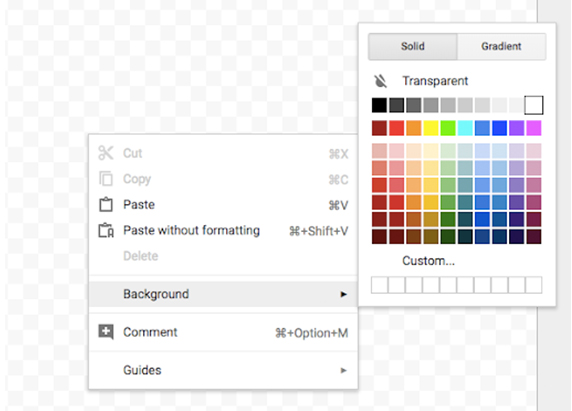
- Right-click anywhere on the checkerboard background. On the menu that appears, select Background → the color white. This will set the overall background to white.
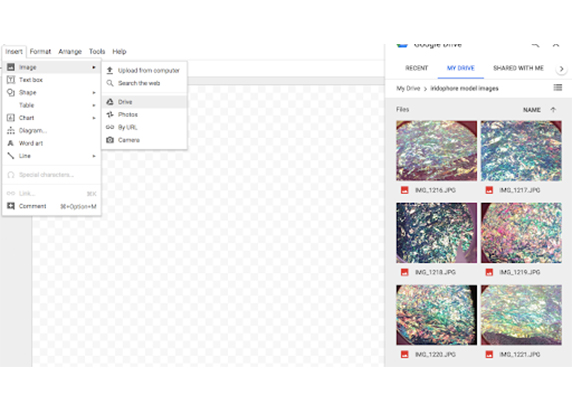
- Click Insert → Image → Drive. Then click on a photograph from the previous activity.
- For EACH photograph that you insert, look for regions of specific colors. For example, in the image to the left, there is a pink area with orange flecks on the left side.
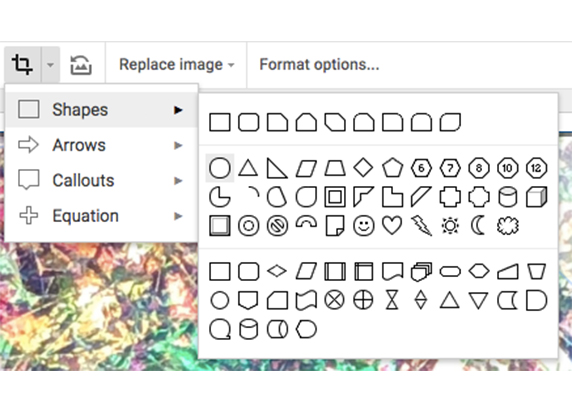
- Look for the CROP IMAGE icon. Click on Crop Image icon first. Then, click on the drop-down arrow beside the icon (it will say “Mask Image”). Select a Shape for your mask. It is recommended that you choose a round shape.
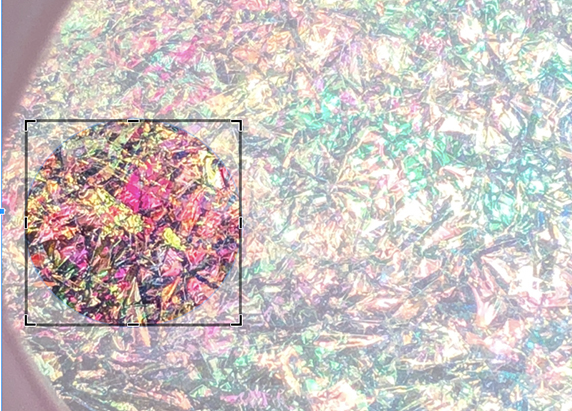
- Resize your mask by clicking on the black handles on the edges of the mask. When you are content with the region you have focused on, then double click on it.
- Resize your selected color by clicking on and dragging a CORNER of the image. Try to make your colors relatively small. A recommended size is 1/2 inch in diameter.
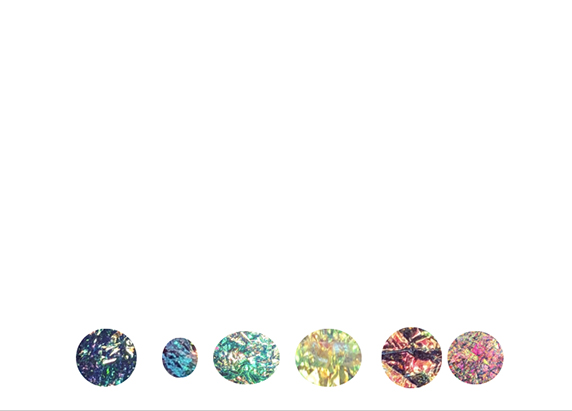
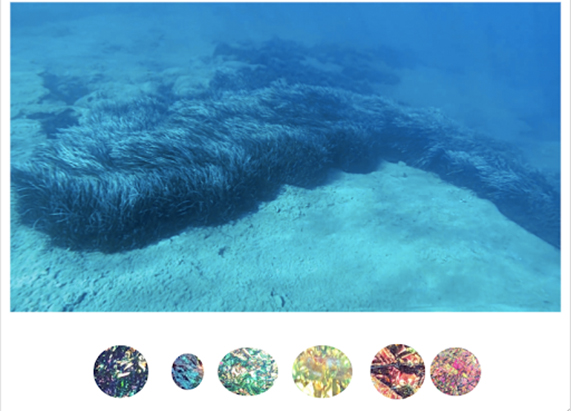
- Repeat Steps 3-7 until you have built up a palette of at least six colors. Remember that you can use the same image more than once, focusing on different regions of color. Drag your selected colors near the bottom of your background, and line them up in a way that is convenient for you.
- Students may search for real underwater backgrounds. One suggestion is these underwater landscapes by National Geographic. Once they choose an image, they can Insert it or Copy-Paste it. Then, they can resize it (by dragging on a corner of the image) so that it is an appropriate size.
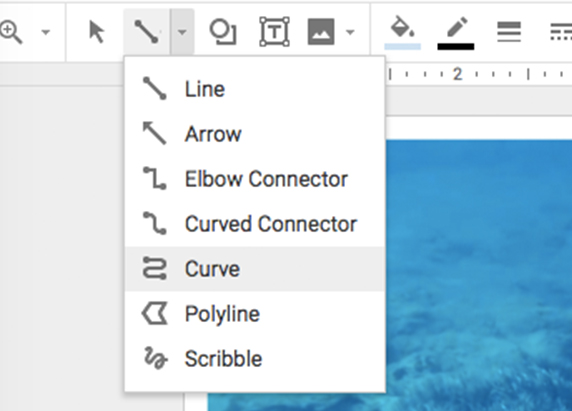
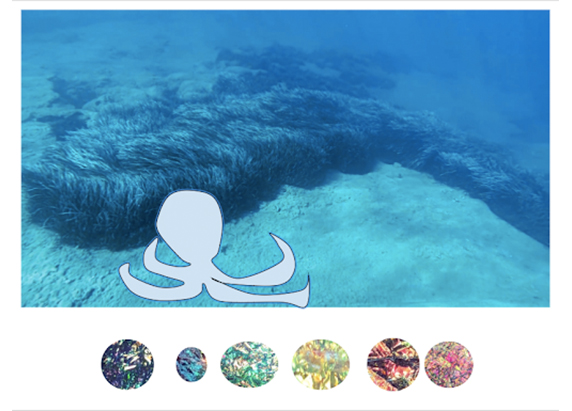
- Select a region of the underwater background to draw your cephalopod. Then, from the Line drop-down menu, choose Curve (although it is possible to also use the Polyline setting, this tends to produce very angular shapes).
- Draw your Cephalopod (if you need ideas, check out this sheet). It is recommended that you click frequently as you draw. Each click produces a set point on the curve. Make sure you close your shape. Once you close it, it should appear as an outline with a light blue fill color.
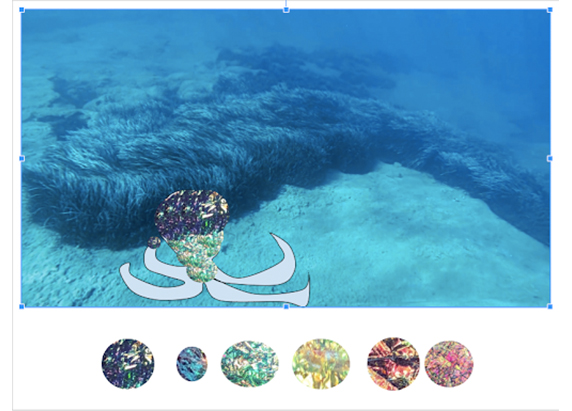
- “Paint” your Cephalopod using the colors of your palette. Select the color you wish to use by clicking on it. Then Copy it (Command-C for Macs, and CTRL-C for Windows) and Paste it (Command-Z for Macs, and CTRL-Z for Windows). Drag your copy to the appropriate place on your Cephalopod. You can resize your color spot by clicking on a corner and dragging it. You can also adjust its angle by clicking on the handle and turning it. Repeat, using different colors, until your entire Cephalopod is covered.
Extensions
How Does It All Stack Up?
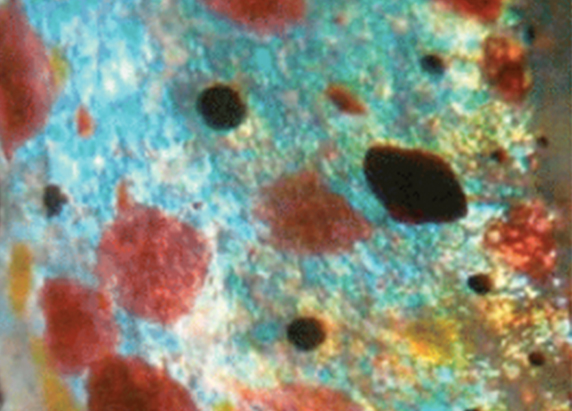
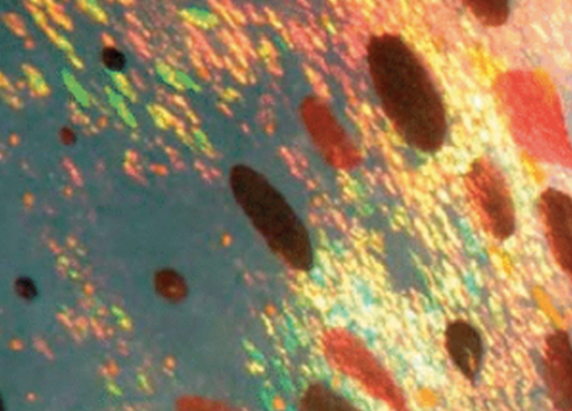
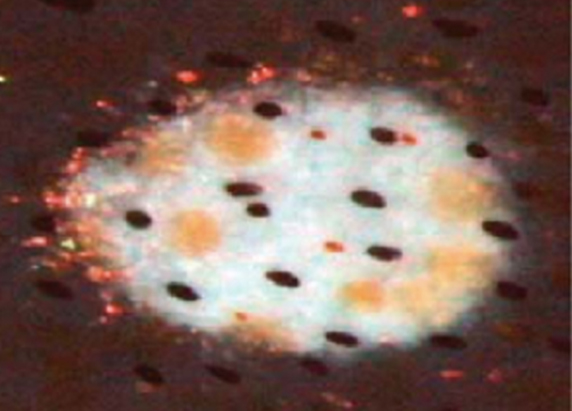
Cephalopods don’t only use one layer at a time; they utilize all three layers simultaneously to create a composite image. This is possible because each layer is at least partially translucent, allowing light to pass through it, even as each layer makes its contribution to “staining” the light a certain color.
Here are some real examples of the three layers of cephalopod skin working together:
The iridophore and leucophore layers are the second and third layers of cephalopod skin. To learn about the first layer, the chromatophore layer, try this activity. When finished with the chromatophore layer activity, try to repeat the camouflage activity found in that lesson using the full palette of a cephalopod! It is recommended that you either do the entire camouflage activity online (using drawing software like Google Draw) or that you print out photos of iridophores/leucophores for use in a hard-copy version.
Standards
Next Generation Science Standards Addressed by this Activity:
4-PS4-1. Develop a model of waves to describe patterns in terms of amplitude and wavelength and that waves can cause objects to move.
4-PS4-2. Develop a model to describe that light reflecting from objects and entering the eye allows objects to be seen.
4-LS1-1: Construct an argument that plants and animals have internal and external structures that function to support survival, growth, behavior, and reproduction.
MS-PS4-2: Develop and use a model to describe that waves are reflected, absorbed, or transmitted through various materials.
HS-PS4-1: Use mathematical representations to support a claim regarding relationships among the frequency, wavelength, and speed of waves traveling in various media.
Credits
Resource by Randy Otaka
Editing by Brian Soash, Shirley Campbell, Ariel Zych, and Lauren Young
Digital Production by Lauren Young
Educator's Toolbox
Meet the Writer

About Randy Otaka
Randy Otaka is an elementary school special education teacher and robotics coach for Wahiawa Elementary School in Wahiawa, Hawaii. He has a passion for STEM education and implements interactive and engaging lessons, such as using Minecraft to model the cardiovascular system to creating scale model solar system orbital paths.